
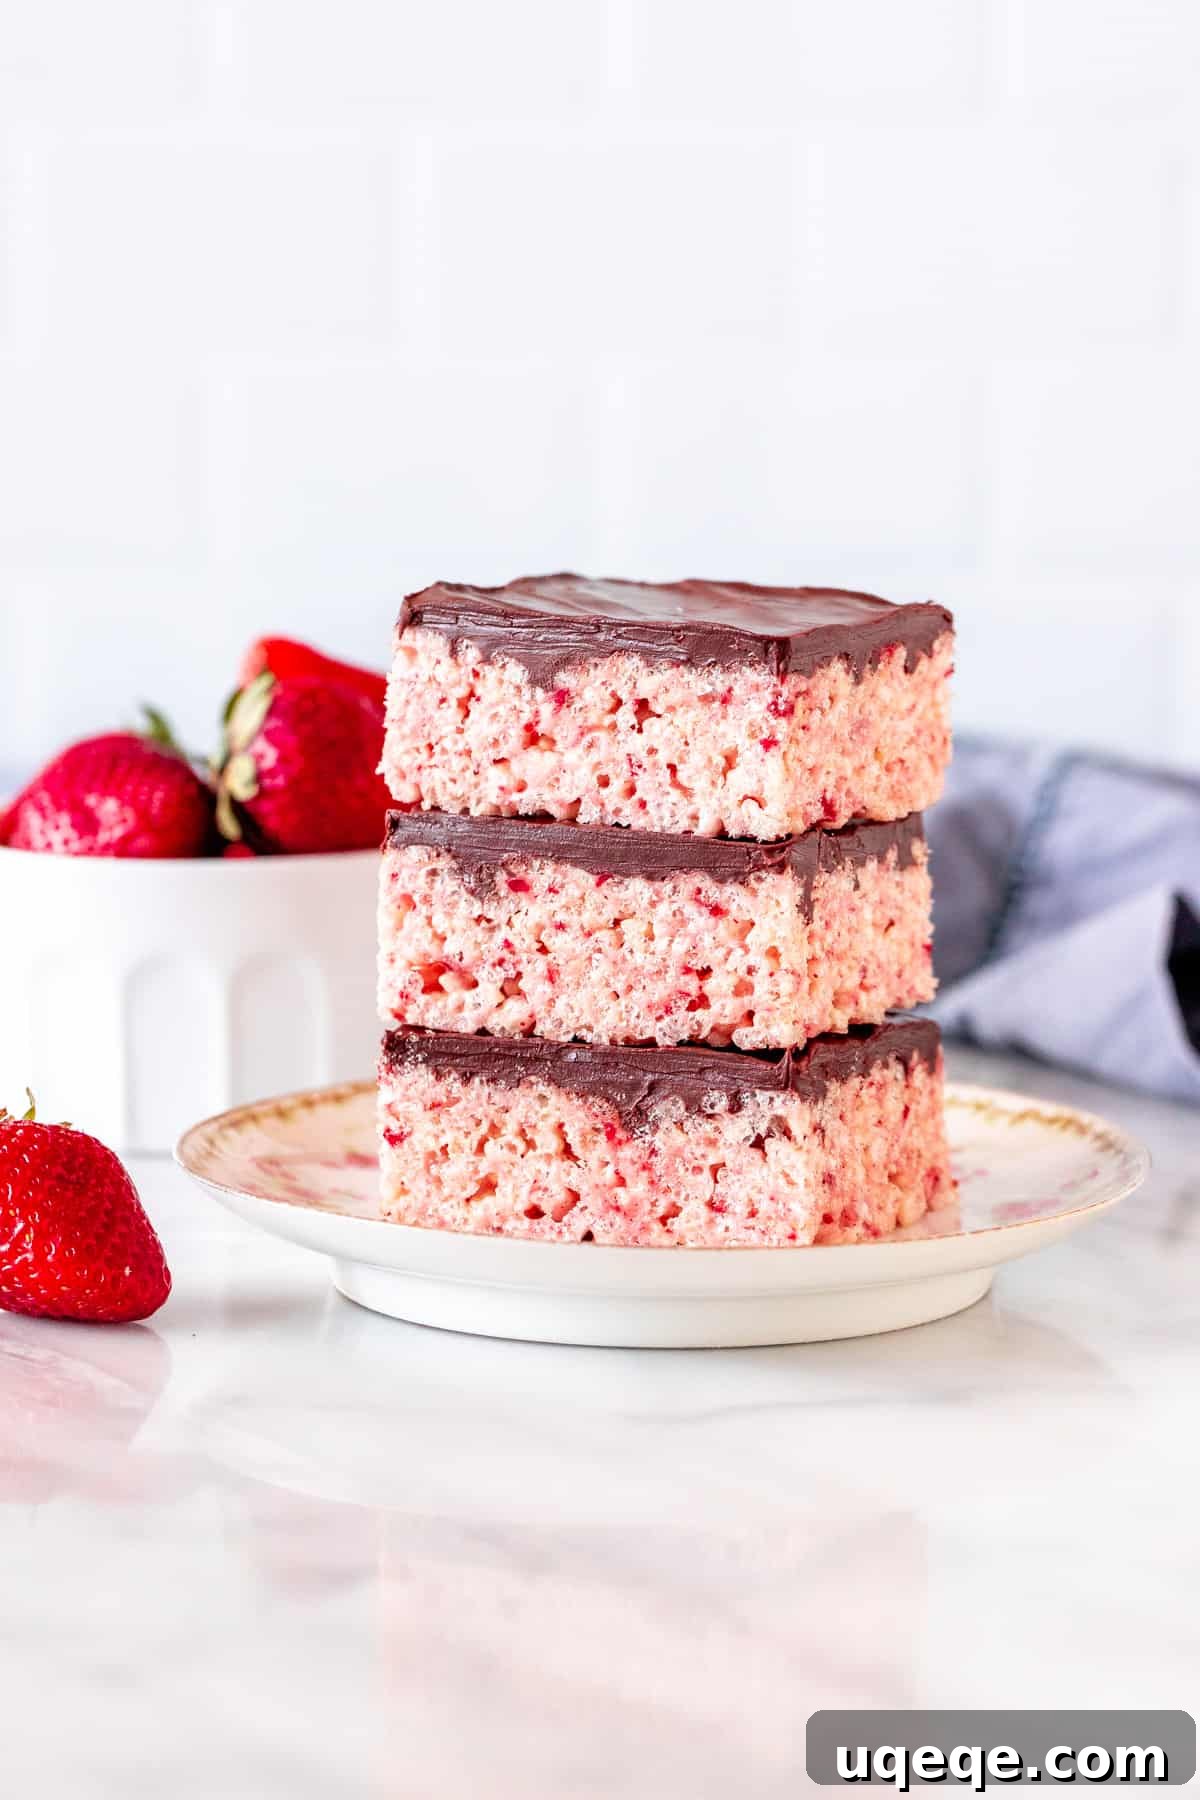
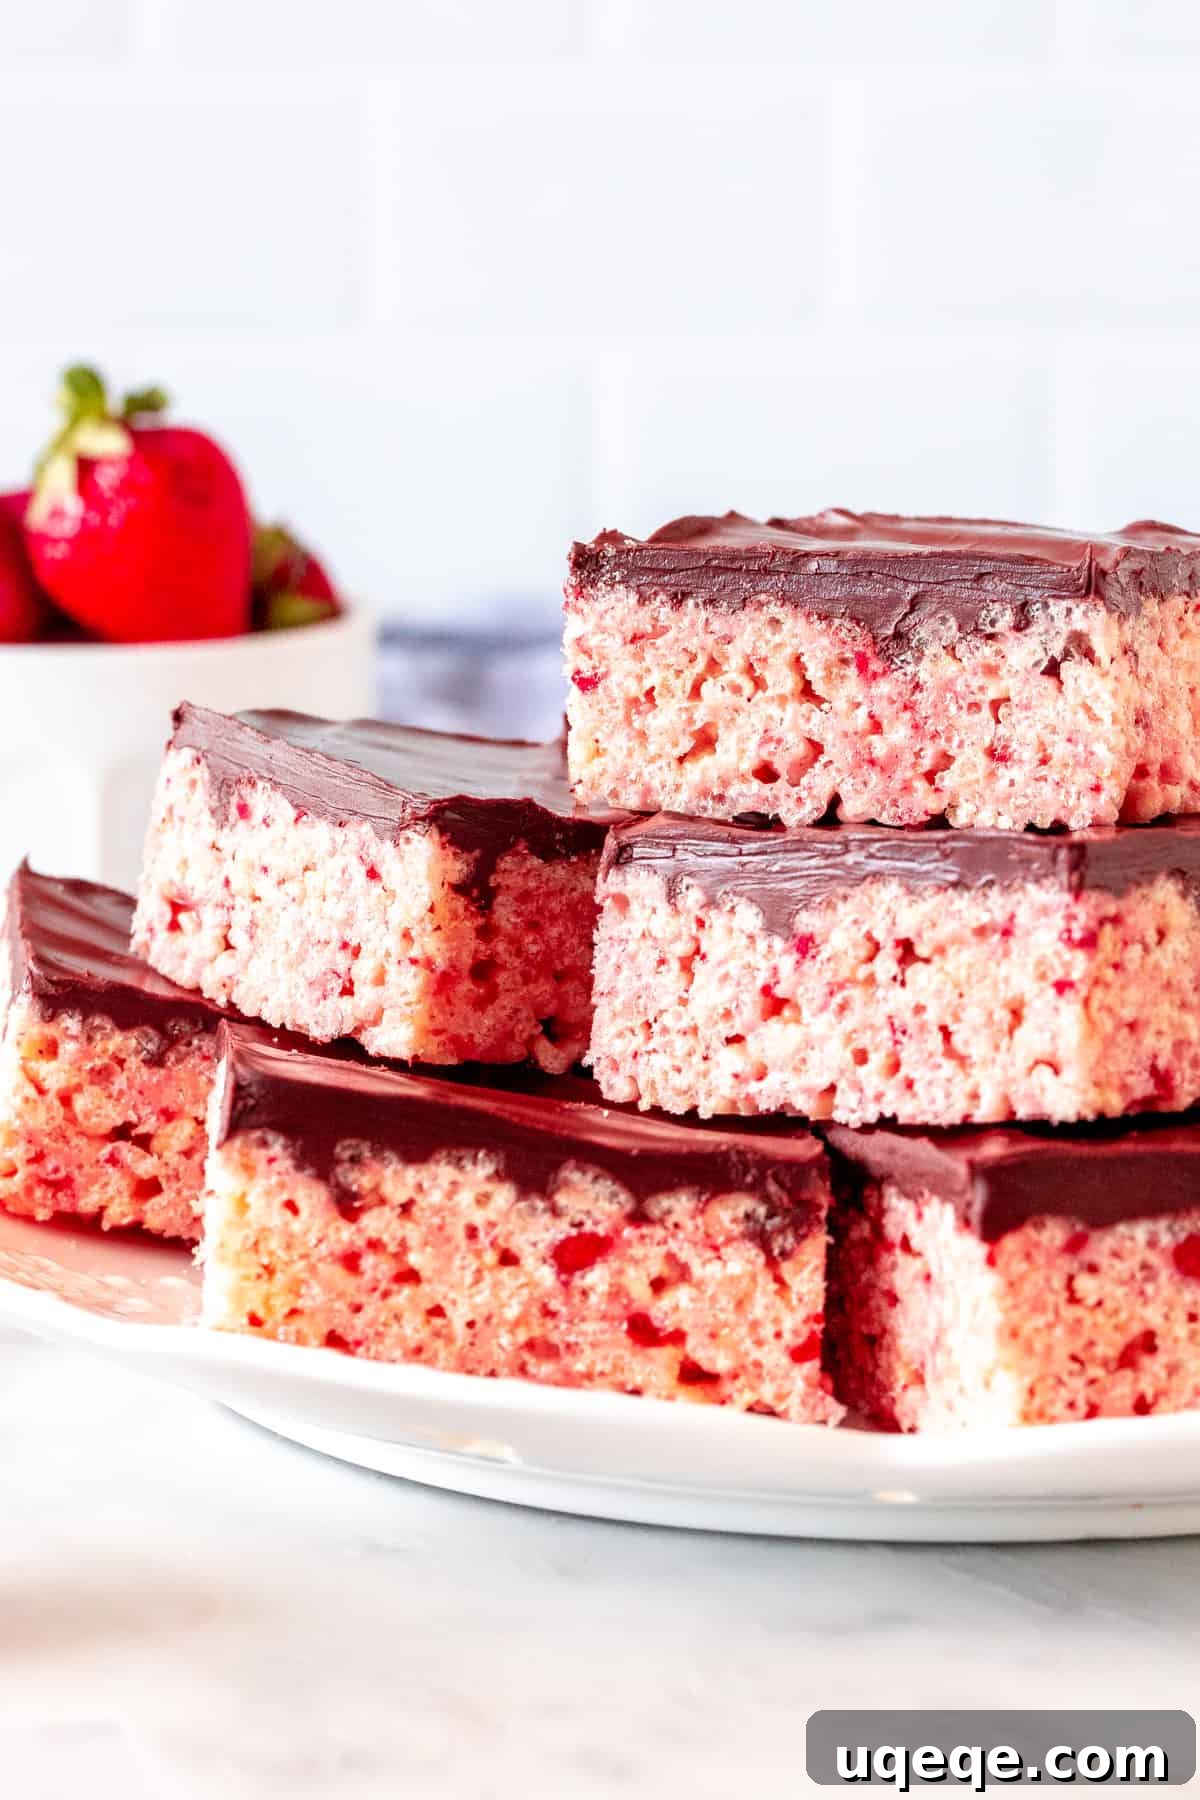
These Strawberry Rice Krispie Treats are a dream come true for anyone craving a simple yet incredibly delicious dessert. With their charming pink hue, soft, gooey texture, and authentic sweet strawberry flavor, they are destined to become a favorite. Ideal for romantic occasions like Valentine’s Day, elegant bridal showers, festive birthdays, or simply as a delightful everyday snack. 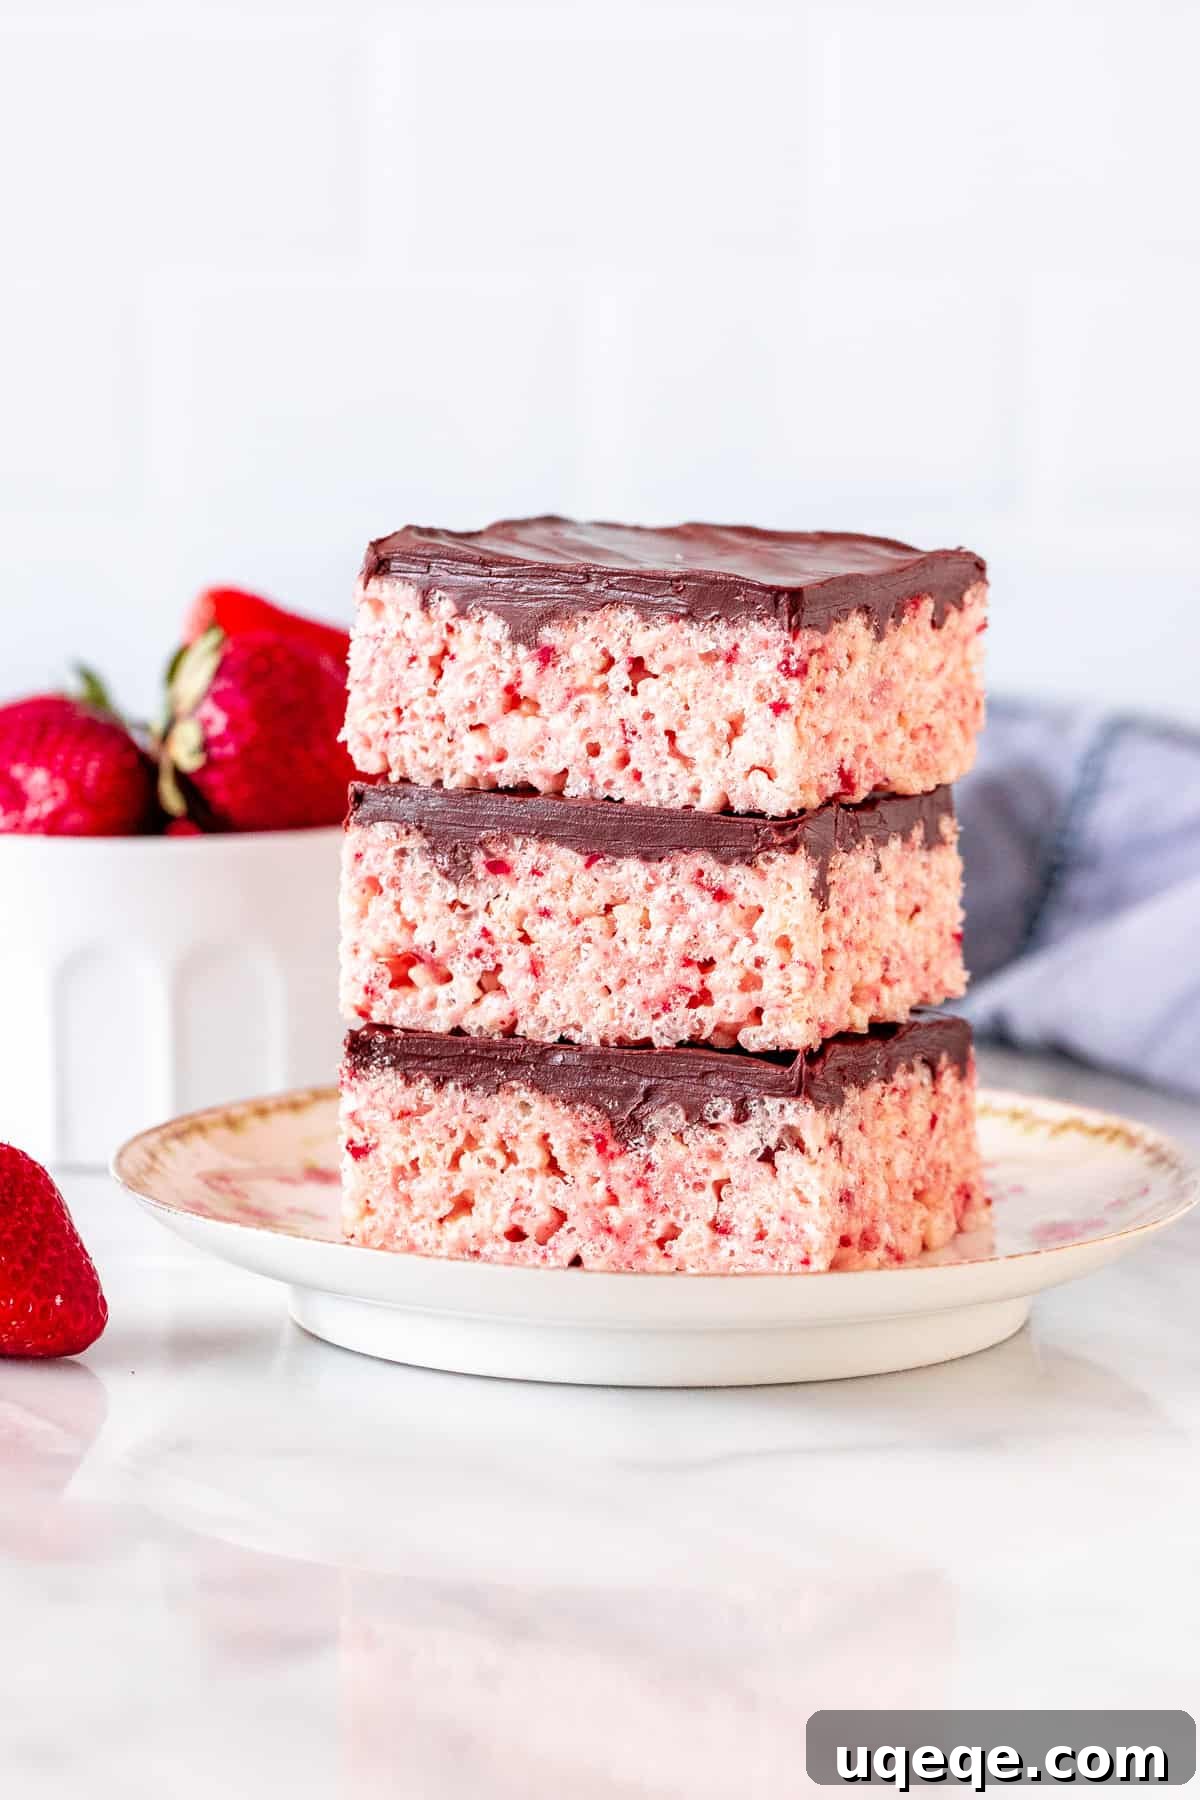
Irresistible Strawberry Rice Krispie Treats: Your Go-To No-Bake Dessert
As special occasions like Valentine’s Day approach, or anytime a craving for something sweet and charming strikes, I find myself drawn to vibrant, delicious pink desserts. These Strawberry Rice Krispie Treats stand out not just for their stunning natural pink color, but also for their incredible simplicity. They are an absolute joy to prepare, making them an excellent activity for baking with children or when you need a quick, impressive treat without much fuss. Imagine a dessert that’s both elegant enough for a bridal shower and fun enough for a kid’s birthday party – this is it!
What truly elevates this recipe above others is the profound and authentic strawberry flavor. We achieve this by utilizing freeze-dried strawberries – real berries that have had their moisture removed, concentrating their natural sweetness and tang. This method ensures you experience a genuine strawberry taste, far superior to the artificial notes often found in ingredients like gelatin or flavored syrups. The result is a treat that is delightfully sweet, perfectly gooey, wonderfully crispy, and utterly addictive. While a decadent chocolate layer on top beautifully complements the strawberry, these treats are equally enchanting and delicious served plain, showcasing their natural berry brilliance.
The Magic Behind Freeze-Dried Strawberries
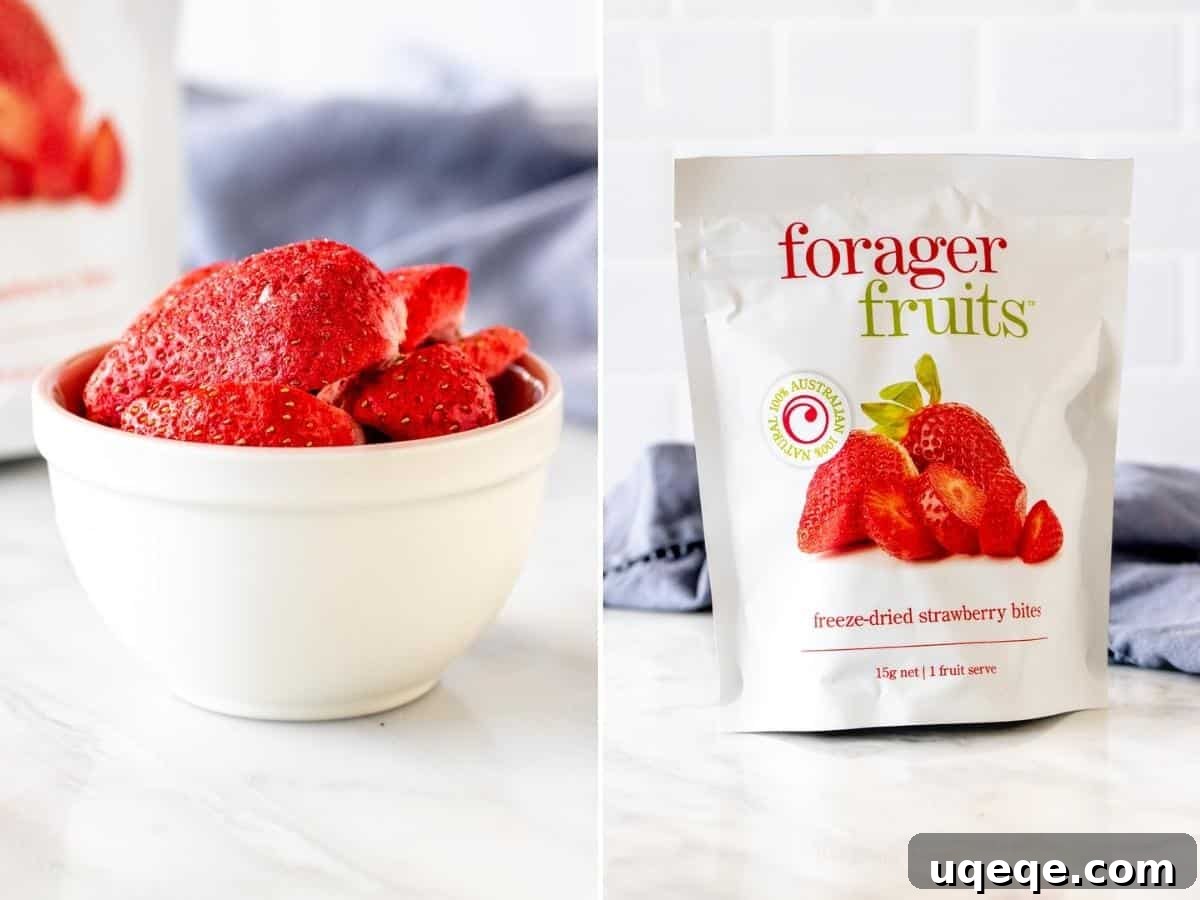
Understanding the role of freeze-dried strawberries is absolutely crucial for the success and distinct flavor of this recipe. These aren’t merely dried fruit; they are actual strawberries that undergo a sophisticated preservation process called freeze-drying. In this method, the fruit is first frozen, and then placed in a vacuum chamber where the ice crystals sublimate – meaning they turn directly from solid ice into water vapor without passing through a liquid state. This unique process effectively removes all moisture from the berries while preserving their original shape, color, nutritional content, and most importantly, their intense, concentrated flavor.
It’s vital to use freeze-dried berries instead of fresh or conventional frozen ones because the high moisture content of fresh or frozen fruit would introduce too much liquid into your marshmallow mixture. This would inevitably prevent the Rice Krispie treats from setting properly, resulting in a soggy, sticky, and ultimately disappointing outcome. Freeze-dried strawberries, on the other hand, provide all the robust strawberry essence and vibrant natural color without compromising the crispy, chewy texture that defines a perfect Rice Krispie treat. They are a game-changer for achieving authentic fruit flavor in no-bake desserts.
When you purchase freeze-dried strawberries, you might find them in various forms – some are neatly sliced, while others are whole berries. Regardless of their initial appearance, the foundational step for this recipe remains the same: transforming them into fine crumbs. This is easily and quickly achieved by pulsing them in a food processor or a high-powered blender. The goal is to create a fine, powdery consistency, almost like flour. This fine powder will then effortlessly incorporate into the warm, melted marshmallow mixture, dissolving beautifully to impart both its concentrated flavor and that stunning, natural pink hue throughout your treats. The transformation is mesmerizing to watch!
Locating freeze-dried strawberries has become significantly easier in recent years due to their increasing popularity in healthy snacking and baking. You can often find them in the health food aisle of major supermarkets, specialty grocery stores, or even in the dried fruit section. Retailers like Amazon also offer a wide selection, making them readily accessible no matter where you are. When selecting your freeze-dried strawberries, look for packages that clearly state “freeze-dried” and ideally contain only strawberries, without added sugars or preservatives, to ensure the purest flavor for your treats. Don’t hesitate to ask store staff if you’re having trouble finding them; their growing presence means they are more common than ever before.
Crafting Your Perfect Strawberry Rice Krispie Treats: Step-by-Step Guide
Once you have your vibrant strawberry powder ready, the process for making these delightful treats mirrors the classic, much-loved Rice Krispie treat method, but with an infusion of natural fruit flavor and a beautiful pink twist. This simplicity makes the preparation a truly satisfying and enjoyable experience, even for novice cooks.
1. The Foundation: Melting Butter and Marshmallows
Begin by adding the butter to a very large, heavy-bottomed saucepan. Melt it slowly and gently over low heat. The emphasis here is on “low heat.” It’s crucial not to rush this step by using high heat, as doing so can scorch the butter and cause the marshmallows to seize up, resulting in tough, grainy treats with an unpleasant texture. Once the butter is melted, add the marshmallows to the saucepan. Stir continuously and patiently with a sturdy rubber spatula as the marshmallows gradually melt down and blend seamlessly with the butter. The mixture will transform into a luscious, sticky, and wonderfully gooey base, perfectly primed for the next flavorful addition.
2. Infusing the Strawberry Flavor
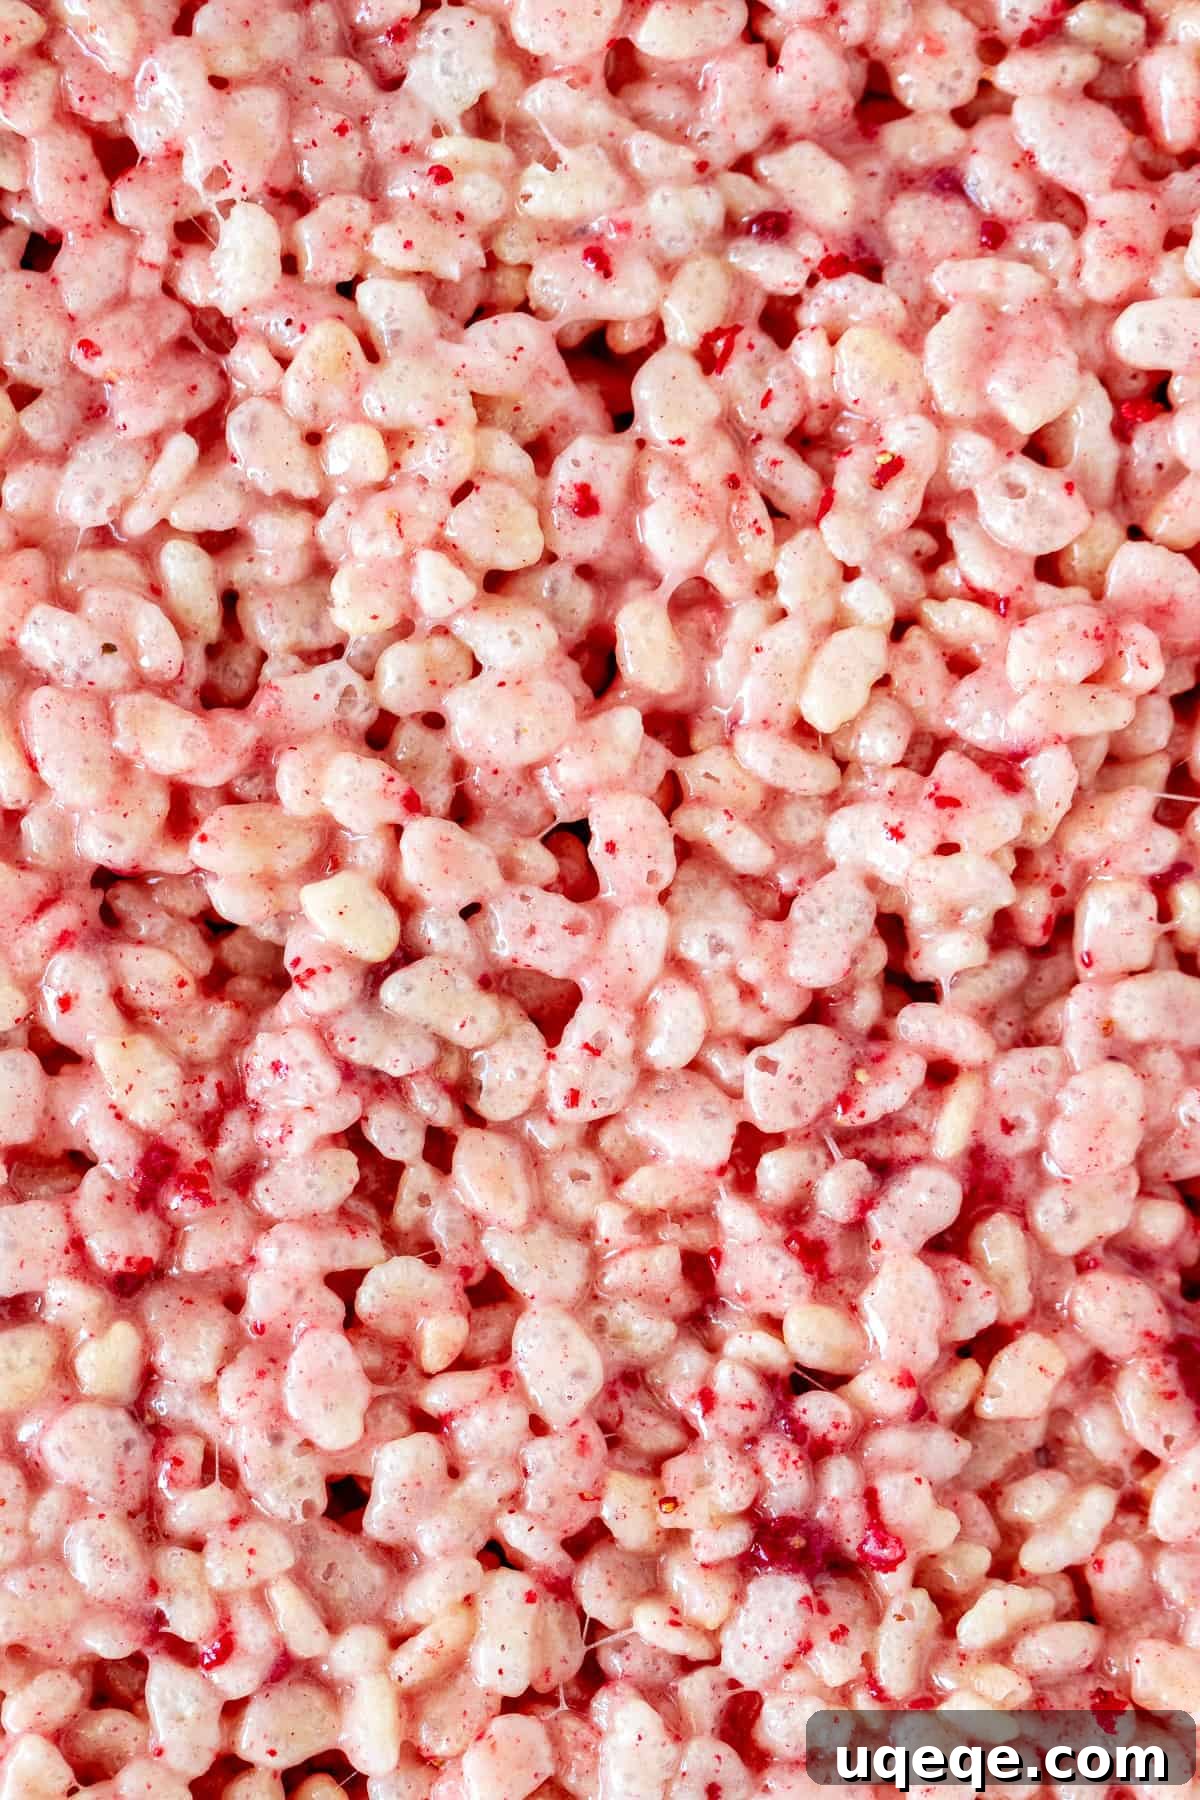
When the marshmallows are almost entirely melted and the mixture is mostly smooth, it’s time for the star ingredient: your finely pulsed freeze-dried strawberry crumbs. Carefully stir them into the warm marshmallow-butter mixture. As you incorporate the strawberry powder, you’ll observe a truly magical transformation. The fine strawberry particles will begin to dissolve into the gooey base, releasing their concentrated flavor and imparting a stunning, natural pink color throughout. This vibrant hue is entirely derived from the berries themselves, eliminating the need for any artificial food coloring. Don’t be concerned if a few tiny, undissolved flecks of strawberry remain; these small pieces will add an extra burst of authentic strawberry flavor and delightful visual texture to your finished treats, a sign of real fruit goodness.
3. Achieving the Perfect Gooeyness: Adding the Cereal
With your fragrant, strawberry-infused marshmallow base ready, it’s time to fold in the crispy rice cereal. The exact quantity of Rice Krispies you use is a key factor in determining the ultimate texture of your finished treats – specifically, how gooey versus how crispy they will be. For a perfect balance of soft, chewy, and crunchy, approximately 5 ½ cups of crispy rice cereal is often ideal. If you are a fan of extra gooey, wonderfully soft, and delightfully chewy treats, I recommend using 5 cups. Conversely, if you prefer a firmer, crispier bar with more snap, feel free to increase the cereal amount to 6 cups. Add the cereal gradually, about a cup at a time, ensuring you stir thoroughly after each addition until every single piece of cereal is generously coated with the warm, sticky marshmallow mixture. This ensures an even distribution of flavor and consistent texture in every bite.
4. Pressing into Perfection: Pan Preparation and Technique
Before spooning your delicious mixture into the pan, prepare your chosen baking pan by lightly greasing it with butter or a non-stick cooking spray. The size of your pan will directly influence the thickness of your finished treats. For thicker, more substantial bars that offer a satisfying bite, a 9×9 inch (23×23 cm) pan is perfect. If you prefer thinner, more elegant bars – much like the ones often featured in photographs – a 9×13 inch (23×33 cm) pan will yield excellent results. Once the warm cereal mixture is transferred to the prepared pan, the technique you use to press it down is crucial. Pro Tip: Lightly grease your hands or the back of a rubber spatula to prevent sticking, then gently but firmly press the mixture down into the pan. Be mindful of your pressure: if you press too tightly or compact the mixture excessively, your bars can become dense and unpleasantly hard. A gentle, even pressure will result in softer, chewier treats that still hold their shape beautifully. This balance is essential for that signature melt-in-your-mouth experience.
The Decadent Touch: Optional Chocolate Topping
While these strawberry treats are utterly delicious and satisfying on their own, adding a layer of rich chocolate can elevate them to an even higher level of indulgence. The classic combination of sweet, slightly tart strawberry with the rich, sometimes bitter, notes of chocolate is a pairing that is universally loved and hard to resist. This chocolate topping is entirely optional, but for those seeking an extra layer of decadence and visual appeal, it comes highly recommended.
For a truly generous and thick layer of chocolate that makes a statement, I typically opt for 10 ounces (284 grams) of your chosen chocolate. This creates a robust topping that perfectly contrasts with the chewy treats below. If you prefer a slightly thinner but still substantial coating, 8 ounces (226 grams) will also work wonderfully, providing a delightful hint of chocolate without overwhelming the strawberry flavor. Should you decide to use a smaller 9×9 inch pan for thicker bars, a quantity of 6-8 ounces (170-226 grams) will be ample for the topping. To prepare the chocolate, start by chopping it into very fine, uniform pieces. This ensures even melting. Place the chopped chocolate in a heatproof bowl. You have two primary methods for melting: using a microwave, heating on medium power in 30-45 second intervals and stirring thoroughly after each until smooth; or employing a double boiler method, where you place the bowl over a saucepan of simmering water, ensuring the bottom of the bowl does not touch the water, allowing for a gentle, even melt. Once the chocolate is perfectly smooth and glossy, pour it evenly over the pressed Rice Krispie treats and spread it with a spatula to create a uniform layer. The final, crucial step is patience: allow the bars to set completely at room temperature until the chocolate has fully hardened. This will ensure perfectly sliceable, visually stunning treats that are ready to impress.
Creative Variations and Customization Ideas for Your Treats
One of the most delightful aspects of making Rice Krispie treats is their incredible versatility and adaptability. This strawberry version provides a fantastic base for endless customization, allowing you to tailor them to your personal preferences or specific occasions:
- Embrace Simplicity (Skip the Chocolate): If you’re short on time, aiming for a lighter treat, or simply adore the pure strawberry flavor, feel free to omit the chocolate topping entirely. These pink marvels are wonderfully delicious on their own, letting the natural berry essence shine through.
- Explore Different Chocolates: Don’t limit your imagination to dark chocolate! Experiment with your favorite type. Milk chocolate will introduce a sweeter, creamier contrast, creating a flavor profile reminiscent of chocolate-dipped strawberries. White chocolate offers a rich, vanilla-like sweetness that pairs exquisitely with the tang of strawberry, enhancing the dessert’s visual appeal. Semi-sweet chocolate provides a balanced profile, appealing to a wide range of palates.
- Elegant Chocolate Drizzle: For a more subtle touch of chocolate that still adds visual flair, melt just 4 ounces (113 grams) of your preferred chocolate. Then, using a spoon or a piping bag with a fine tip, elegantly drizzle the chocolate over the cooled treats. This method allows the beautiful pink strawberry color to remain prominent while still offering that irresistible chocolate hint.
- Festive Shaped Treats: Transform your ordinary bars into extraordinary delights for holidays or parties. For Valentine’s Day, use a lightly greased heart-shaped cookie cutter to cut out charming heart-shaped treats from the cooled, un-chocolated bars. You can do the same with stars for summer celebrations or simple circles for birthdays. These individual shapes can then be dipped or drizzled with chocolate for an extra special touch.
- Intensify the Hue: While freeze-dried strawberries naturally impart a beautiful pink, if you desire an even more vibrant and eye-catching treat, a tiny drop of red or pink gel food coloring can be added along with the strawberry powder. This will deepen the color without altering the taste.
- Add Flavor Boosters: Enhance the overall flavor profile by stirring in a teaspoon of pure vanilla extract or a touch of almond extract along with the strawberry powder. These extracts will complement and deepen the berry notes beautifully.
- Creative Mix-ins: Introduce extra texture and flavor by folding in additional ingredients with the cereal. Consider white chocolate chips for a creamy contrast, finely chopped pistachios for a lovely green color and nutty crunch, or a handful of mini chocolate chips for pockets of intense chocolate flavor. Remember not to add too many mix-ins, as this might compromise the treats’ ability to hold their shape.
- Gorgeous Garnishes: Before your chocolate topping has completely set, sprinkle on some extra freeze-dried strawberry pieces for texture and visual appeal, colorful sprinkles for a festive look, or delicate chocolate shavings to truly impress your guests.
Storing Your Delicious Strawberry Rice Krispie Treats
Proper storage is absolutely essential to maintain the freshness, desirable chewiness, and irresistible quality of your Strawberry Rice Krispie Treats. While it might be a common inclination to refrigerate them, I strongly advise against it for cereal treats. The cold environment of a refrigerator tends to make them overly hard, dense, and can significantly diminish their wonderfully gooey and chewy texture, making them much less enjoyable to eat. To preserve their ideal consistency, allow your treats to cool and set completely, especially if they have a chocolate topping. Once fully set, transfer them to an airtight container. They will remain wonderfully fresh, soft, and delicious for up to 4 days when stored at room temperature. If you’ve added a chocolate topping, ensure it’s firm before stacking or layering them in the container to prevent any smudging or sticking.
Why These Strawberry Rice Krispie Treats Are a Must-Try Dessert
In a culinary landscape often dominated by complex, multi-step desserts, these Strawberry Rice Krispie Treats offer a refreshing and delightful return to simplicity, all without compromising on flavor, texture, or visual appeal. They perfectly embody the essence of an easy, no-bake recipe that consistently delivers impressive and crowd-pleasing results. The thoughtful incorporation of real freeze-dried strawberries is the secret to their success, ensuring an incredibly vibrant, authentic fruit flavor and a naturally beautiful pink color that’s ideal for any celebration, from an intimate family gathering to a grand party.
This recipe is designed for everyone: whether you are a seasoned home baker looking for a quick win, a beginner eager to explore the joys of dessert making, a busy parent searching for a fun and engaging activity with children, or simply someone who appreciates a fast, delicious, and satisfying sweet treat. You’ll love the harmonious blend of crispy rice cereal, irresistibly gooey marshmallow, and intense strawberry goodness, which can be further enhanced by an optional, rich layer of chocolate. These aren’t just treats; they are moments of simple, unadulterated joy, easily created and shared, leaving everyone asking for more. Indulge in the ease and deliciousness that define these extraordinary Strawberry Rice Krispie Treats!
For more delightful Valentine’s Day favorites or other delicious dessert inspirations, be sure to explore these tempting recipes:
- Strawberry Layer Cake – a tender cake infused with fresh berries and crowned with luscious strawberry frosting.
- Raspberry Cheesecake Brownies – rich, fudgy brownies elegantly swirled with creamy, tangy raspberry cheesecake.
- Maraschino Cherry Cake – a classic, moist, and tender cake bursting with the sweet, nostalgic flavor of maraschino cherries.
- Red Velvet Cupcakes – decadent, moist, and tender cupcakes with a hint of cocoa, beautifully topped with a smooth and tangy cream cheese frosting.
Strawberry Rice Krispie Treats
By: Fiona Dowling
These strawberry Rice Krispie treats are a little gooey with a beautiful pink color and sweet strawberry flavor. Perfect for Valentine’s Day, bridal showers & birthdays!
Prep: 15 mins
To Set: 2 hrs
Total: 2 hrs 15 mins
Servings: 15 Rice Krispie treats
Rate Recipe
Print Recipe
Equipment
- 9×13 inch (23 x 33 cm) baking pan*
- Food processor or high-powered blender
- Very large saucepan
- Rubber spatula
- Heatproof bowl (for chocolate)
- Sharp knife
Ingredients
- 1.5 ounces freeze dried strawberries (43 grams) , feel free to use up to 2 ounces for a stronger flavor
- 1/3 cup unsalted butter (75 grams) , salted works too
- 12 ounce bag mini marshmallows (340 grams) , see recipe Notes for alternatives
- 5-6 cups crispy rice cereal
- 10 ounces dark chocolate (284 grams) , or milk, semi-sweet or white chocolate
Instructions
- Lightly grease a 9×13 inch pan. Optionally, lightly grease a 9×9 inch pan for thicker bars (see Recipe Notes below).
- Add the freeze-dried strawberries to a food processor or high-powered blender. Pulse until they’re fine crumbs.
- Add the butter to a very large saucepan. Melt over low heat.
- Add in the marshmallows and gently stir with a rubber spatula as the marshmallows melt together with the butter.
- When the marshmallows are almost melted, add in the pulsed freeze-dried strawberries. Gently stir as the freeze-dried berries dissolve and melt.
- Once the marshmallows are completely melted (if you have pieces of strawberries still – that’s ok), turn off the burner. Stir in the cereal 1 cup at a time. You want all the cereal covered with gooey marshmallow.
- Spoon/pour the mixture into the prepared pan. Lightly grease your hands and gently press the mixture down into the pan. The tighter you pack it down, the firmer your cereal treats will be.
- Chop the chocolate into very fine pieces and place in a heatproof bowl.
- Microwave the chopped chocolate on medium power (not high power, which is often standard) for 30-45 second intervals. Stir between each interval until smooth.
- Pour the chocolate over the Rice Krispie treats and spread smooth. Let the bars set at room temperature until the chocolate has hardened. Slice with a thin, sharp knife. I always let cereal treats firm up on the counter, instead of in the fridge, because in the fridge they can get too hard and lose their chewiness.
Notes
- Pan Sizes: This recipe is designed for a 9×13 inch pan to yield thinner bars. For thicker, more substantial bars, a 9×9 inch pan can be used. If opting for a 9×9 inch pan, you’ll only need 6-8 ounces (170-227 grams) of chocolate for the topping.
- Marshmallows: A 12-ounce bag of mini marshmallows typically equals about 7 cups. If you prefer to use regular marshmallows, 12 ounces is roughly equivalent to 50 large marshmallows. Should you only have a 10-ounce bag of marshmallows available, I recommend adjusting the recipe by using a 9×9 inch pan and reducing the crispy rice cereal to 4 cups. The amounts for butter and freeze-dried strawberries can remain the same.
- Storage: To ensure your cereal treats retain their delightful gooey and chewy texture, always store them in an airtight container at room temperature. Refrigeration can cause them to become excessively hard and crispy, diminishing their appeal. They will remain wonderfully fresh for up to 4 days.
- Nutrition: The provided nutritional details are an estimate only. They are based on one treat with chocolate topping, assuming the entire pan is sliced into 15 equal-sized pieces. Individual nutritional values may vary depending on specific ingredients and portion sizes.
Nutrition Information (Estimated Per Serving)
| Calories: | 244 kcal |
| Carbohydrates: | 32g |
| Protein: | 2g |
| Fat: | 12g |
| Saturated Fat: | 7g |
| Polyunsaturated Fat: | 1g |
| Monounsaturated Fat: | 4g |
| Trans Fat: | 1g |
| Cholesterol: | 11mg |
| Sodium: | 20mg |
| Potassium: | 182mg |
| Fiber: | 2g |
| Sugar: | 17g |
| Vitamin A: | 133 IU |
| Vitamin C: | 35mg |
| Calcium: | 17mg |
| Iron: | 3mg |
Like this recipe? Rate and comment below!