
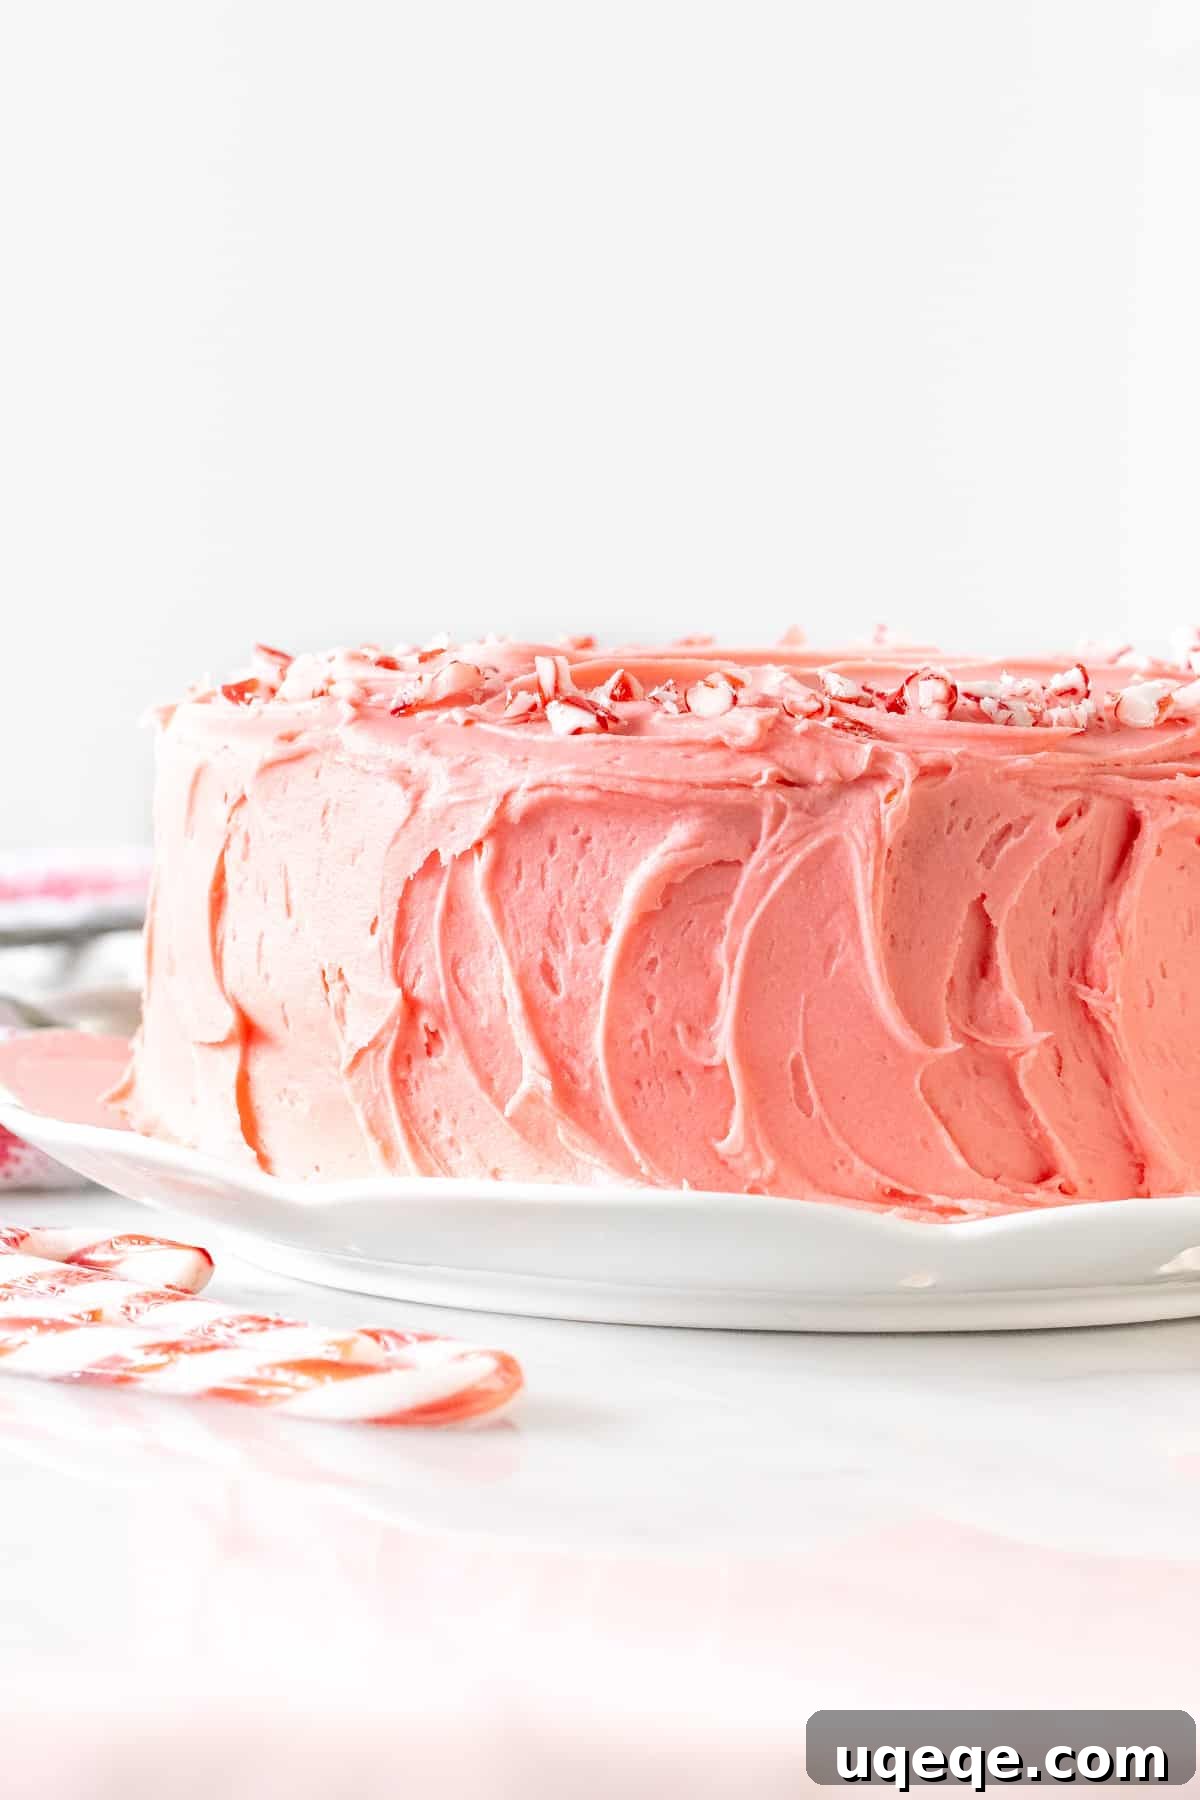
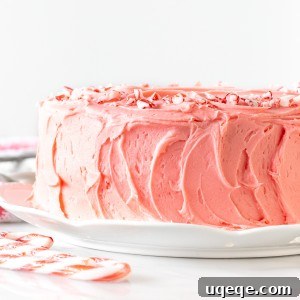
Get ready to enchant your taste buds and dazzle your holiday guests with a truly spectacular dessert: our ultimate Candy Cane Cake. This isn’t just any cake; it’s a festive masterpiece featuring layers of incredibly moist and tender vanilla cake, subtly infused with the invigorating hint of peppermint. Each bite promises a symphony of flavors, perfectly balanced to evoke the joyous spirit of Christmas. Adorned with a ridiculously creamy and fluffy white chocolate peppermint buttercream, then elegantly topped with shimmering crushed candy canes, this cake is destined to become the star of your holiday table. It’s the perfect show-stopping treat that tastes as magical as it looks, capturing the very essence of holiday cheer in every slice.
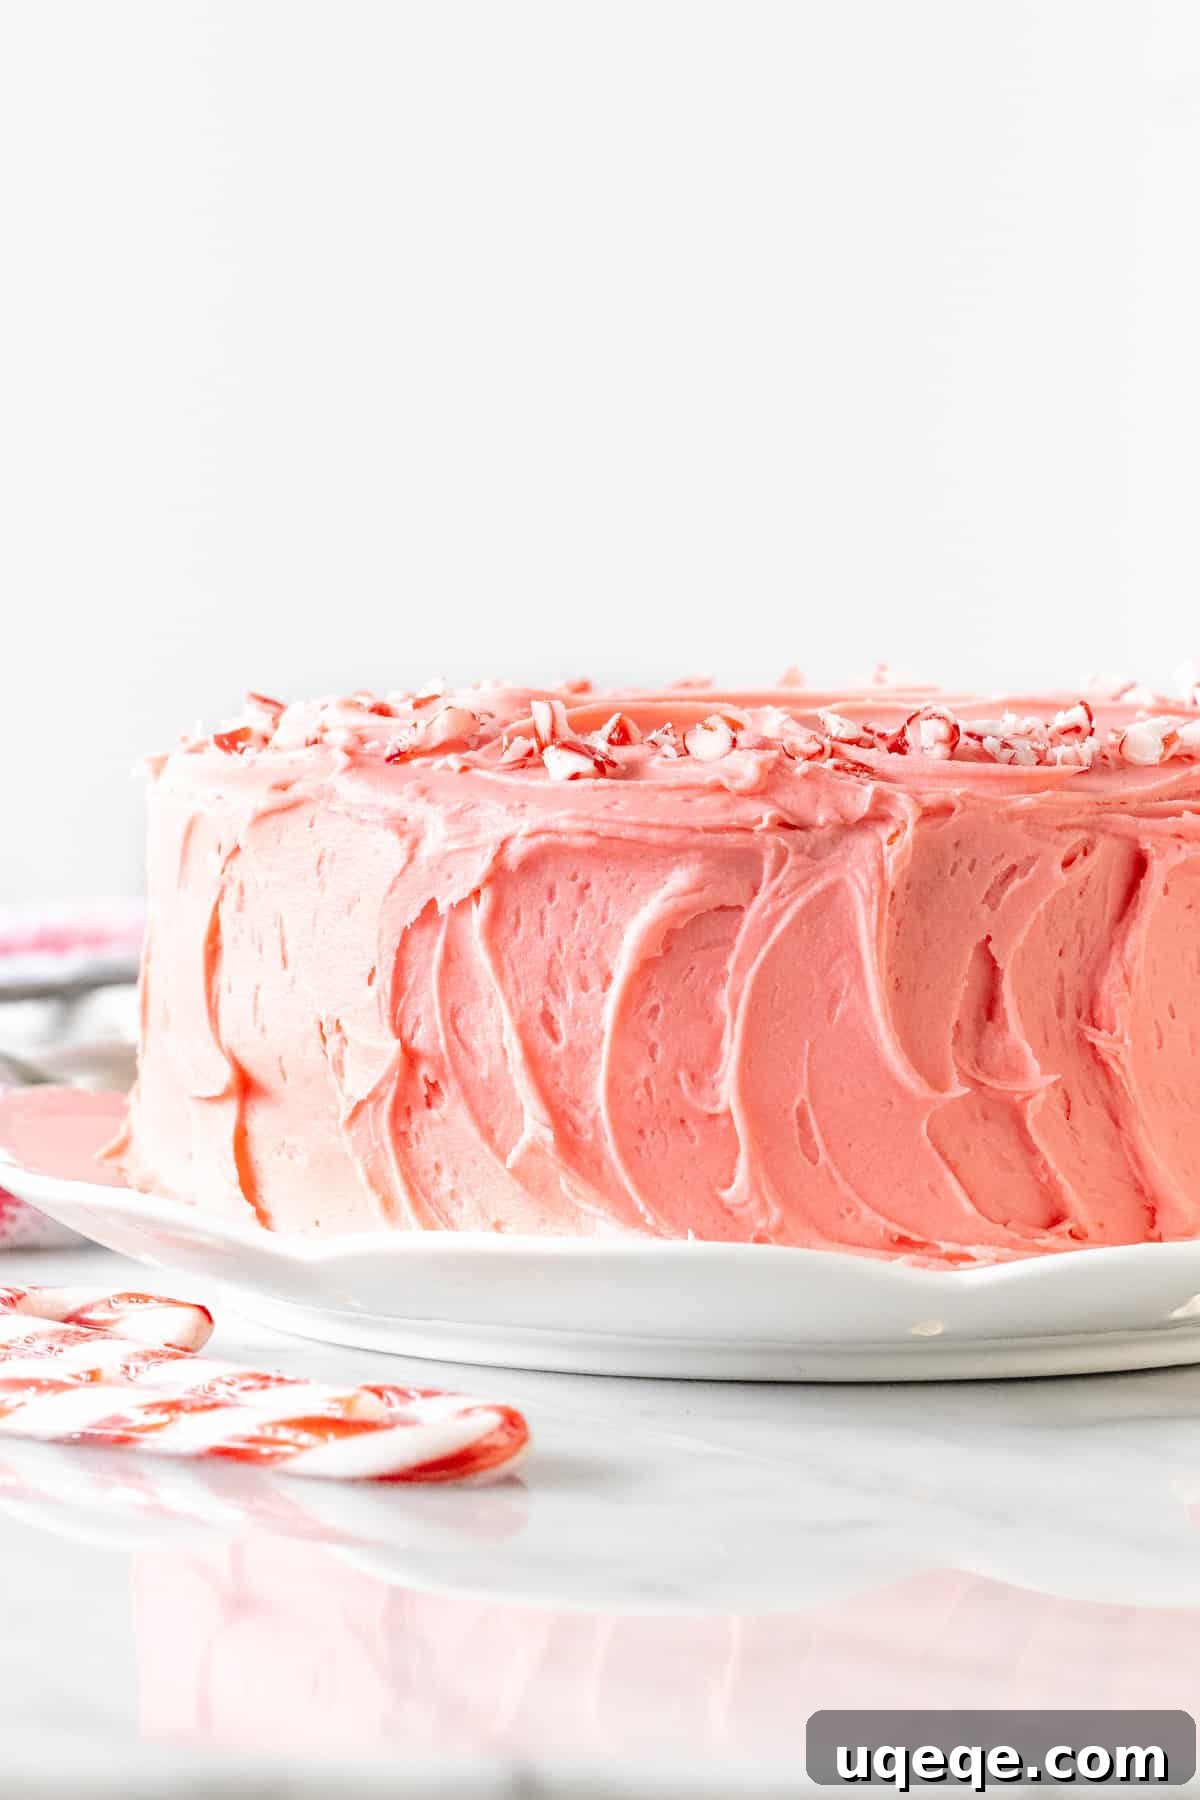
If you’re searching for a holiday cake that not only boasts stunning presentation but also delivers an unforgettable taste of Christmas, look no further. This candy cane layer cake offers a soft, delicate crumb that melts in your mouth, carrying just the right amount of peppermint extract. My initial hesitation about infusing the cake layers with peppermint quickly vanished after the first taste – it adds depth and brightness without being overwhelming. Complementing the cake is our signature frosting, a velvety dream that combines the rich notes of white chocolate with the cool, refreshing burst of peppermint. It’s a flavor combination so irresistible, it reminds me of indulging in luxurious white chocolate candy cane treats or the delightful top layer of peppermint bark, reimagined in a decadent, spreadable form.
Crafting the Perfect Peppermint Cake Layers
The foundation of this exquisite dessert is a meticulously crafted white vanilla cake, delicately infused with a measured amount of peppermint extract. White cake distinguishes itself from traditional vanilla cake by exclusively using egg whites, resulting in a distinctly whiter color compared to the golden hue of its counterpart. This choice isn’t purely aesthetic; the absence of egg yolks yields a slightly more delicate texture, which I’ve found to be superior for absorbing and showcasing the subtle peppermint flavor. The less “rich” background of the white cake allows the vibrant peppermint notes to truly sing, creating a harmonious and refreshing taste experience.
To ensure unparalleled moisture and a prolonged shelf life, our cake recipe incorporates both high-quality unsalted butter and a touch of vegetable oil. While butter is paramount for imparting that classic, rich flavor, the addition of just two tablespoons of oil plays a crucial role in enhancing the cake’s tenderness and keeping it wonderfully moist for longer. This thoughtful combination guarantees a cake that remains soft and delightful, even days after baking, making it an ideal choice for holiday entertaining when freshness is key.
Decadent White Chocolate Peppermint Frosting
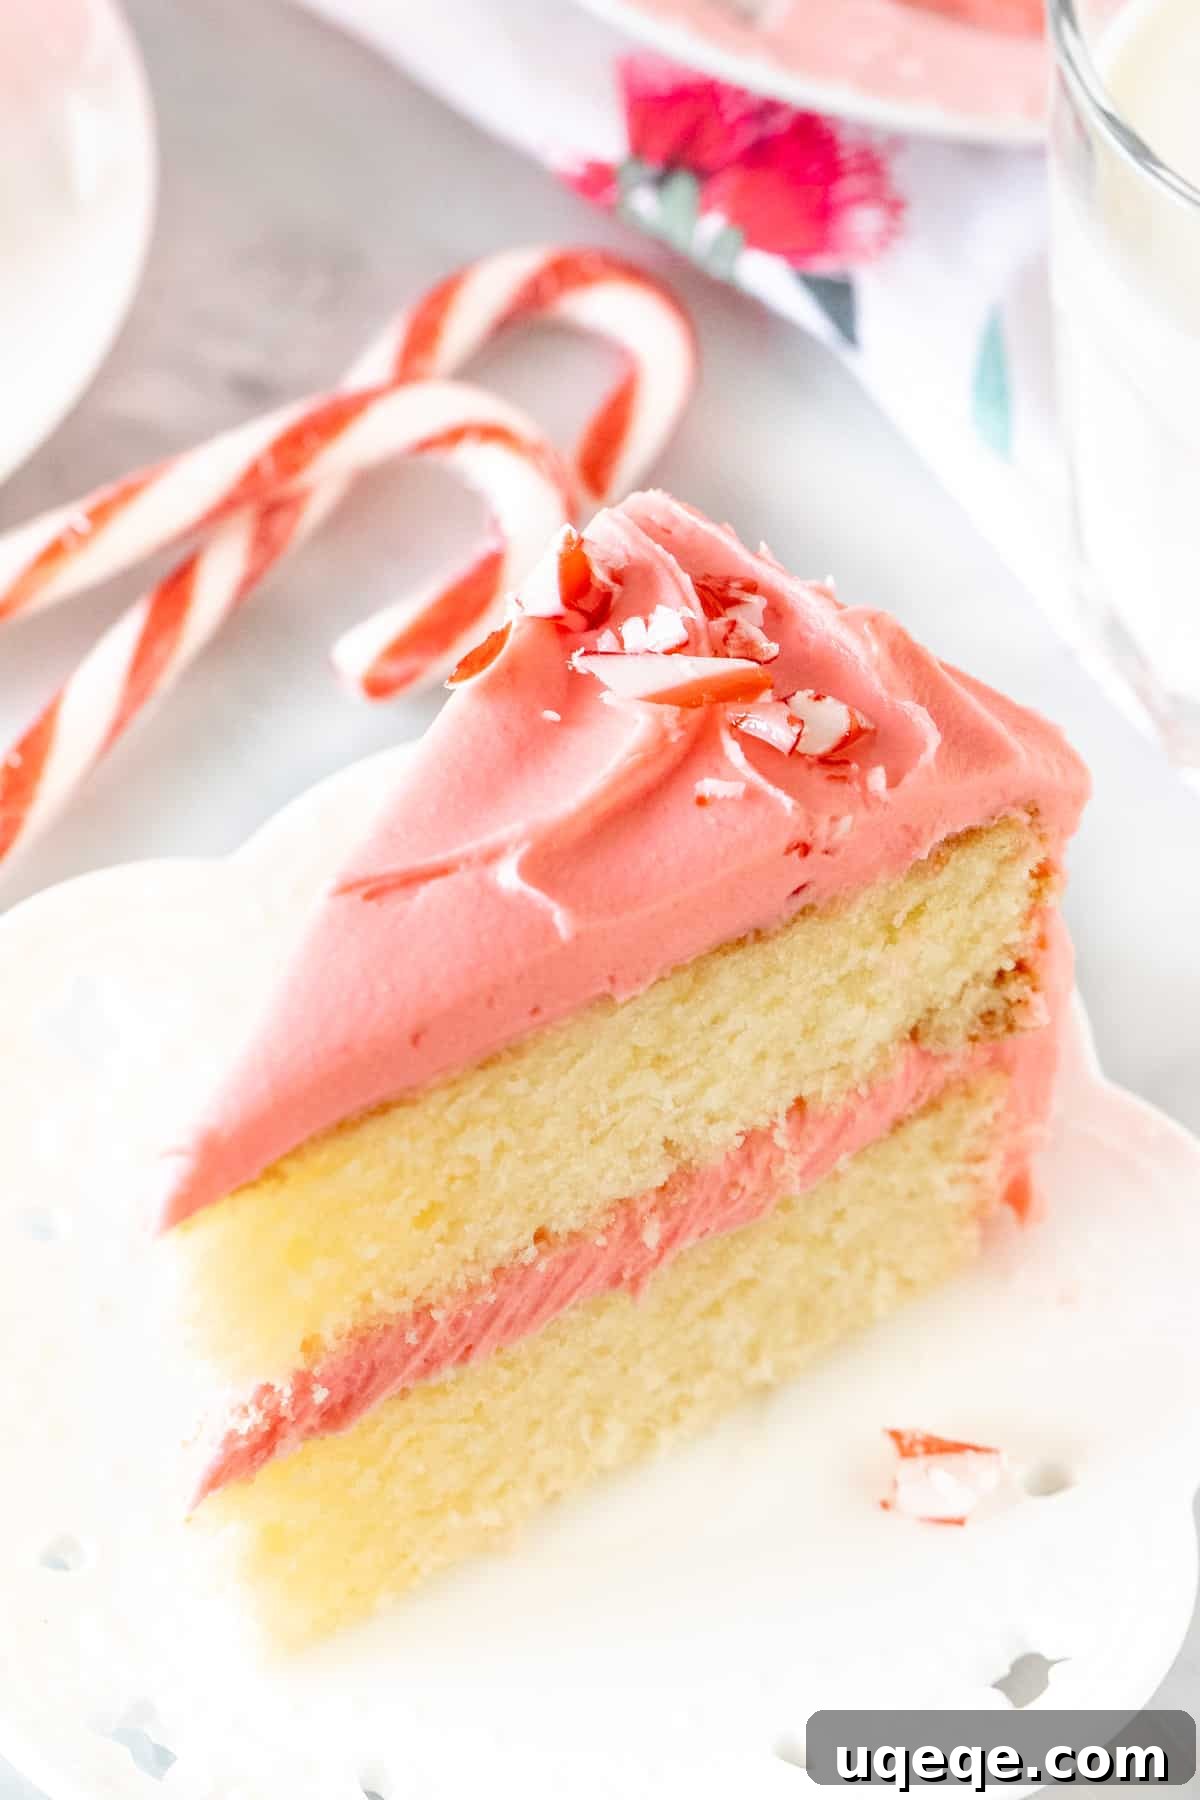
Prepare to fall in love with this frosting – it is truly a slice of heaven. Imagine generous swirls of light, fluffy, and incredibly creamy white chocolate buttercream, perfectly infused with the invigorating essence of peppermint. Each spoonful is a dreamy experience, reminiscent of the finest white chocolate candy cane truffles or the irresistible top layer of a premium peppermint bark, transformed into a velvety smooth frosting. To elevate its festive charm, I like to tint the frosting with a subtle hint of red food coloring, achieving a beautiful soft pink hue that perfectly complements the holiday theme. The final touch involves generously scattering crushed candy canes over the frosted cake, adding a delightful crunch and an extra burst of vibrant peppermint flavor that contrasts wonderfully with the smooth creaminess of the frosting.
Expert Baking Tips & Tricks for a Flawless Result
Achieving a bakery-quality Candy Cane Cake is simpler than you might think with these expert tips and tricks. Paying attention to these details will ensure your cake layers are tender, your frosting is perfect, and your final creation is nothing short of magnificent.
- Embrace Cake Flour for a Tender Crumb: This recipe specifically calls for cake flour, known for its lower protein content, which results in an exceptionally soft and tender crumb. It is crucial to sift your cake flour thoroughly before use, as it can often be quite lumpy, and sifting ensures a light, even texture in your batter. If cake flour isn’t readily available, don’t fret! You can easily create a substitute: for every cup of all-purpose flour, remove two tablespoons and replace them with two tablespoons of cornstarch (also known as cornflour). Sift this mixture together at least three times to ensure it’s well combined and aerated. This simple trick mimics the properties of cake flour beautifully.
- Room Temperature is Key: For the best emulsion and a smooth, uniform batter, ensure that your milk, butter, and egg whites are all at room temperature before you begin mixing. Cold ingredients can cause the batter to curdle or result in a denser, less airy cake. Planning ahead to let these ingredients sit out for about 30-60 minutes can make a significant difference in the final texture of your cake.
- Avoid Overmixing the Batter: Once you’ve added the dry ingredients to the wet, mix only until everything is just combined. Overmixing develops the gluten in the flour, leading to a tough, chewy cake. A gentle hand and a watchful eye are your best allies here; stop the mixer as soon as no dry streaks remain.
- Complete Cooling for Perfect Frosting: This step cannot be stressed enough: your cake layers absolutely must be 100% completely cooled before you even think about applying frosting. Attempting to frost warm or even slightly cool cakes will result in melted, sliding frosting and a crumbly mess. Patience is a virtue in baking, especially here!
- Level Your Cake Layers for a Professional Finish: If your cake layers emerge from the oven with slightly domed tops, don’t worry – this is common. To achieve a perfectly flat, professional-looking layer cake, use a long serrated knife to gently saw off the rounded tops of each cooled cake layer. This creates a stable surface for stacking and ensures your cake stands tall and even.
- Quality White Chocolate Makes a Difference: For the truly luxurious White Chocolate Peppermint Frosting, invest in high-quality white chocolate. Good quality chocolate will melt smoothly and contribute a rich, authentic flavor. Avoid using candy melts or white chocolate chips that contain stabilizers, as these often lack depth of flavor and can sometimes result in a grainy or overly sweet frosting.
- Melted Chocolate Must Be Cooled: When incorporating the melted white chocolate into your buttercream, ensure it has cooled to almost room temperature, or at least no longer warm to the touch. Adding warm chocolate to butter will inevitably melt the butter, turning your creamy frosting into a soupy disaster. Let it sit for at least 10-15 minutes after melting, stirring occasionally to help it cool evenly.
Smart Make-Ahead & Storage Solutions
Plan your holiday baking efficiently with these helpful make-ahead and storage tips, ensuring your Candy Cane Cake is fresh and fabulous when you’re ready to serve.
- Freezing Cake Layers: To get a head start, you can bake the cake layers in advance. Once fully cooled, wrap each individual layer tightly in several layers of plastic wrap, then an additional layer of aluminum foil or place them in a freezer-safe bag. They can be frozen for up to two months. When you’re ready to assemble, simply thaw the layers overnight in the refrigerator before proceeding with frosting.
- Prepping Ahead for Serving Day: The unfrosted cake layers can also be made one day prior to serving. After they’ve cooled completely, store them in an airtight container at room temperature overnight. Then, on the day you plan to serve, prepare the frosting and assemble your beautiful cake.
- Storing the Finished Cake: A frosted cake can be stored covered at room temperature for up to 8 hours without compromising its quality. For longer storage, or for any leftovers, place the cake in an airtight container and refrigerate for up to 4 days. For optimal enjoyment, allow refrigerated cake slices to sit on the counter for about 30 minutes to reach room temperature before slicing and serving.
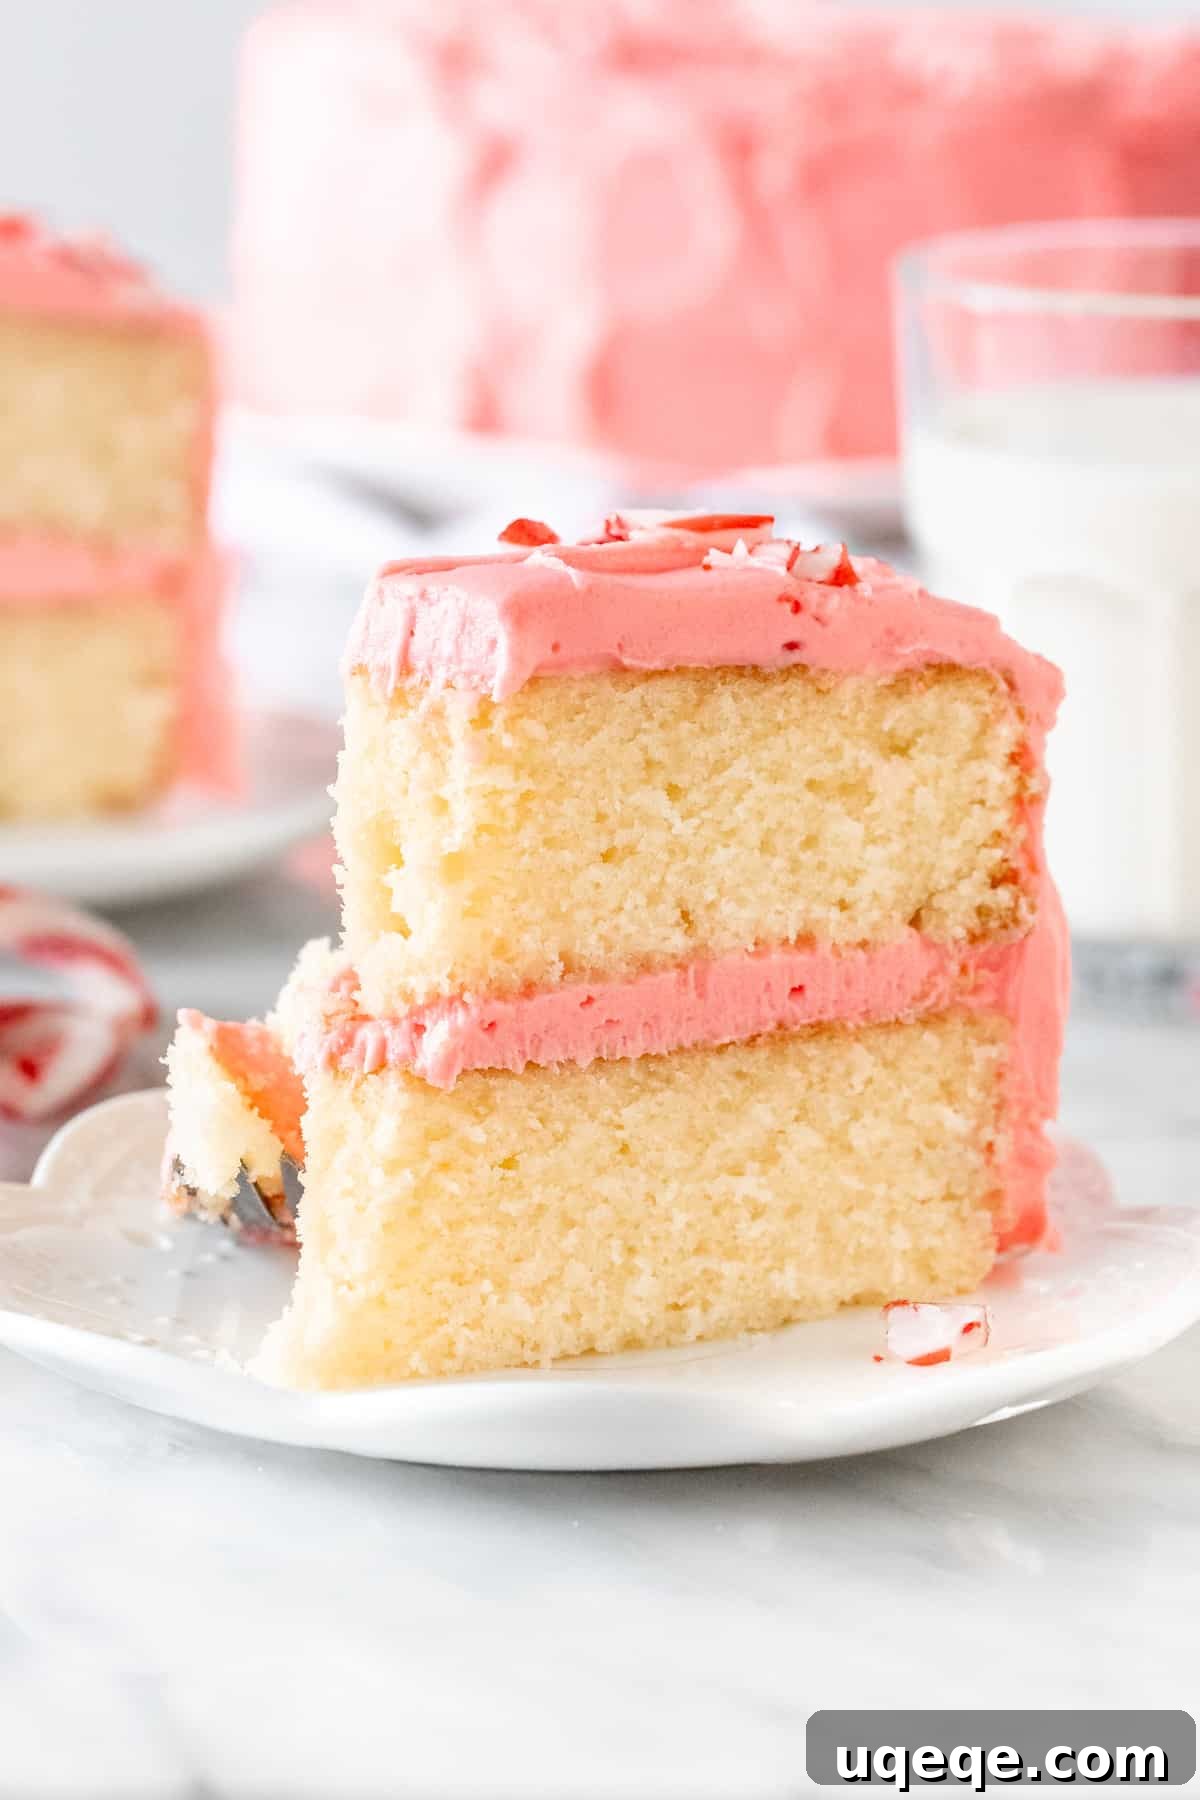
This Candy Cane Cake is more than just a dessert; it’s a delightful celebration of festive flavors. Its perfectly moist and flavorful layers offer a beautiful peppermint essence that is truly delicious without being overpowering. The harmonious blend of white chocolate in the creamy peppermint frosting elevates this cake from simply good to absolutely extraordinary, promising an unforgettable taste experience for everyone at your holiday gathering.
For those who love a chocolate twist, be sure to explore our Chocolate Candy Cane Cake. And if you’re looking for more delicious candy cane inspired treats, delve into these other irresistible recipes:
- Candy Cane White Chocolate Chip Cookies
- Candy Cane Brownies
- Peppermint Cheesecake
- Chocolate Peppermint Cheesecake
Candy Cane Cake: The Full Recipe
This show-stopping candy cane cake features perfectly moist and tender vanilla cake layers with a hint of peppermint, all generously frosted with an incredibly creamy white chocolate peppermint buttercream and adorned with crushed candy canes. It’s the quintessential Christmas dessert!
By: Fiona Dowling
- Prep Time: 45 mins
- Cook Time: 35 mins
- Cooling Time: 2 hrs
- Total Time: 3 hrs 20 mins
- Servings: 10 pieces
Pin Recipe | Rate Recipe | Print Recipe
Equipment
- Two 8-inch round cake pans (with high sides)*
Ingredients
For the Candy Cane Cake:
- 2 3/4 cup cake flour (330 grams), sifted
- 2 teaspoons baking powder
- 1/2 teaspoon salt
- 1 cup whole milk (240 ml), 2% works too
- 1/2 teaspoon peppermint extract, feel free to use 1 teaspoon for a stronger flavor
- 2 tablespoons vegetable oil (30 ml), canola works too
- 3/4 cup unsalted butter (168 grams), room temperature
- 1 3/4 cup granulated sugar (350 grams)
- 5 large egg whites, discard the yolks
For the White Chocolate Peppermint Frosting:
- 6 ounces white chocolate (170 grams)
- 1 cup unsalted butter (226 grams), softened, but not melty
- 3-4 cups powdered sugar (330 – 440 grams)
- 1/2 – 2 teaspoons peppermint extract
- 1/4 teaspoon salt
- a few drops red food coloring
- 2-3 tablespoons heavy cream (30-45 ml), or whipping cream
- 2-3 candy canes, crushed
Instructions
For the Candy Cane Cake:
- Preheat the oven to 350F (180C) degrees. Line the bottom of two 8-inch cake pans with parchment paper, and grease and flour the sides.
- Whisk together the flour, baking powder, and salt in a medium bowl.
- In a liquid measuring cup, whisk together the milk, oil, and peppermint extract.
- In a large bowl, beat the butter and sugar until fluffy (about 3 minutes).
- Mix in the egg whites one or two at a time, turning off the mixer and scraping down the sides of the bowl as necessary to ensure even incorporation.
- Sift in about 1/3 of the flour mixture (do not just dump it in, otherwise there will be lumps). Mix on a low speed until just combined.
- Then, mix in about 1/2 of the milk mixture. Repeat this process: sift in about 1/3 more of the dry ingredients and mix, followed by the rest of the milk. Finally, sift in the remaining dry ingredients and mix until just combined, being careful not to overmix.
- Pour the batter evenly between the two prepared pans. Bake both cakes in the middle of the oven for approximately 25-30 minutes, or until an inserted toothpick comes out clean and the sides of the cake begin to pull away slightly from the edges of the pan.
- Cool the cakes in their pans for at least 1 hour. Afterward, gently invert the cake pans and carefully remove the cakes. Continue cooling completely on a wire rack before frosting.
For the White Chocolate Peppermint Frosting:
- Chop the white chocolate into very small, uniform pieces.
- Melt the chocolate using a double boiler over low heat, stirring until smooth. Alternatively, microwave in 30-second intervals on medium heat, whisking well after each interval until completely smooth. Avoid microwaving on high power, as this can easily burn or cook the chocolate, resulting in a grainy texture. Set the melted chocolate aside to cool for at least 10-15 minutes, ensuring it is no longer warm to the touch.
- In a large bowl, beat the softened butter until it is light and fluffy.
- Gradually beat in about 2 cups of powdered sugar, 1/2 teaspoon of peppermint extract, and a few drops of red food coloring. Start the mixer on a low speed to prevent a cloud of sugar, then slowly increase the speed until everything is well combined and fluffy.
- Carefully beat in the cooled melted white chocolate. It is crucial that the chocolate is not warm when added to the butter, otherwise the frosting may melt and become thin.
- Continue to beat in the remaining powdered sugar, about 1/2 to 1 cup at a time, alternating with 1 tablespoon of heavy cream, until the frosting reaches a thick, creamy, and spreadable consistency. Taste and adjust the peppermint extract as desired for a stronger flavor.
Assembling the Cake:
- If your cake layers have domed tops, use a long serrated knife to gently saw off the rounded portion of each cooled cake layer to create flat, even surfaces.
- Place one cake layer on your chosen cake plate or stand, bottom side up, for a stable base. Spread approximately 1/3 of the prepared frosting evenly over this layer.
- Carefully place the second cake layer on top, also bottom side up. Use the remaining frosting to generously cover the sides and top of the cake, creating beautiful swirls. If you find cake crumbs mixing into your frosting, apply a very thin “crumb coat” of frosting first, then refrigerate the cake for 20 minutes to set before applying a thicker, decorative layer of frosting.
- Finally, decorate the frosted cake with a generous sprinkling of crushed candy canes for a festive finish.
Recipe Notes for Success
- Pan Sizes & Bake Times: This recipe was developed and photographed using two 8-inch round cake pans with 2-inch (5 cm) high sides. Please note, this batter quantity is too much for two 8-inch cake pans with shallower 1-inch or 1.5-inch sides. Alternatively, you can adapt the recipe for different pan configurations:
- Two 9-inch (23 cm) round pans: Bake for approximately 22-27 minutes.
- Three 8-inch (20 cm) round pans: Bake for approximately 20-25 minutes.
- One 9×13 inch (23 x 33 cm) rectangle pan: Bake for about 40 minutes. If using this size, you may wish to divide the frosting recipe in half as less is needed for a single layer.
- Cake Flour Substitution: As mentioned in the tips, if you don’t have cake flour on hand, measure out 2 3/4 cups of all-purpose flour. Remove 6 tablespoons of this flour, then add in 6 tablespoons of cornstarch (AKA cornflour). Sift this mixture together at least three times to ensure proper distribution. Do not simply substitute cake flour with all-purpose flour in a 1:1 ratio, as the texture will be significantly different.
- Room Temperature Ingredients: To reiterate, for the best results with the peppermint cake, ensure that your butter, egg whites, and whole milk are all at room temperature before you begin mixing the batter. This helps create a smooth, emulsified batter and a consistent cake texture.
- Peppermint Extract vs. Oil: Always use peppermint extract for this recipe, not peppermint oil. Peppermint oil is much more concentrated and can easily overpower the delicate flavors of the cake. Peppermint extract is typically found in the baking aisle alongside vanilla extract.
- Storage Guidelines: The finished, frosted cake can be stored covered at room temperature for up to 8 hours. For any leftovers, or if preparing further in advance, store the cake in an airtight container in the refrigerator for up to 4 days. For optimal enjoyment, allow refrigerated cake slices to sit on the counter for about 30 minutes to reach room temperature before serving.
- Nutrition Information: The provided nutritional details are an estimate only. They are based on a single slice of cake including frosting and candy canes, assuming the cake is cut into 10 equal pieces. Depending on slice size, you may be able to yield up to 12 pieces from this recipe.
Nutrition Facts (Estimated per serving)
- Calories: 842 kcal
- Carbohydrates: 111g
- Protein: 8g
- Fat: 42g
- Saturated Fat: 25g
- Polyunsaturated Fat: 3g
- Monounsaturated Fat: 11g
- Trans Fat: 1g
- Cholesterol: 93mg
- Sodium: 235mg
- Potassium: 236mg
- Fiber: 1g
- Sugar: 84g
- Vitamin A: 1053 IU
- Vitamin C: 1mg
- Calcium: 114mg
- Iron: 1mg
We hope you enjoy creating and sharing this wonderful Candy Cane Cake! Don’t forget to rate and leave a comment below with your feedback and experiences.