
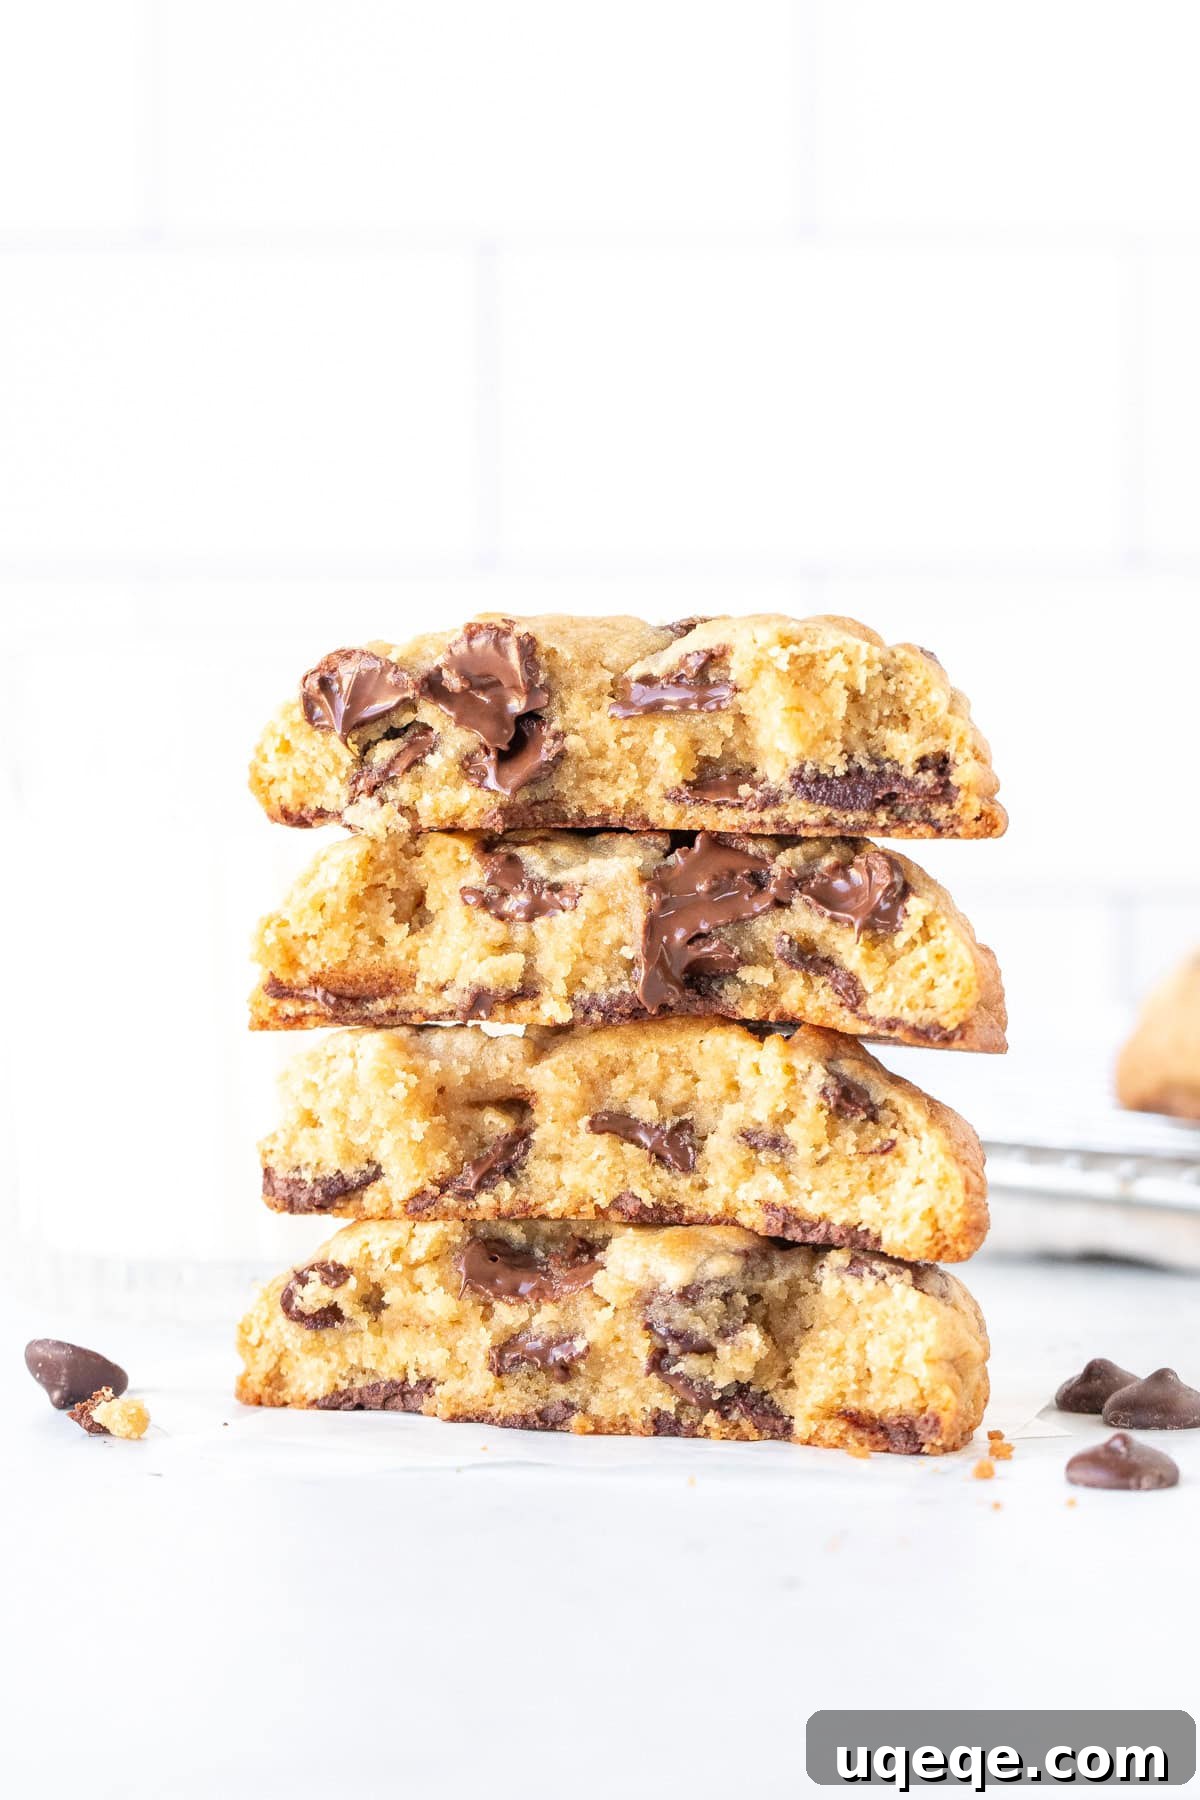
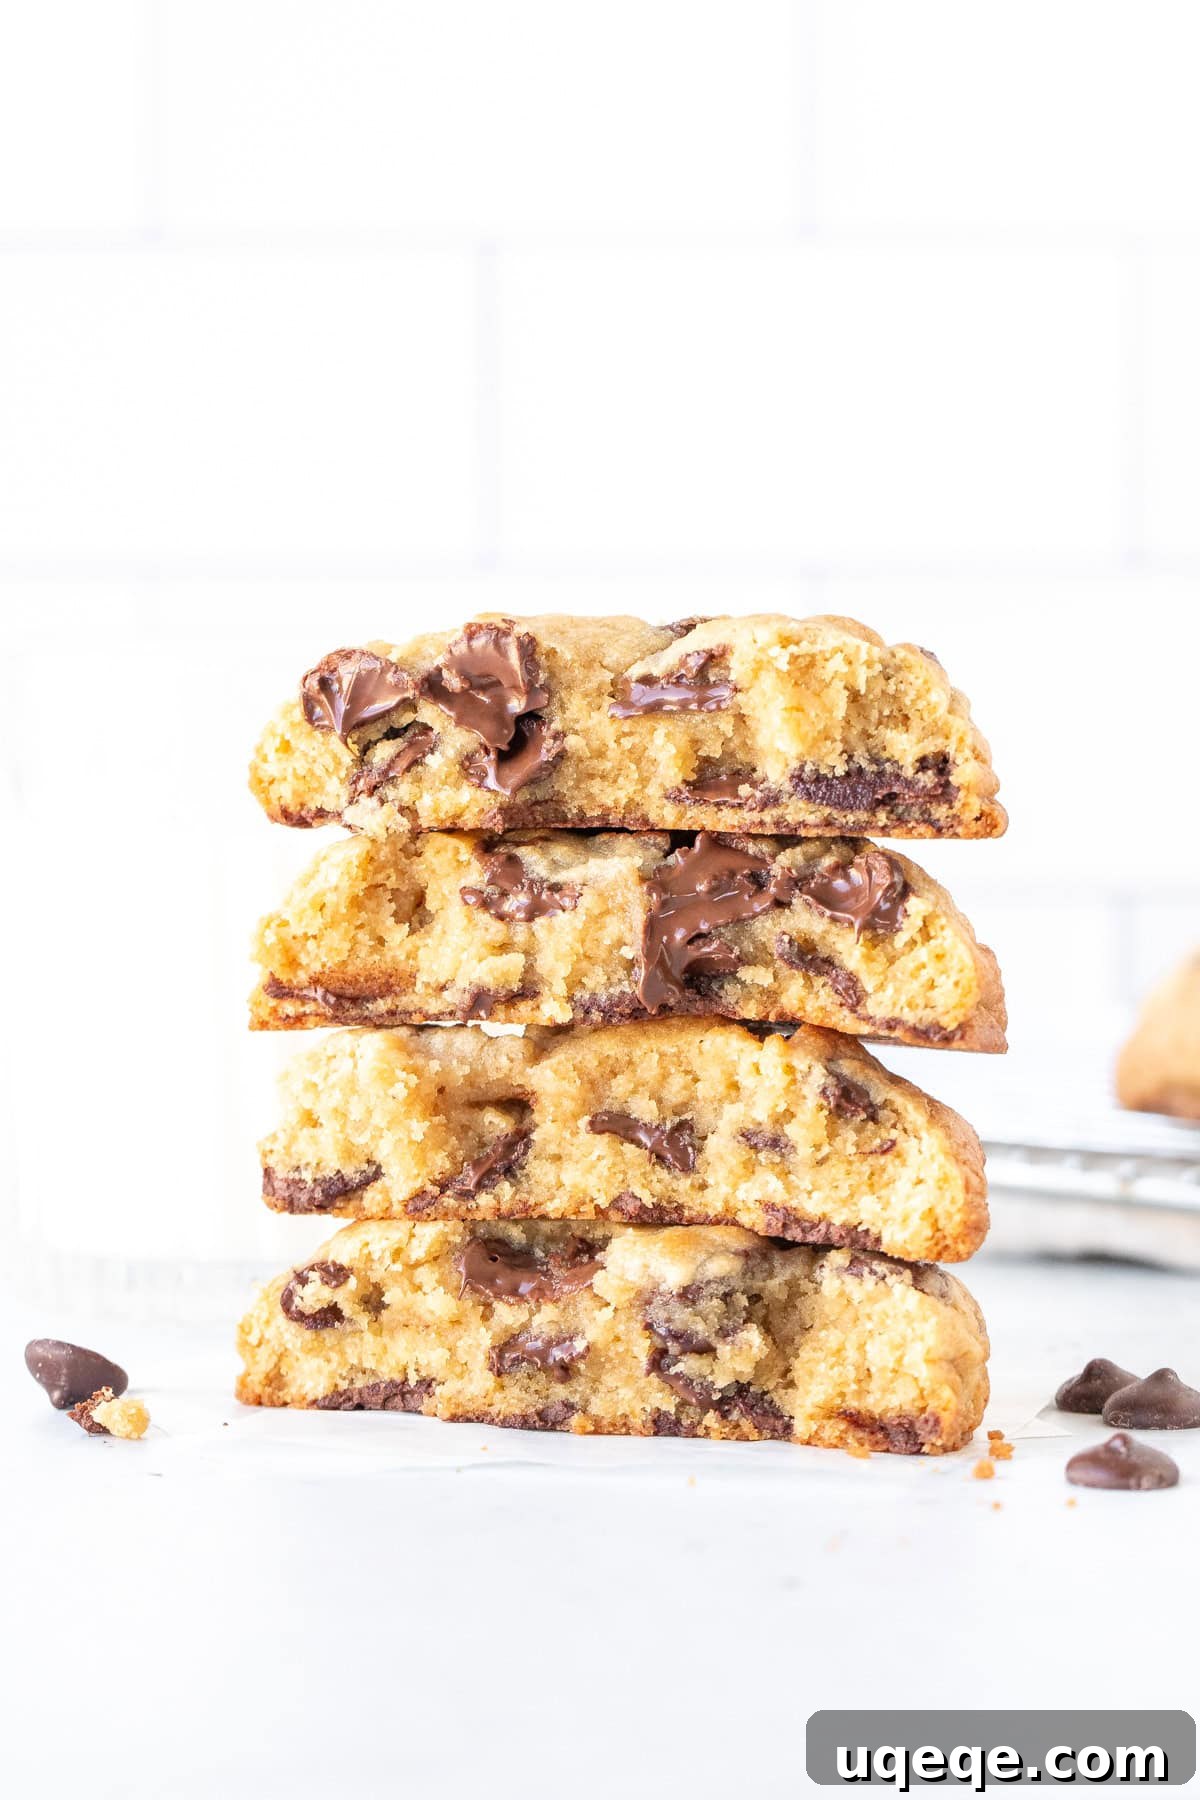
Craving a truly indulgent treat? If you’re searching for extra chunky cookies that deliver on both texture and flavor, then look no further! This easy-to-follow recipe will guide you to baking unbelievably thick chocolate chip cookies that are slightly crispy on the outside, delightfully gooey in the middle, and absolutely loaded with melt-in-your-mouth chocolate chips. Forget those flat, sad cookies – get ready for a colossal, bakery-style masterpiece!
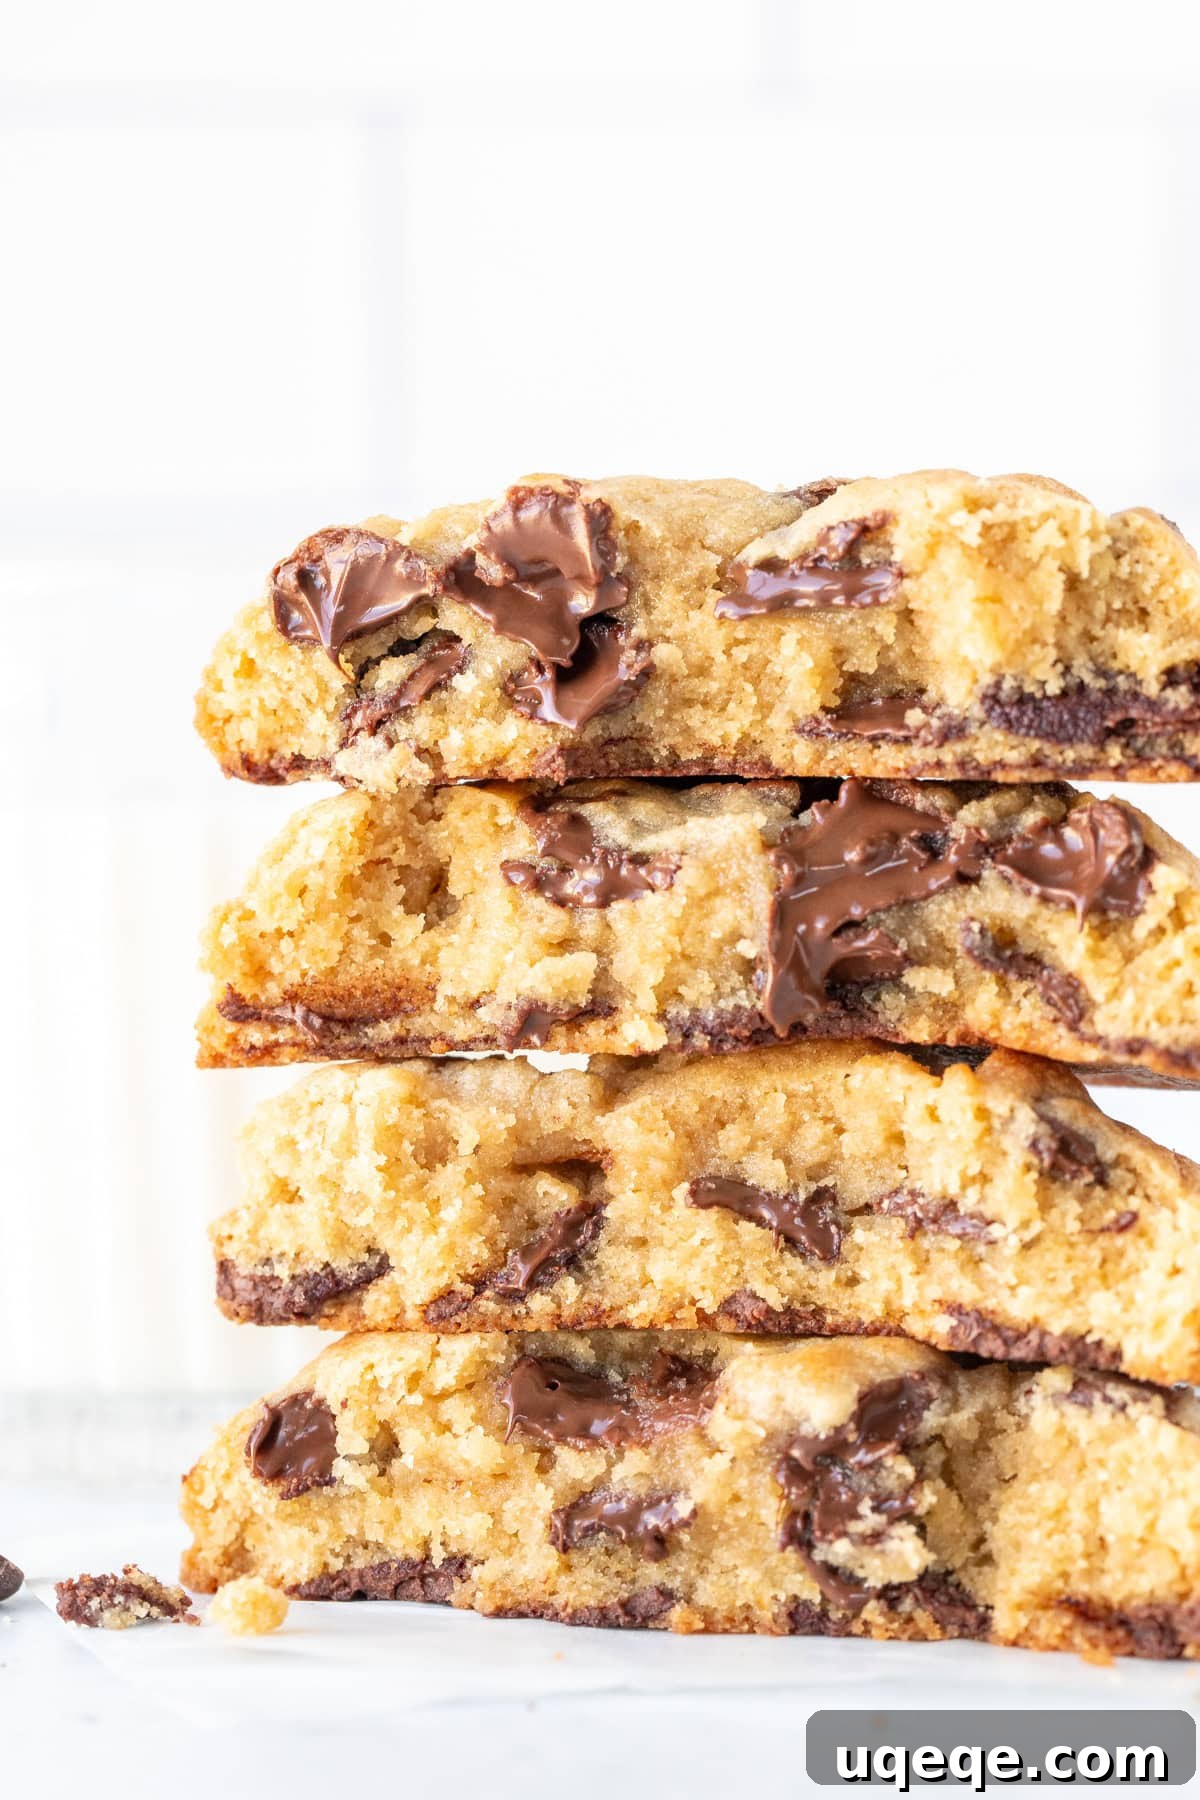
The inspiration for these magnificent thick chocolate chip cookies comes from the countless viral videos showcasing those irresistible, ooey-gooey, extra chunky cookies dominating social media feeds. This recipe isn’t just simple to execute; it’s meticulously crafted with precise ingredient proportions to guarantee cookies that are exceptionally thick, wonderfully chewy, perfectly gooey in the middle, and bursting with generous amounts of chocolate chips in every bite. They’re designed to satisfy even the most intense cookie cravings, mimicking the quality of your favorite bakery right in your own kitchen.
Prepare yourself for truly ginormous and incredibly rich cookies. These aren’t your average bite-sized treats; they are substantial, decadent, and utterly satisfying. Let’s dive into the delicious world of baking and create some magic!
The Science Behind Irresistibly Thick Chocolate Chip Cookies
Achieving that coveted thick and chewy texture isn’t just luck; it’s a careful balance of ingredients and technique. Here’s a detailed look at what makes this recipe stand out and ensures your cookies reach their peak thickness and gooey perfection:
- Optimal Flour Ratio: The foundation of a thick cookie lies in its flour content. Unlike thinner, crispier cookies that often have a higher butter-to-flour ratio, this recipe calls for a significantly higher amount of flour relative to the butter. This increased flour content is crucial for providing the necessary structure and body, preventing the cookies from spreading too much during baking and encouraging them to rise taller rather than wider. Proper measurement, ideally by weight, is key to this balance.
- The Magic of Cake Flour: Incorporating cake flour alongside all-purpose flour is a game-changer for texture. Cake flour has a lower protein content than all-purpose flour, which results in a more tender crumb and a softer, fluffier center. This contrast creates that desirable chewy-soft interior that perfectly complements the slightly crisp exterior, elevating your cookie experience.
- Baking Powder for Lift: While many cookie recipes rely solely on baking soda, this recipe predominantly uses baking powder. Baking powder creates more lift and volume, contributing to the cookie’s height and thickness. Baking soda, typically activated by an acidic ingredient (like brown sugar), helps with spread and tenderness, but baking powder provides that upward boost that helps these cookies stand tall and proud. The combination ensures both texture and impressive stature.
- High Temperature Baking: Baking these cookies at a slightly higher temperature, 375°F (190°C), rather than the typical 350°F (180°C), is a deliberate choice. The initial burst of heat sets the edges of the cookies quickly, preventing excessive spreading and locking in their thickness. This higher temperature also helps create a beautifully golden-brown, slightly crispy exterior while allowing the center to remain wonderfully underbaked and gooey, achieving that perfect textural contrast that defines a truly exceptional chocolate chip cookie.
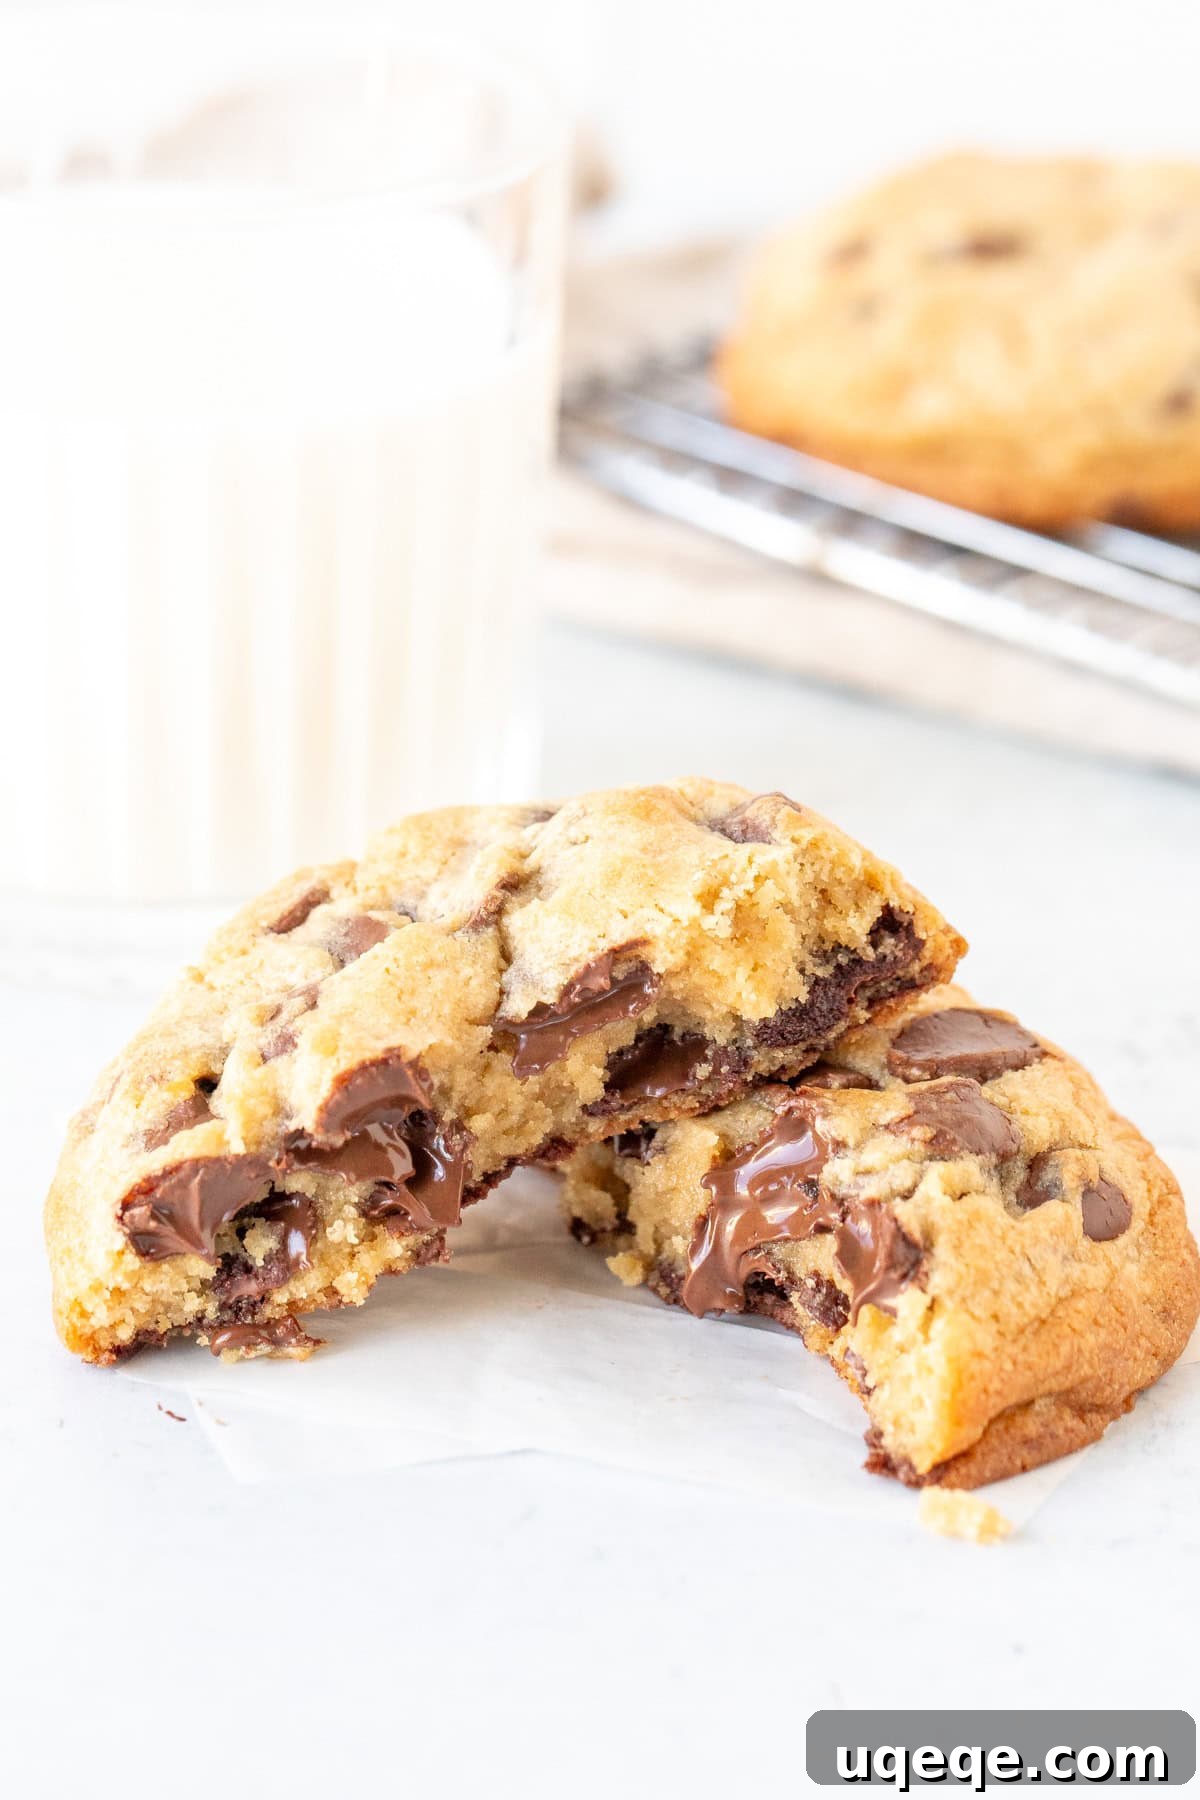
Step-by-Step Guide to Baking Your Best-Ever Thick Chocolate Chip Cookies
Creating these sensational cookies is a straightforward process, but paying attention to each step and these helpful tips will ensure truly remarkable results. Below, you’ll find detailed instructions with insights to guide you. If you’re a seasoned baker or have made these before, feel free to scroll down to the dedicated recipe card for a concise version.
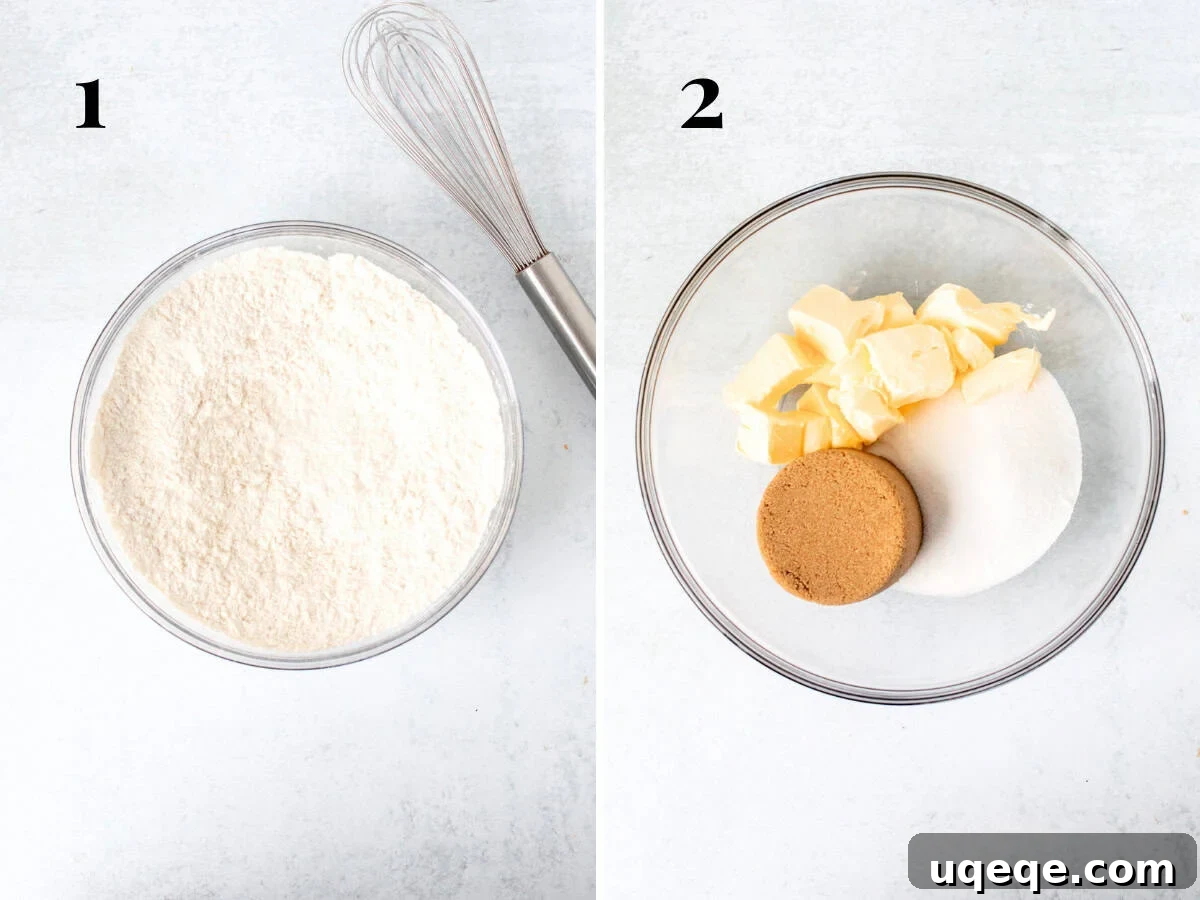
- Prepare Your Dry Ingredients: Begin by sifting together the all-purpose flour, cake flour, baking powder, baking soda, and salt in a medium-sized bowl. Sifting is especially important for cake flour, as it tends to be quite lumpy, and you want a smooth, even mixture. Give the bowl a few good whisks to ensure everything is thoroughly combined.
- Why Cake Flour? As mentioned, cake flour is key for those soft, fluffy centers. It’s crucial to use plain cake flour, not self-rising. Sifting prevents dense spots in your cookies.
- Precision in Flour Measurement: Accurate flour measurement is paramount. Too much flour will result in dry, crumbly cookies, while too little can lead to excessive spreading. For the most consistent and best results, I highly recommend using a digital kitchen scale to measure your flour by weight (grams). If you don’t have a scale, first whisk the flour in its container to aerate it, then spoon it gently into a dry measuring cup and level off the top with a straight edge without packing it down.
- Cream the Sugars and Butter: In a separate large mixing bowl, using an electric mixer, cream together the softened unsalted butter, light or dark brown sugar, and granulated sugar. Continue mixing until the mixture is light, fluffy, and all lumps of brown sugar have disappeared. While you’ll still see granules of granulated sugar, the texture should be visibly lighter and well combined. Ensure your butter is softened but not melted, which impacts the cookie’s texture.
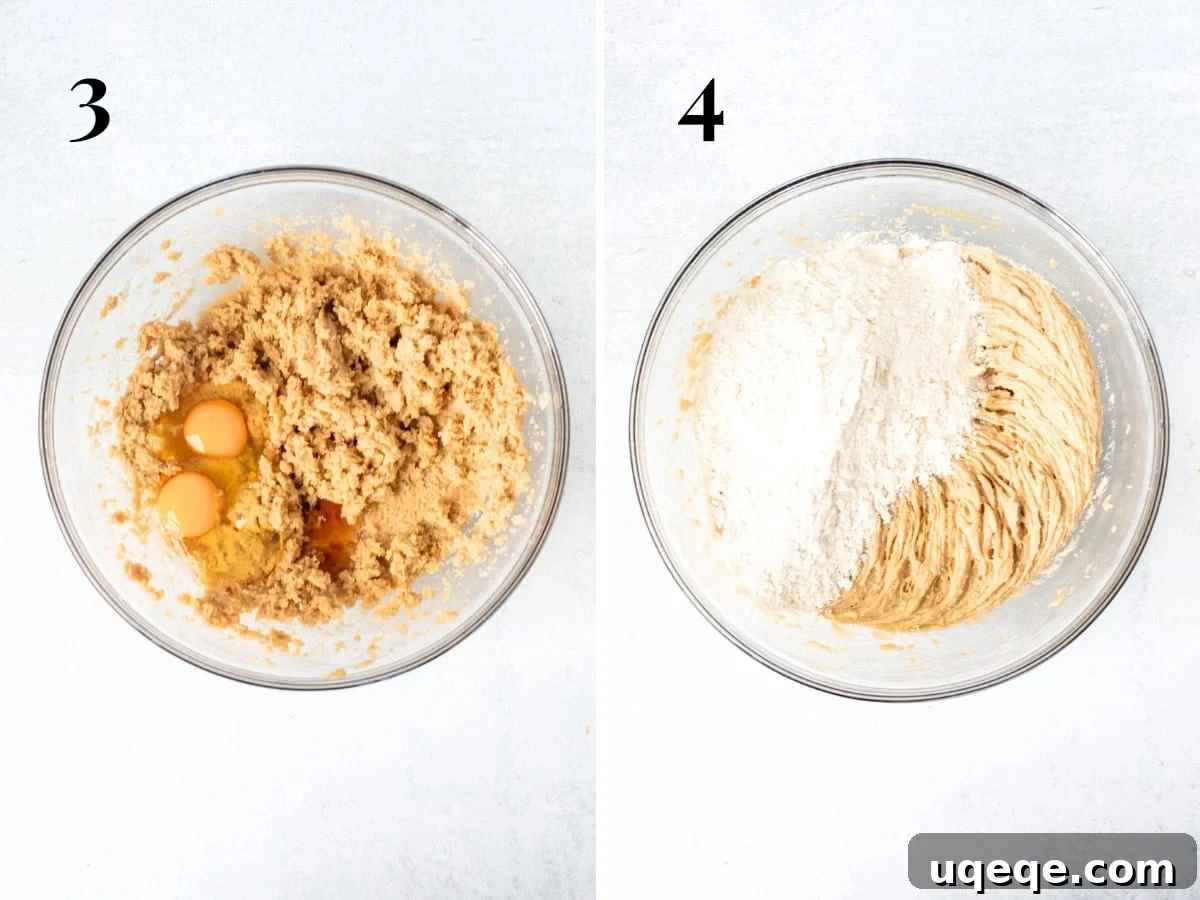
- Incorporate Eggs and Vanilla: Add the large eggs and vanilla extract to the creamed butter and sugar mixture. Beat until just combined.
- Scrape the Bowl: Always pause the mixer and scrape down the bottom and sides of the bowl with a rubber spatula. This ensures all ingredients are fully incorporated and prevents streaks of unmixed butter or sugar, leading to a uniform dough.
- Gradually Add Dry to Wet Ingredients: Carefully, and in stages, mix the dry ingredients into the wet butter mixture. I find it best to add about half of the dry mixture at a time. Start by stirring it a few times with a rubber spatula to prevent a “flour cloud,” then turn your electric mixer on a low speed, gradually increasing to medium until mostly combined. Repeat with the remaining flour mixture.
- Dough Consistency: The dough should be noticeably thick and somewhat challenging to fully incorporate all the flour. Resist the urge to overmix once the flour is added, as this can develop gluten and lead to tough cookies. When you squeeze a small amount of dough between your palms, it should hold its shape without sticking to your fingers. If it’s too sticky, your flour measurement might be off, or your butter was too soft.
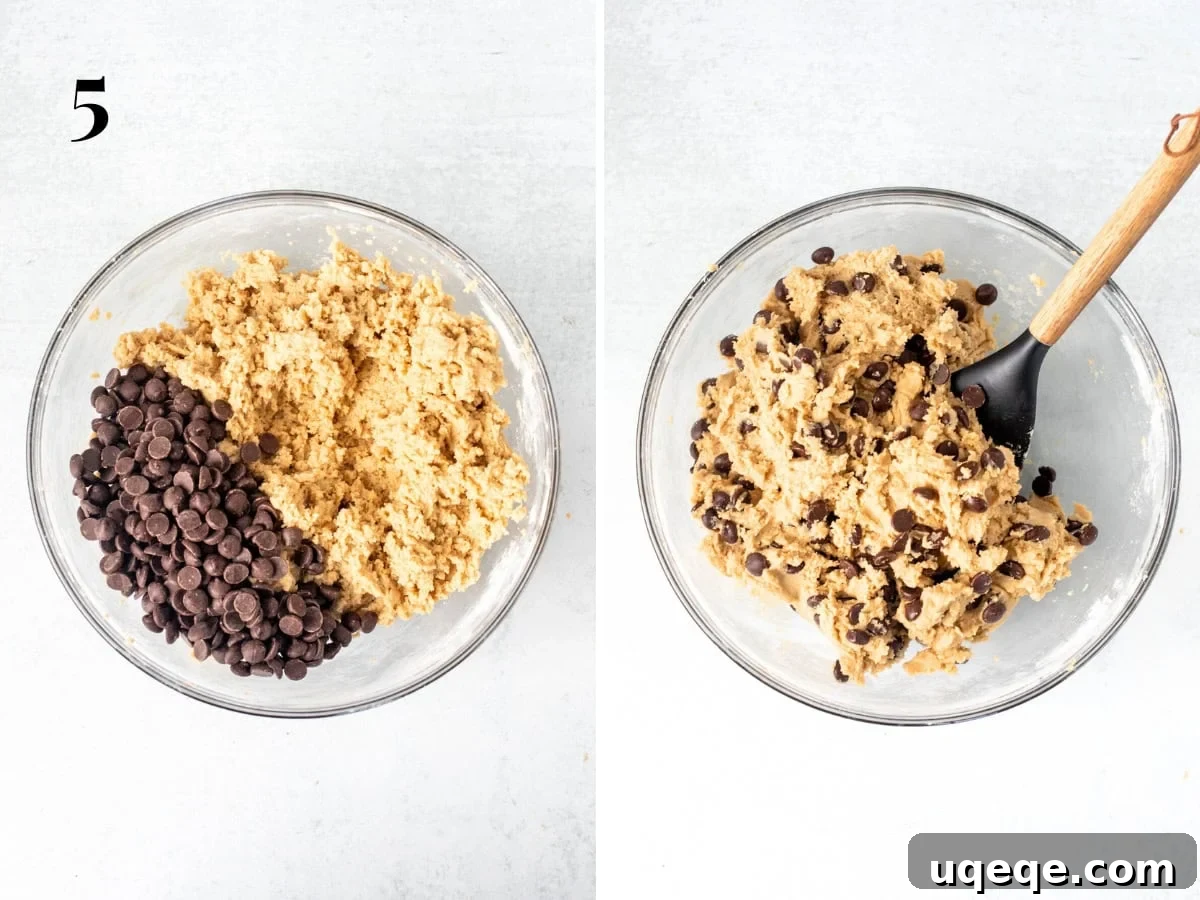
- Fold in the Chocolate Chips: Once your dough is ready, it’s time for the star ingredient! Gently fold in a generous 2 cups of your favorite chocolate chips. You can use milk, semi-sweet, dark, or a blend of several types for varied flavor. Ensure they are evenly distributed throughout the thick batter.
- Chill the Dough: Cover the bowl tightly with plastic wrap and refrigerate the cookie dough for at least 60 minutes. Chilling is not optional for these thick cookies; it’s essential! This process allows the butter to firm up, preventing the cookies from spreading too much in the oven. It also allows the flavors to meld and the flour to fully hydrate, resulting in a richer, more complex flavor and a wonderfully chewy texture.
- Preheat and Prepare for Baking: When you’re ready to bake, preheat your oven to 375°F (190°C). Line your cookie sheets with parchment paper or silicone baking mats. This prevents sticking and ensures even baking and easy cleanup.
- Oven Temperature Matters: As discussed, baking at 375°F (190°C) is key. This slightly higher temperature helps the edges set quickly, promoting thickness and a beautiful golden-brown top. It creates a satisfying crispy exterior that beautifully contrasts with the soft, gooey interior. Make sure your oven has ample time to reach the correct temperature – using an oven thermometer can ensure accuracy.
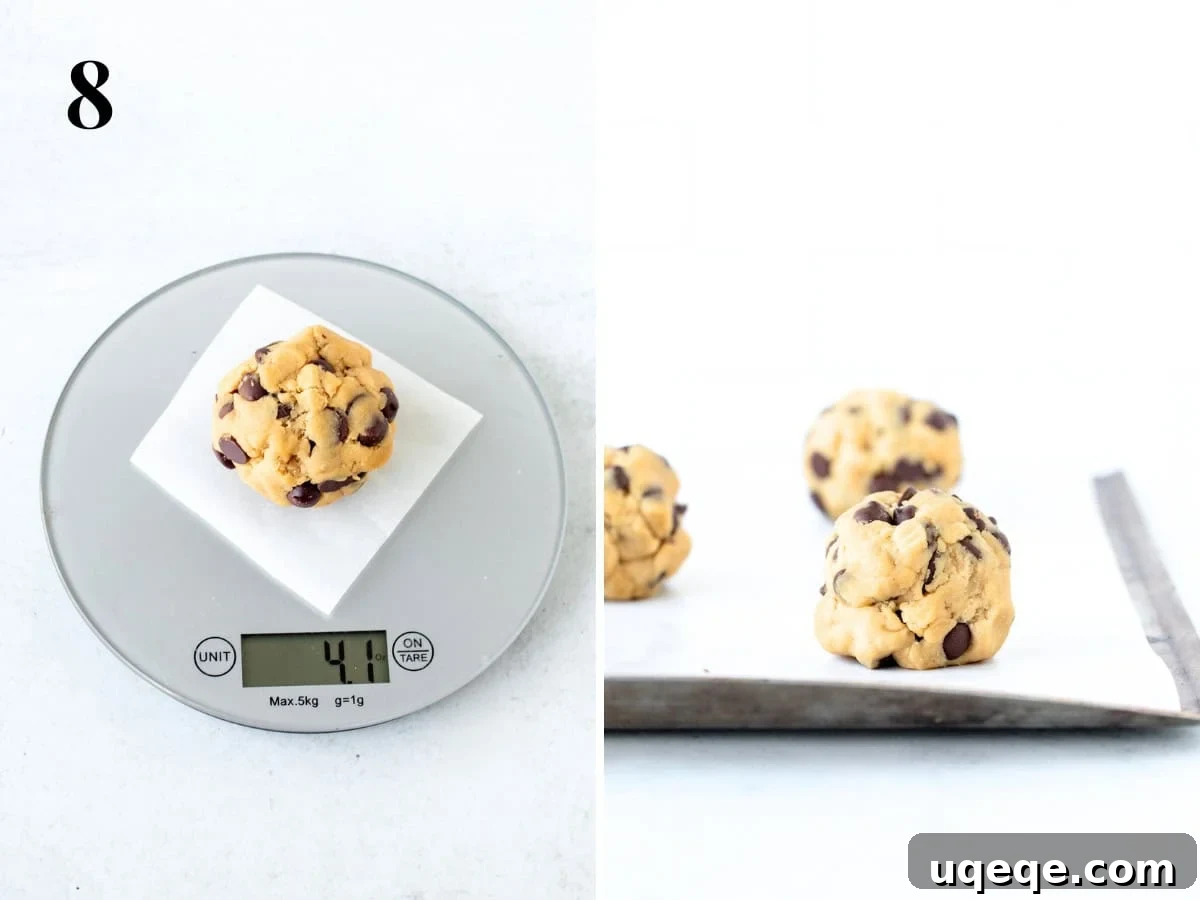
- Form Cookie Dough Balls: Scoop the chilled dough and form it into large balls. For truly colossal cookies, aim for about 1/4 to 1/3 cup of dough per cookie. To ensure uniform size and even baking, I highly recommend using a kitchen scale. Each of my cookies weighed approximately 4 ounces (112 grams). Place the dough balls at least 2 inches (about 5 cm) apart on the lined cookie sheets to allow for a little spread.
- Bake to Perfection: Bake one sheet at a time in the middle rack of your preheated oven for about 12-15 minutes. Baking time can vary depending on your oven and desired gooeyness. Keep a close eye on them; the cookies are done when their tops look set and the edges are just starting to turn a light golden brown. The centers will still look soft and slightly underdone – this is exactly what you want for that gooey texture!
- Cooling: Allow the cookies to cool on the baking sheets for at least 10-15 minutes before attempting to transfer them to a wire cooling rack. Because these cookies are so thick and gooey, they need time to set up and firm up slightly after baking. Moving them too soon can cause them to fall apart.
Freezing and Make-Ahead Tips for Freshly Baked Cookies Anytime
These thick chocolate chip cookies are perfect for preparing in advance, ensuring you always have a delicious treat on hand. Here are some invaluable tips for storing your dough and baked cookies:
- Refrigerating Cookie Dough: The prepared cookie dough is remarkably versatile. It can be stored, covered tightly with plastic wrap, in the refrigerator for up to 48 hours. This prolonged chilling time can actually deepen the flavors, making the cookies even more delicious. When you’re ready to bake, take the bowl out of the fridge and let it sit on the counter for about 15-20 minutes. This allows the dough to soften just enough to be easier to scoop and form into balls.
- Freezing Cookie Dough Balls: For ultimate convenience, freeze individual cookie dough balls. After forming the dough into balls, place them on a parchment-lined baking sheet and freeze for about 30-60 minutes, or until solid. Once firm, transfer the frozen dough balls to an airtight freezer bag or container. They will keep beautifully for up to 2 months. When a cookie craving strikes, simply preheat your oven to 375°F (190°C), place the frozen dough balls on a lined baking sheet, and bake according to the instructions. You may need to add an extra 1-2 minutes to the baking time to account for the frozen state. No need to thaw!
- Storing Baked Cookies: Once baked and completely cooled, store your thick chocolate chip cookies in an airtight container at room temperature for up to 4 days. To maintain their freshness and chewiness, you can even place a slice of bread in the container with them – the cookies will absorb moisture from the bread.
- Freezing Baked Cookies: Baked and cooled cookies also freeze exceptionally well. Place them in an airtight freezer-safe container or bag, separating layers with parchment paper to prevent sticking. They can be frozen for up to 2 months. Thaw them in the refrigerator overnight, then bring to room temperature or warm slightly in the microwave for a “freshly baked” experience.
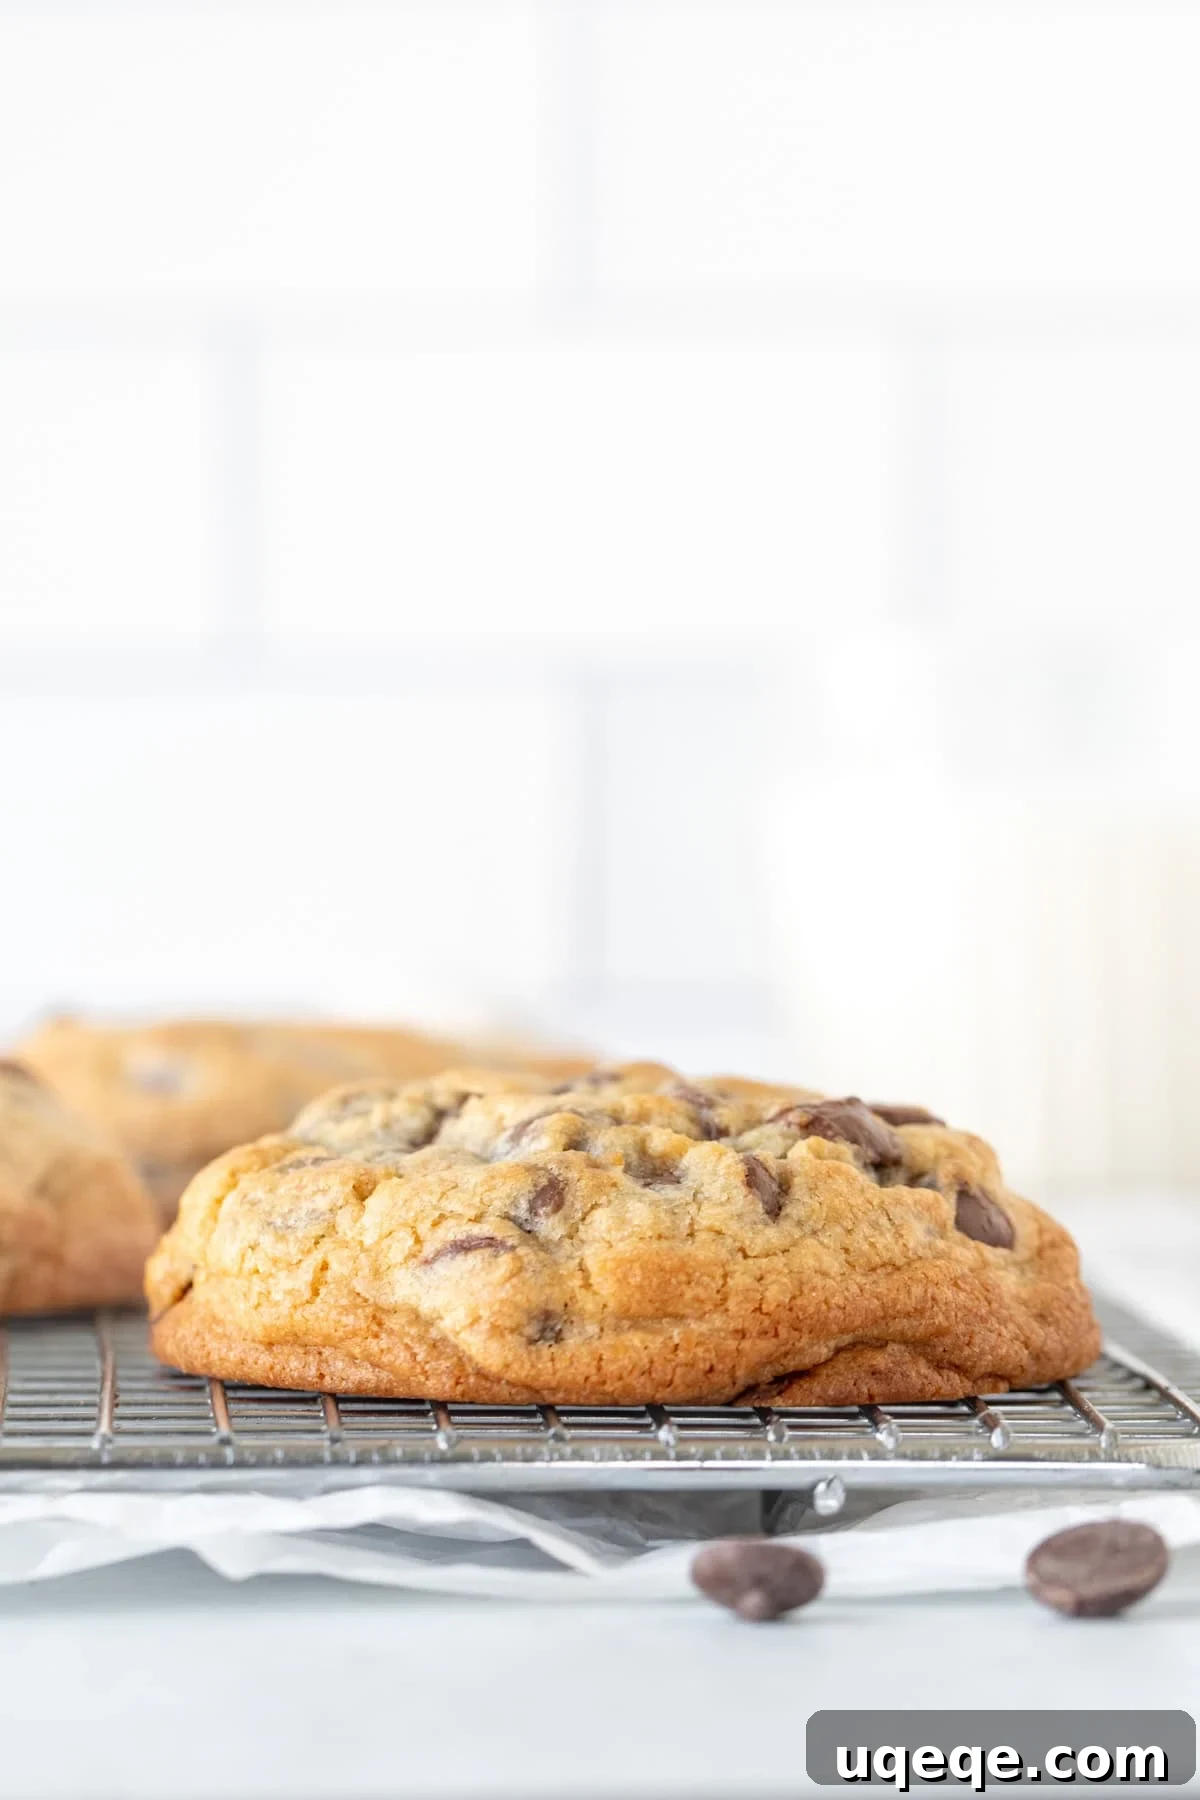
These thick, chunky, and perfectly decadent chocolate chip cookies are a true triumph. With their slightly crispy edges and gloriously gooey centers, you no longer need to seek out a viral bakery to satisfy your craving for the best thick chocolate chip cookies. You can create them right in your own kitchen!
If these cookies have inspired you to explore more delightful baking adventures, be sure to try these other fantastic cookie recipes:
- Dark Chocolate Peanut Butter Chip Cookies – an equally thick and gooey delight for peanut butter and chocolate lovers.
- Bakery-Style White Chocolate Macadamia Cookies – for a classic, buttery, and nutty favorite reminiscent of professional bakeries.
- Espresso Chocolate Chunk Cookies – elevate your cookie game with a gourmet bakery flavor that’s rich and sophisticated.
Thick Chocolate Chip Cookies
By: Fiona Dowling
If you’re looking for extra chunky cookies – then try this easy recipe for thick chocolate chip cookies. These cookies are slightly crispy on the outside and gooey in the middle with tons of chocolate chips.
Prep Time: 15 mins
Cook Time: 14 mins
Chilling Time: 1 hr
Total Time: 1 hr 30 mins
Servings: 12 very large cookies
Rate Recipe
Print Recipe
Equipment
- Cookie Sheets
- Electric Mixer
- Large Mixing Bowls
- Rubber Spatula
- Digital Kitchen Scale (recommended)
- Parchment Paper or Silicone Baking Mats
Ingredients
- 2 cups all-purpose flour (250 grams), measured properly
- 1 1/2 cups cake flour (180 grams), sifted & measured properly
- 1 1/2 teaspoons baking powder
- 1/2 teaspoon baking soda
- 1/2 teaspoon salt
- 1 cup unsalted butter (226 grams), softened but not starting to melt
- 1 cup brown sugar (210 grams), light or dark
- 3/4 cup granulated sugar (150 grams)
- 2 large eggs
- 2 teaspoons vanilla extract
- 2 cups chocolate chips (about 360 grams)
Instructions
- In a medium bowl, whisk together the all-purpose flour, cake flour, baking powder, baking soda, and salt. Be sure to sift the cake flour first as it tends to be lumpy. Set aside.
- In a separate large bowl, using an electric mixer, beat together the softened butter, brown sugar, and granulated sugar until thoroughly creamed (about 1-2 minutes), until no brown sugar lumps remain.
- Beat the eggs and vanilla extract into the butter mixture until just combined. Remember to scrape down the sides and bottom of the bowl to ensure all ingredients are incorporated.
- Add about half of the dry flour mixture into the butter mixture. Stir a few times by hand with a spatula, then beat together with the electric mixer on a low speed until mostly incorporated. Repeat this process with the remaining flour mixture. The dough will be very thick, and it should be somewhat difficult to incorporate all the flour. Avoid overmixing.
- Fold in the chocolate chips until evenly distributed throughout the thick batter.
- Cover the bowl with plastic wrap and refrigerate for at least 1 hour, or up to 48 hours. Chilling the dough is essential for thick cookies.
- When you’re ready to bake, preheat your oven to 375°F (190°C). Line cookie sheets with parchment paper or baking mats.
- Form the dough into large balls, using about 1/4 to 1/3 cup of dough for each. For uniform size, I recommend weighing each cookie ball to about 4 ounces (112 grams). If the dough has been chilled for a long time, let it sit on the counter for 10-15 minutes before scooping. Place the dough balls at least 2 inches (about 5 cm) apart on the lined cookie sheets.
- Bake one sheet at a time in the middle of the preheated oven for about 14-16 minutes, or until the tops look set and the edges are starting to turn golden brown. The centers will still appear soft and slightly underbaked – this is desired for a gooey texture. Baking times can vary by oven.
- Cool the cookies on the baking sheets for at least 10-15 minutes. Because these cookies are so thick and soft, they need this time to set before being transferred to a wire rack, otherwise, they may fall apart.
Notes
- Cake Flour Substitution: For the best results, use cake flour. If you don’t have cake flour, you can create a substitute: for 1 1/2 cups of cake flour, measure out 1 1/4 cups of all-purpose flour (in addition to the other 2 cups of all-purpose flour required by the recipe). Add 3 tablespoons of cornstarch to this 1 1/4 cups of all-purpose flour and sift them together well before using. Do not substitute 1:1 with just all-purpose flour.
- Storage: Store baked and completely cooled cookies in an airtight container at room temperature for up to 4 days. For longer storage, baked and cooled cookies can be frozen for up to 2 months in an airtight freezer container. Thaw in the fridge, then bring to room temperature or warm briefly.
- Nutrition Information: The provided nutritional details are an estimate only and are based on 1 cookie, assuming the recipe yields 12 uniform, very large cookies. Actual values may vary based on specific ingredients and preparation.
Nutrition
Calories: 551kcal
Carbohydrates: 79g
Protein: 7g
Fat: 24g
Saturated Fat: 14g
Polyunsaturated Fat: 1g
Monounsaturated Fat: 4g
Trans Fat: 1g
Cholesterol: 76mg
Sodium: 183mg
Potassium: 130mg
Fiber: 2g
Sugar: 49g
Vitamin A: 585IU
Vitamin C: 0.2mg
Calcium: 87mg
Iron: 2mg
Loved this recipe? Share your thoughts and rate it below! Your feedback is invaluable.