
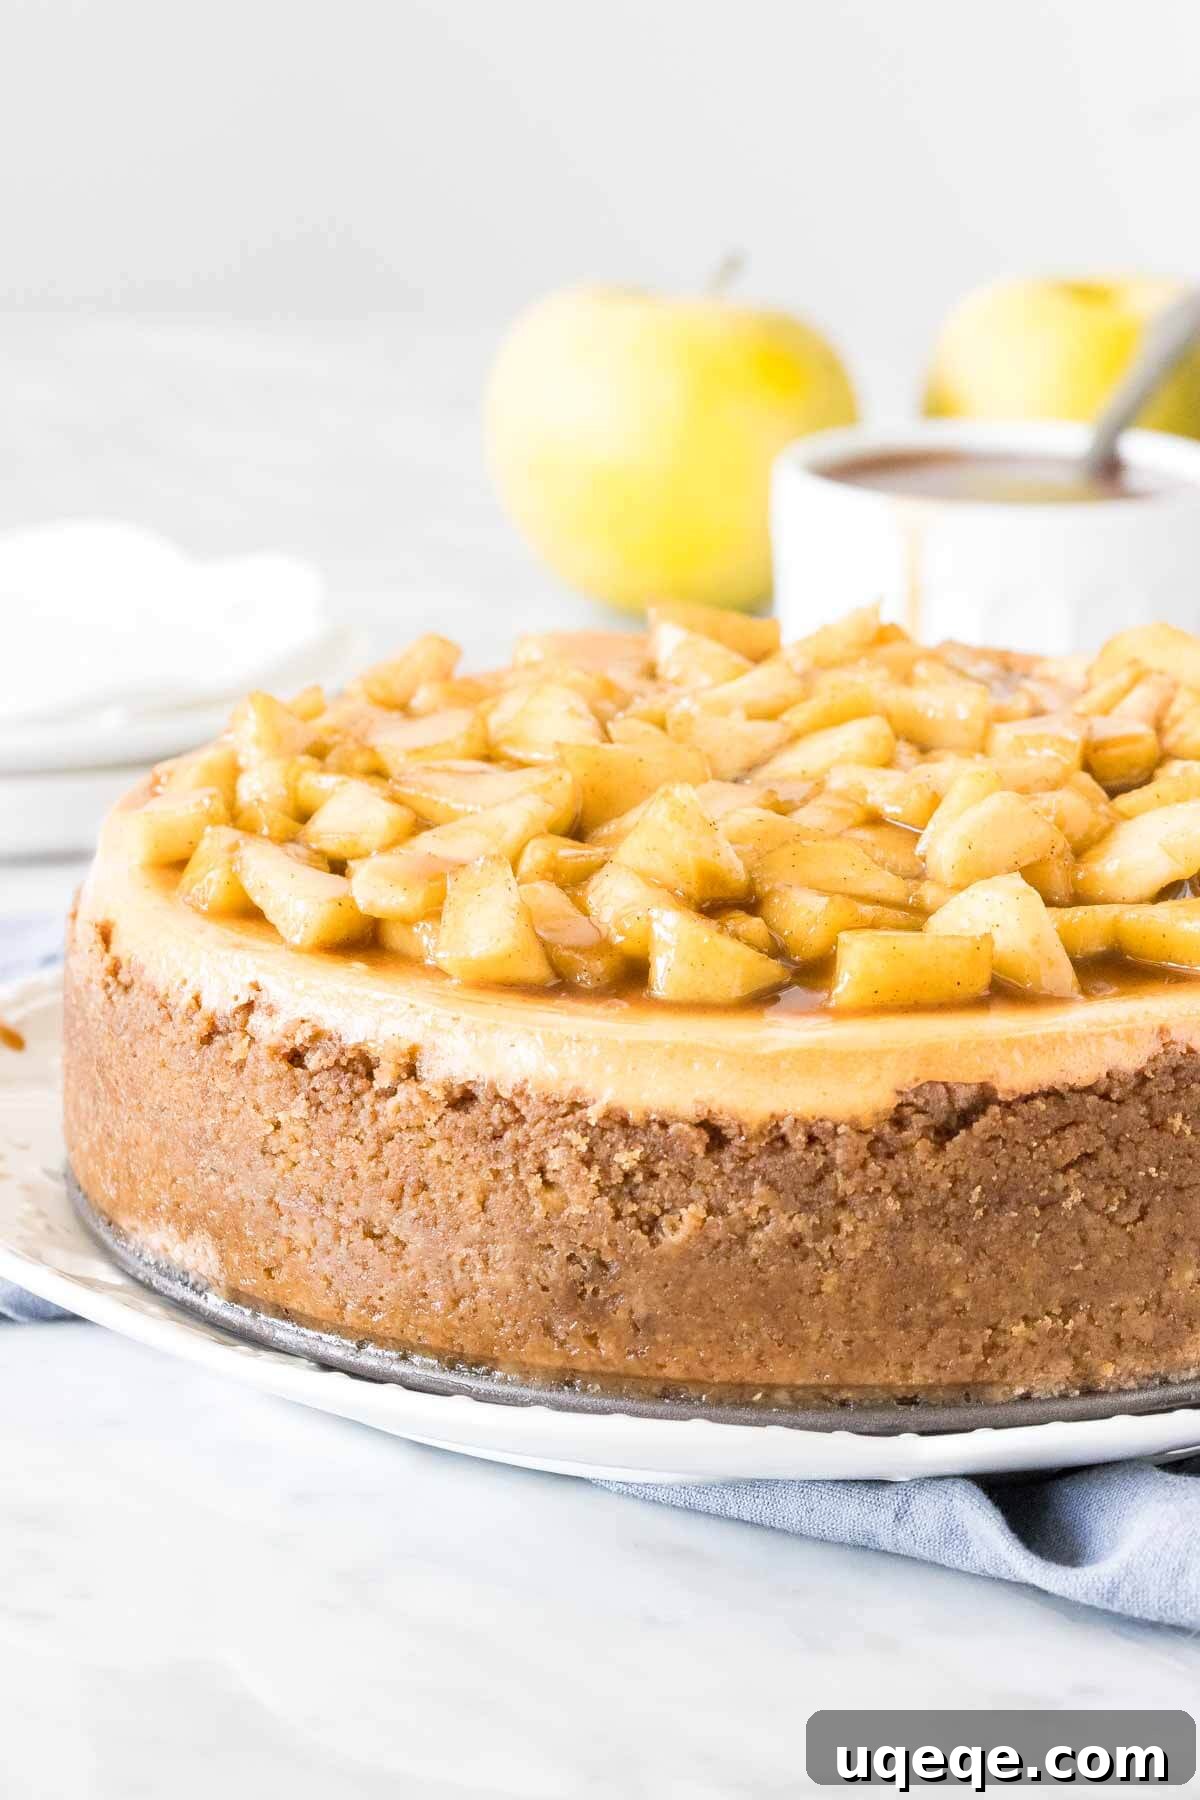
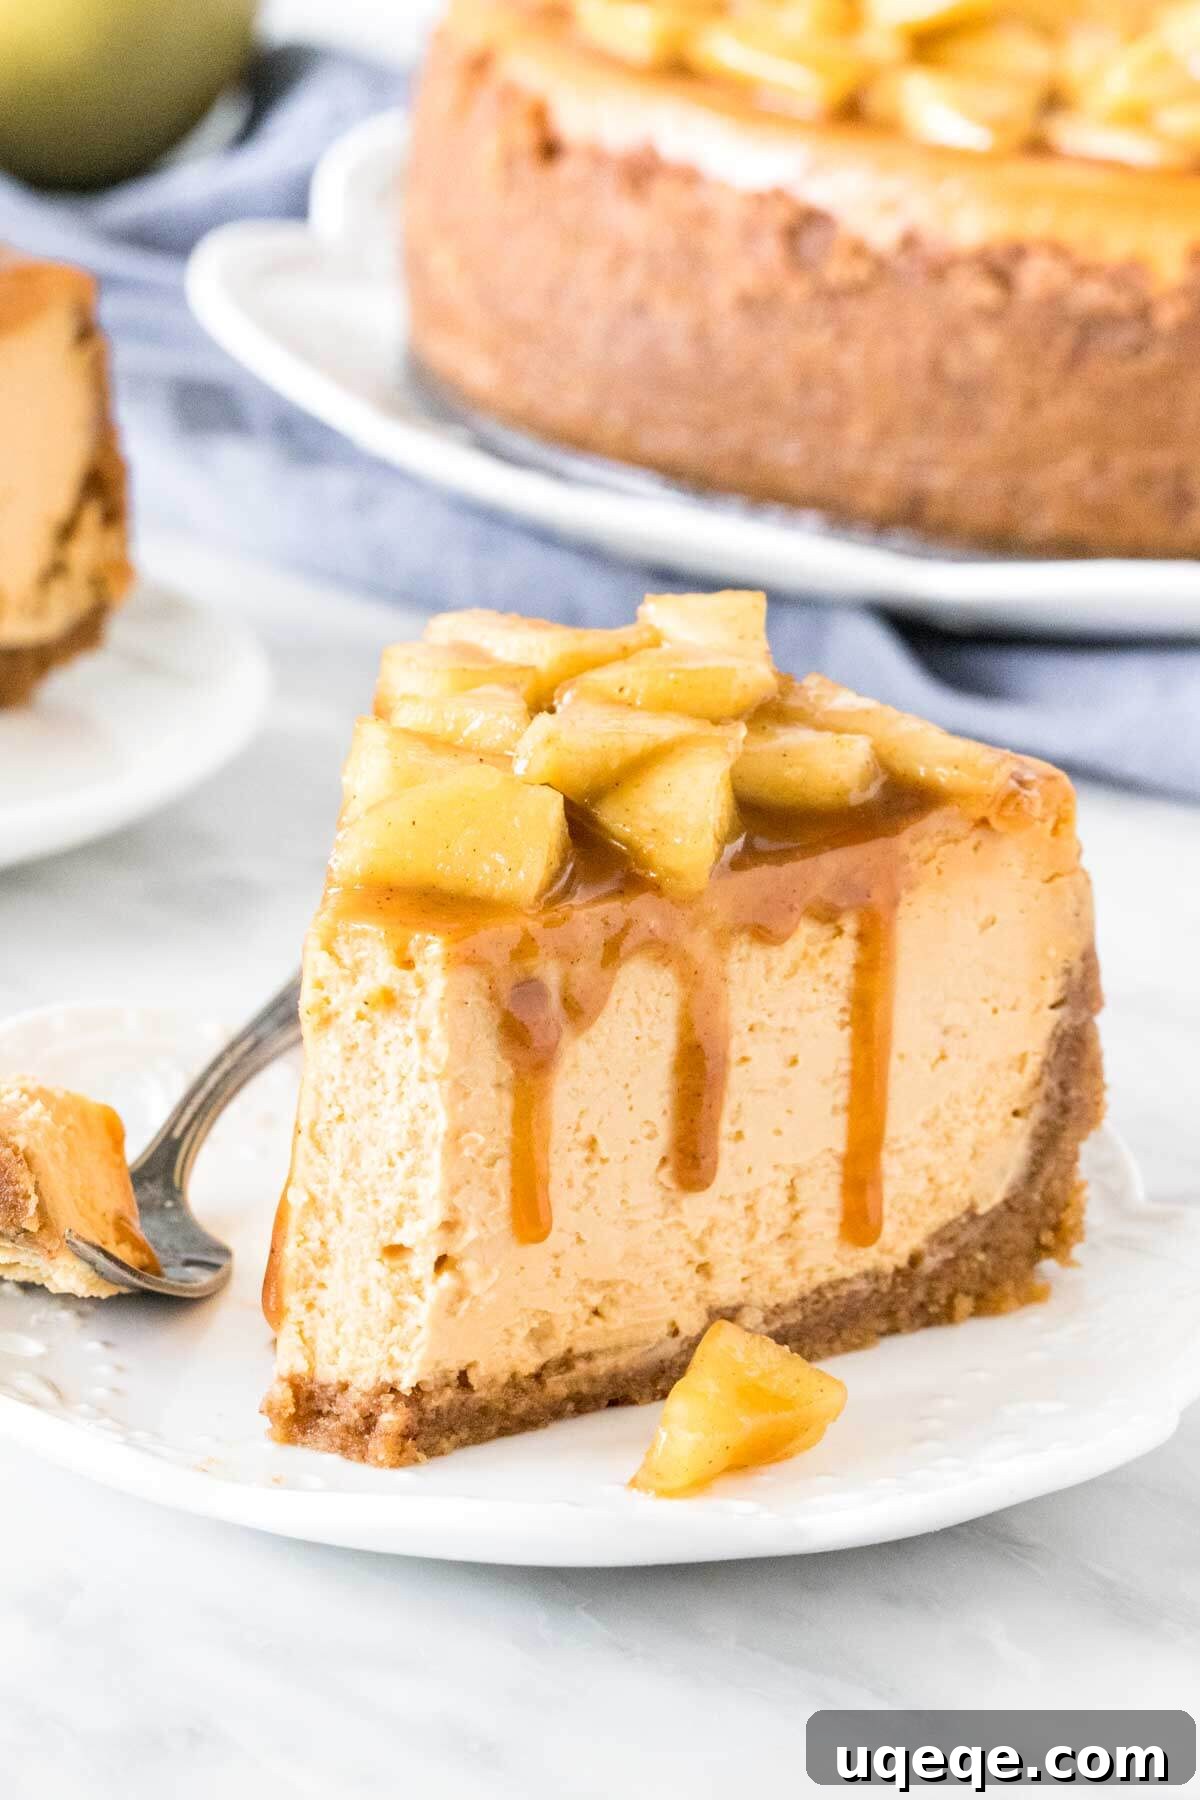
Are you searching for an extraordinary apple dessert that truly captures the essence of autumn? While classic apple crisp and apple pie certainly have their charm, this **Caramel Apple Cheesecake** offers a sophisticated and incredibly decadent twist. Imagine a lusciously creamy cheesecake infused with the deep, buttery notes of salted caramel, all nestled within a crunchy cinnamon graham cracker crust, and crowned with tender, spiced apples. This is more than just a dessert; it’s a showstopper, designed to impress your guests and bring the comforting flavors of fall to your table in the most delightful way.
The Ultimate Caramel Apple Cheesecake: Your Guide to a Fall Masterpiece
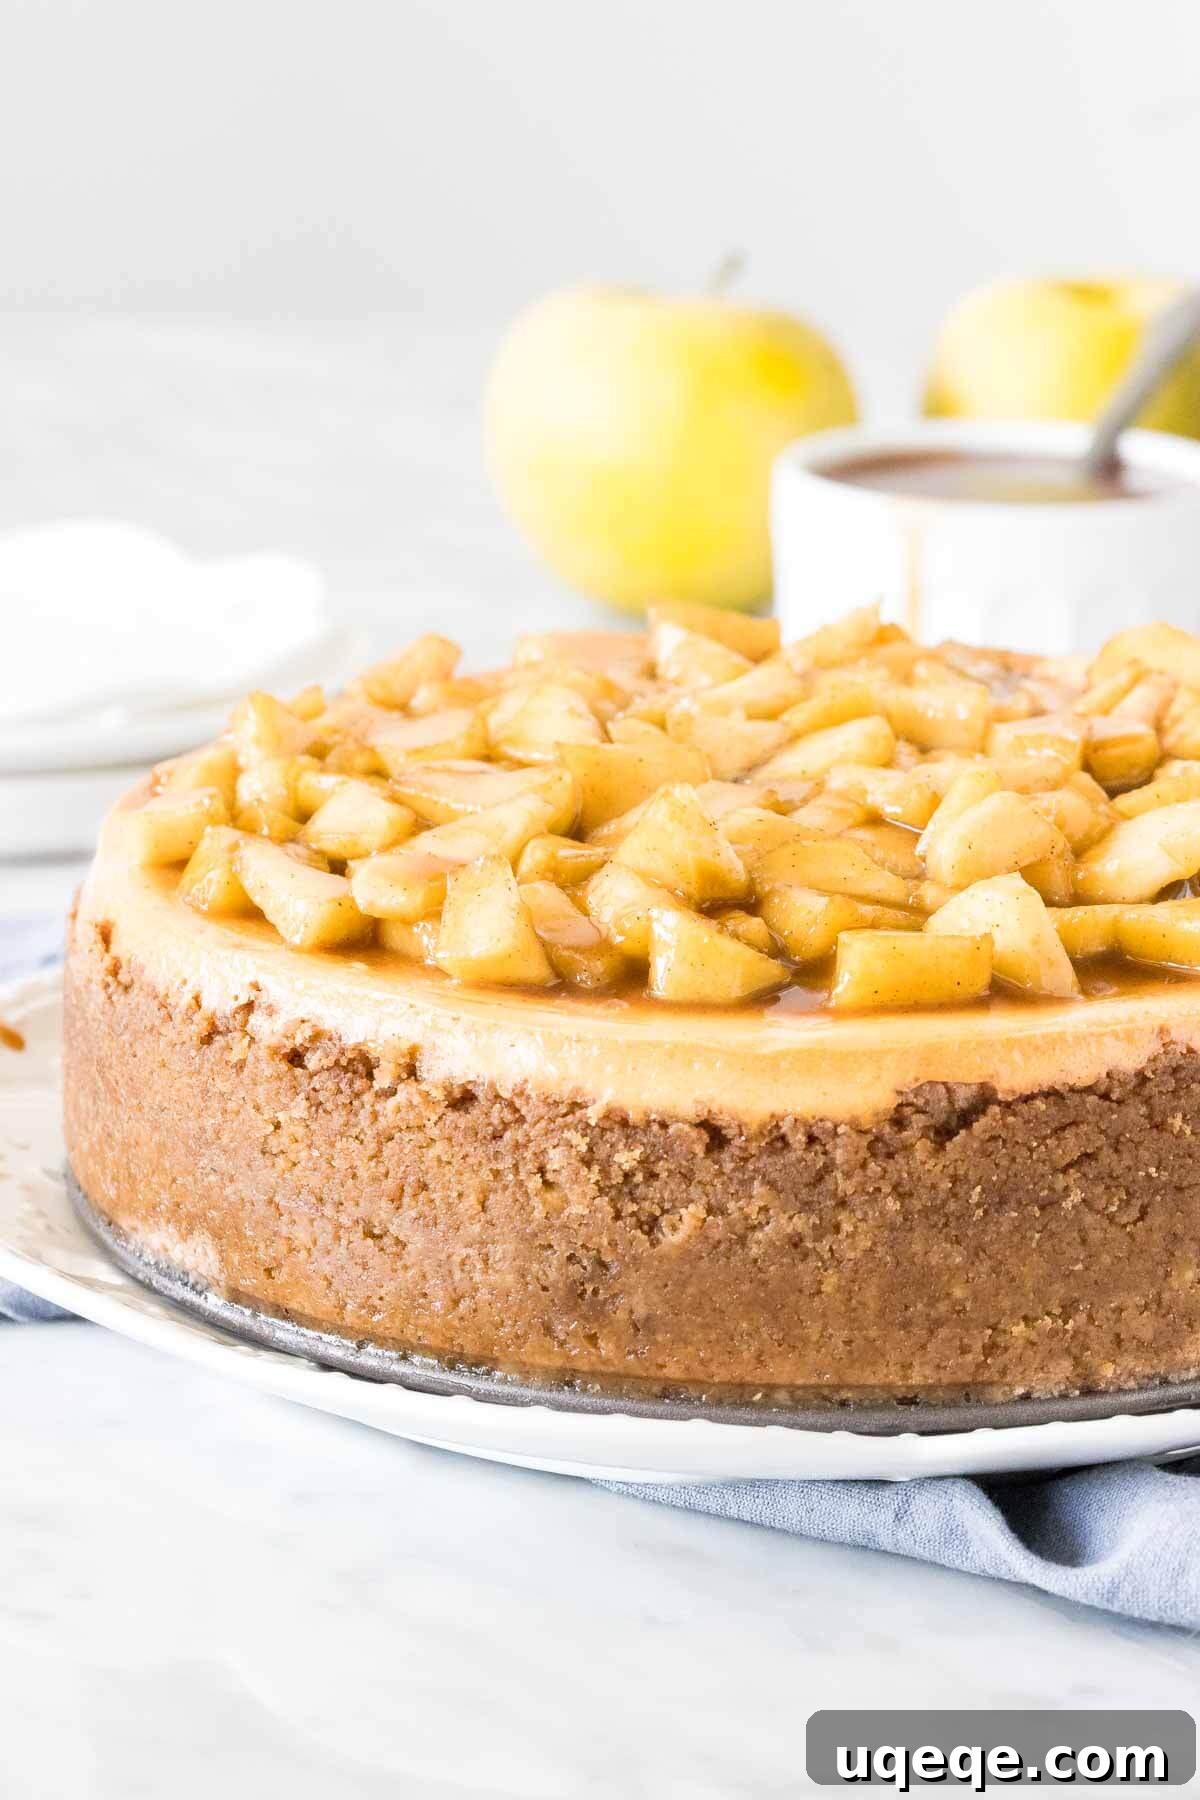
Forget everything you thought you knew about apple desserts. This isn’t just an ordinary cheesecake topped with apples; it’s a meticulously crafted culinary experience where every element is designed to evoke the heartwarming feeling of autumn. From its robust, spiced graham cracker base to its velvety, caramel-infused filling and the vibrant, cinnamon-kissed apple topping, this **Caramel Apple Cheesecake** is a celebration of seasonal flavors. It’s ideal for special gatherings, holiday feasts, or simply as a luxurious treat to enjoy with loved ones.
The recipe might seem extensive at first glance, but don’t be intimidated by the number of steps. Each component is straightforward, and when combined, they create a dessert that is far greater than the sum of its parts. Let’s break down the journey to creating this autumnal delight.
Crafting the Perfect Cinnamon Graham Cracker Crust
Every exceptional cheesecake begins with an outstanding crust, and this **Caramel Apple Cheesecake** is no exception. We’re moving beyond a basic graham cracker crust by infusing it with a generous hint of cinnamon, which perfectly complements the apple topping and the caramel notes within the filling. This adds an extra layer of warmth and spice that immediately signals “fall” to your palate.
To ensure maximum flavor and a satisfying crunch, our recipe calls for a slightly thicker crust that extends not just across the bottom of the pan but also partially up the sides. This provides a delightful textural contrast to the smooth filling and helps define each slice. Pre-baking the crust is a crucial step often overlooked; it helps set the butter, creating a sturdy foundation that won’t crumble and ensures it remains wonderfully crisp, even after absorbing some moisture from the creamy filling. Just 10 minutes in the oven transforms the loose crumb mixture into a golden, fragrant base, ready for its decadent layers.
The Rich and Creamy Salted Caramel Cheesecake Filling
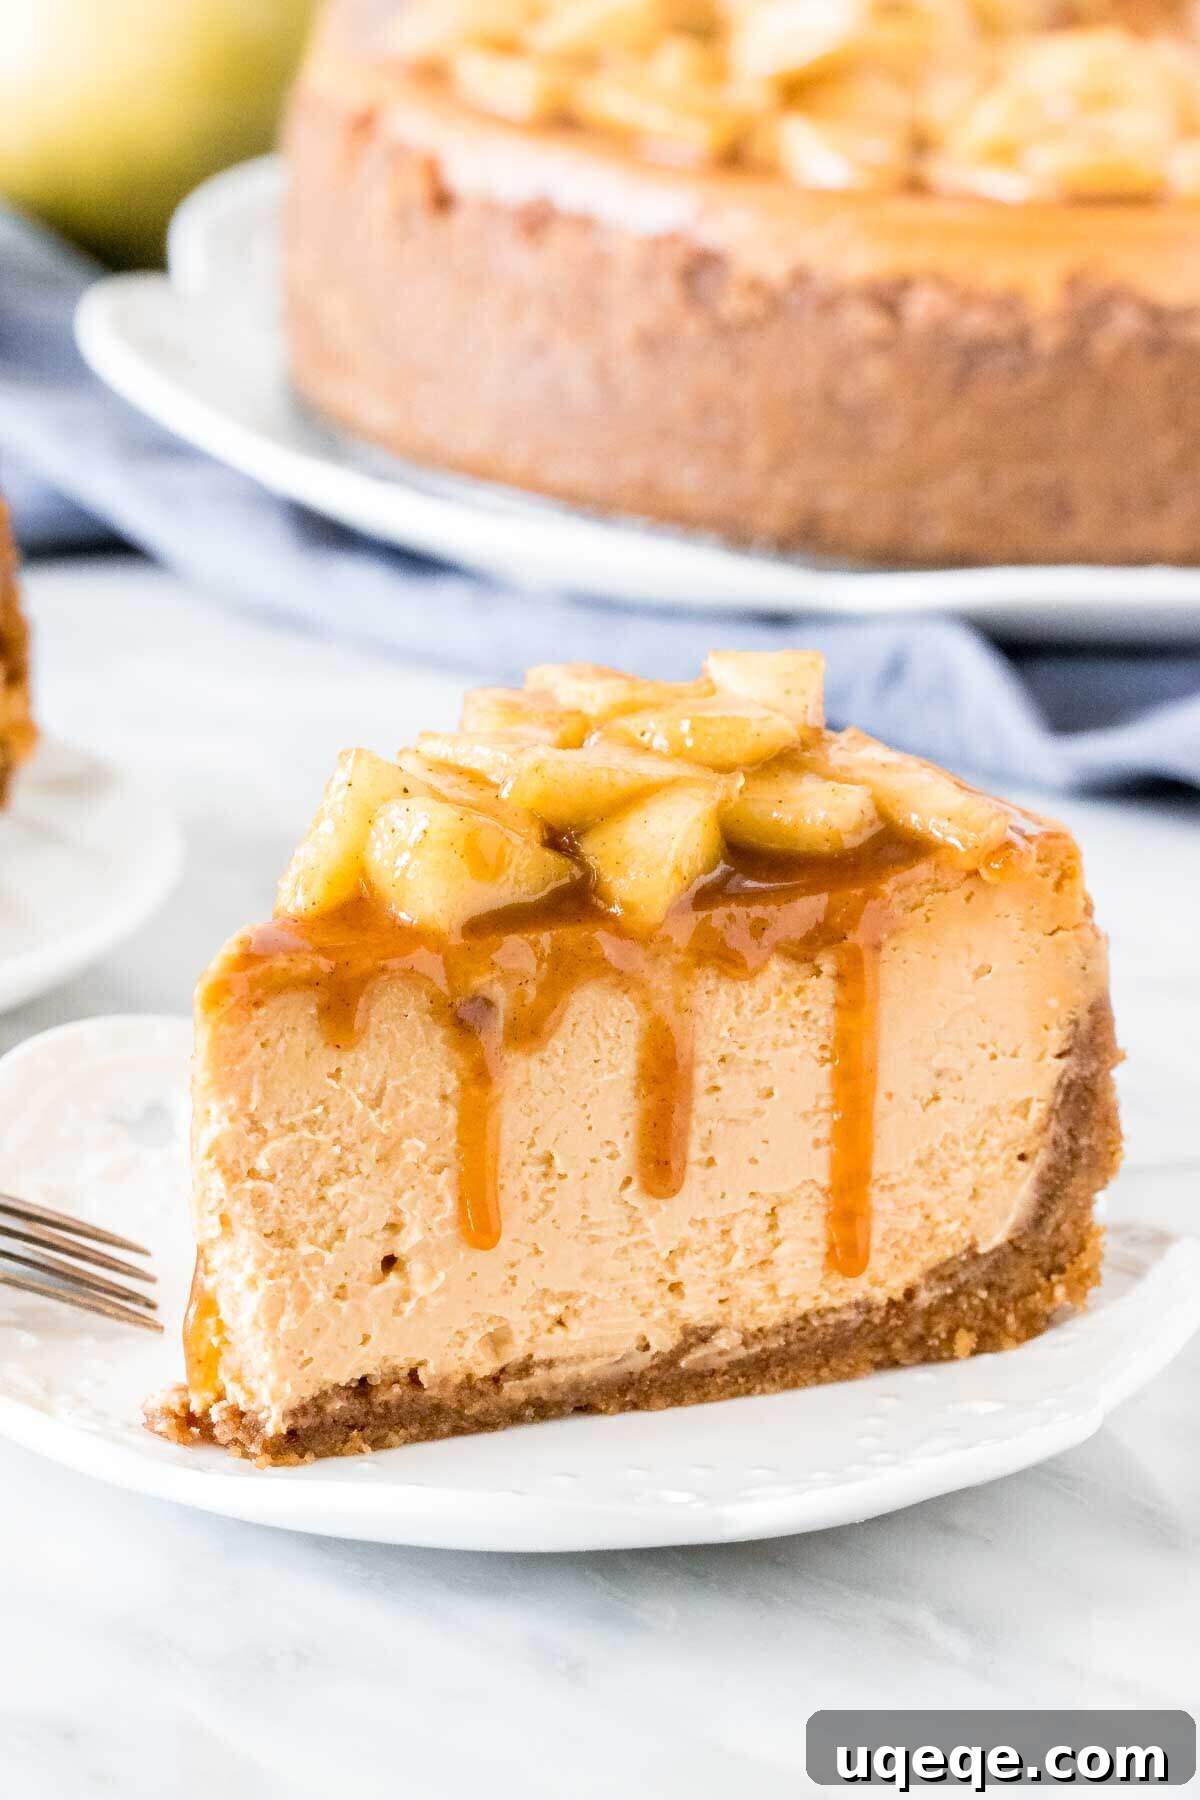
Many “apple cheesecakes” simply involve a classic New York Cheesecake base topped with apples. However, our goal was to create a truly integrated **Caramel Apple Cheesecake** experience, where the caramel influence runs deep within the creamy filling itself. That’s why we directly incorporate luscious salted caramel sauce into the cheesecake batter, giving every bite a harmonious blend of sweet, salty, and tangy flavors. You can choose to use your favorite homemade salted caramel recipe – we’ve provided a link to ours – or opt for a high-quality store-bought version. The key is to select a thick, rich caramel sauce, not the thin, squeeze-bottle variety, as its consistency contributes significantly to the filling’s texture.
Preparing the cheesecake filling follows the foundational principles of classic baked cheesecakes. It starts with beating full-fat cream cheese until it’s impeccably smooth and free of lumps. This is non-negotiable for a silky texture. Next, granulated sugar, the star salted caramel sauce, and a touch of pure vanilla extract are carefully folded in, building the complex flavor profile. The addition of sour cream is vital; it contributes a subtle tang that balances the sweetness, and, perhaps more importantly, ensures a wonderfully smooth, non-grainy consistency, making your cheesecake truly professional-grade. Finally, gently whisked eggs are incorporated. The goal is to mix just until combined to avoid introducing too much air, which can lead to cracks during baking. Each ingredient plays a specific role, contributing to the ultimate creamy, dreamy texture and unforgettable taste of this **Caramel Apple Cheesecake**.
Mastering the Water Bath Technique for a Flawless Cheesecake
For many home bakers, the thought of a “water bath” for cheesecake can seem intimidating, conjuring images of complex pastry school techniques. However, I assure you, it’s a remarkably simple process that is absolutely essential for achieving a perfect, crack-free, and sumptuously smooth cheesecake. A water bath, or *bain-marie*, provides a consistently moist and gentle heat environment, which is crucial for the delicate custard-like structure of a cheesecake.
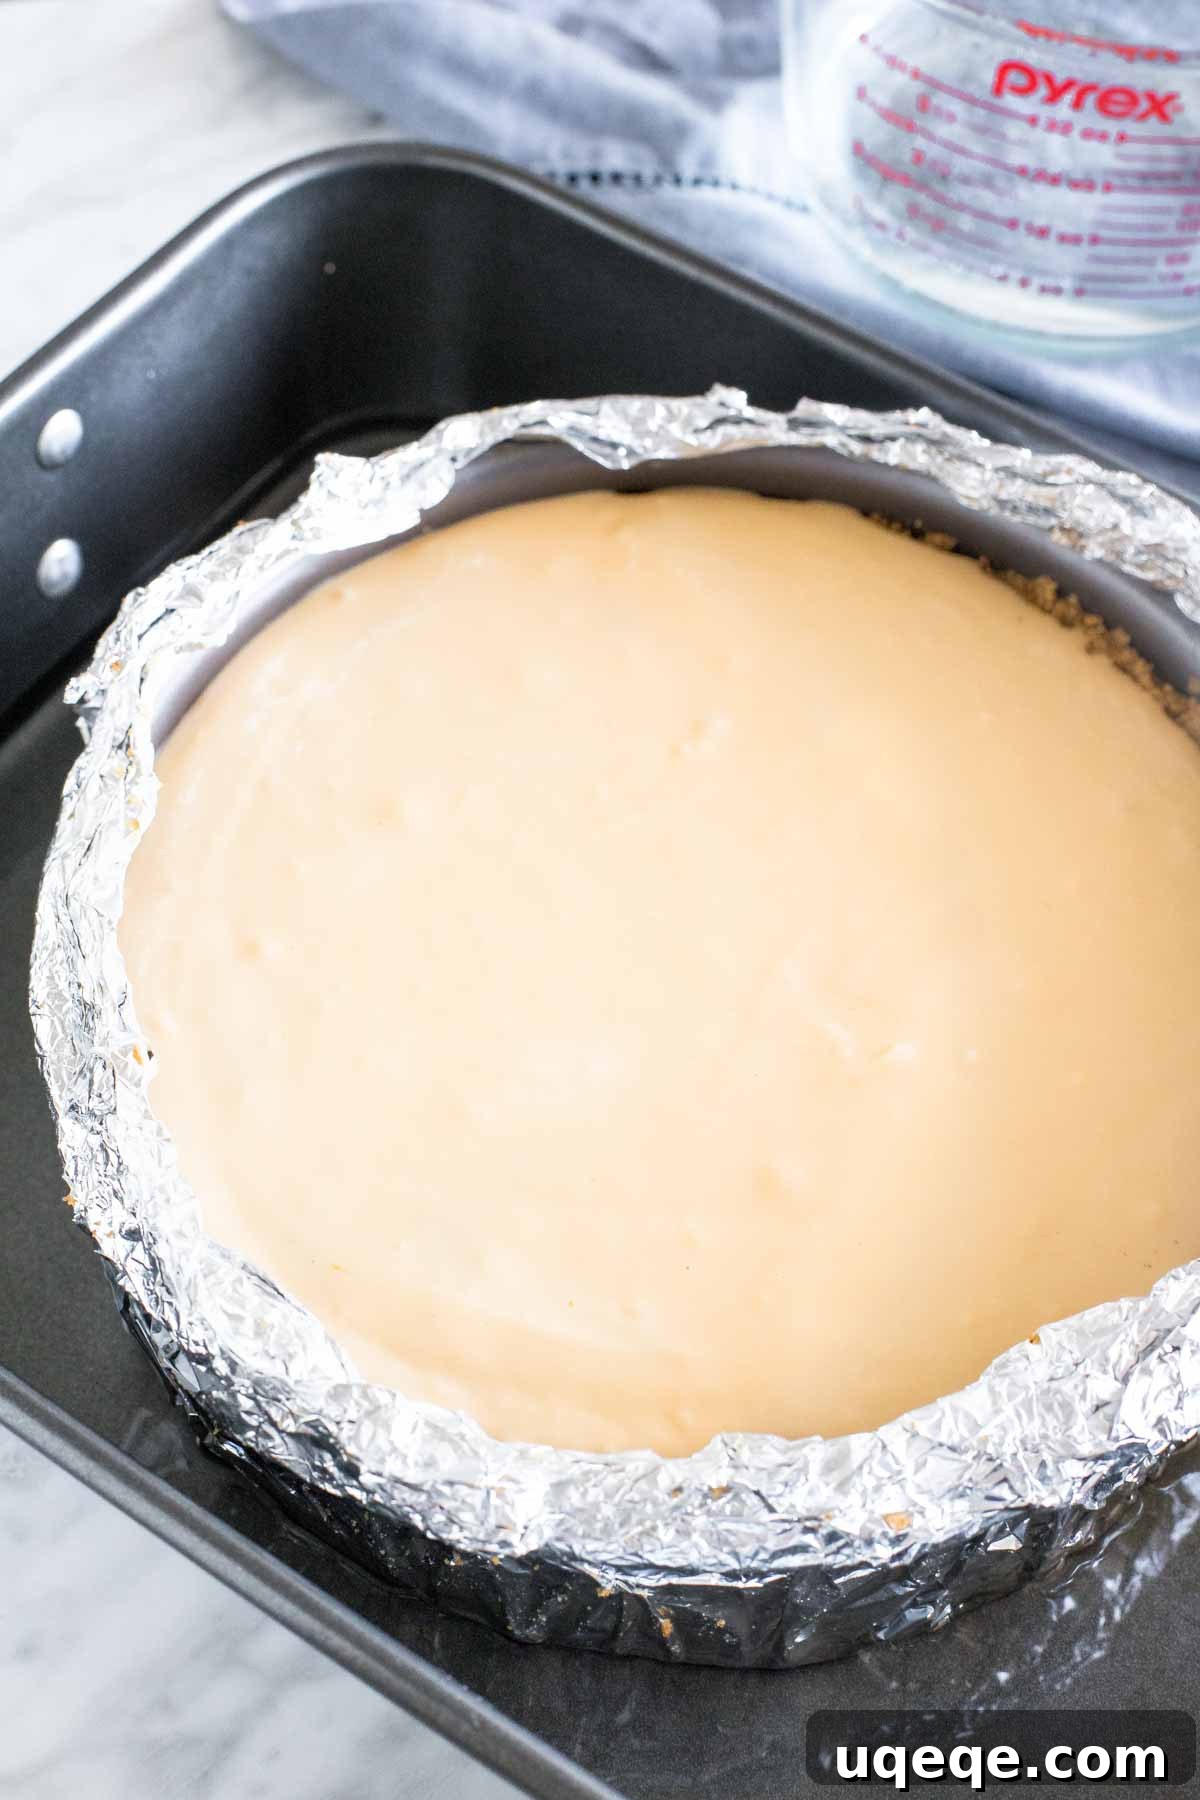
Here’s how it works: Your springform pan, containing the unbaked cheesecake filling, is meticulously wrapped in several layers of heavy-duty aluminum foil. This acts as a protective barrier, preventing any water from seeping into the crust. The wrapped pan is then carefully placed inside a larger roasting pan. About ½ to 1 inch of hot water is poured into the roasting pan, surrounding the springform pan. As the cheesecake bakes, the steam from the water creates a humid environment within the oven, preventing the cheesecake from drying out too quickly and, consequently, from cracking on top. It also ensures an even, slow bake, leading to that signature creamy texture from edge to center. This seemingly complex step is actually your best friend for **Caramel Apple Cheesecake** perfection. Below, you can see a visual example of how the setup appears before baking, demystifying the process completely.
Creating the Irresistible Cinnamon Apple Topping
No **Caramel Apple Cheesecake** would be complete without a generous layer of warmly spiced apples on top. This topping isn’t just an afterthought; it’s designed to be the crowning glory, adding a burst of fresh apple flavor, a hint of spice, and another touch of caramel. We essentially prepare a stovetop apple pie filling, but with an extra drizzle of caramel sauce to truly tie all the flavors of the cheesecake together.
The choice of apples is critical here. You’ll want an apple that maintains some texture and doesn’t turn mushy when cooked. For a sweeter topping, varieties like Honeycrisp or Fuji are excellent choices, offering a delightful crunch and natural sweetness. If you prefer a more tart contrast to the rich cheesecake, Granny Smith apples are ideal; they soften beautifully while retaining their signature tartness, which mellows slightly during cooking. Regardless of your preference, ensure the apples are peeled, cored, and sliced into uniform pieces for even cooking. The apples are gently cooked with butter, cinnamon, sugar, and a splash of water until they reach your desired tenderness – I prefer mine with a slight bite. Finally, a generous spoonful of salted caramel is stirred in, enveloping the tender apples in a glorious, sticky glaze. This fresh, vibrant topping provides a perfect balance to the rich, creamy cheesecake.
Essential Baking and Cooling Tips for Cheesecake Success
Achieving a perfect **Caramel Apple Cheesecake** with a smooth, uncracked surface and an exquisitely creamy texture requires patience and adherence to a few key principles. Beyond the water bath, the cooling process is just as vital.
- **Room Temperature Ingredients:** Always ensure your cream cheese, sour cream, and eggs are at room temperature. This allows them to combine smoothly without overmixing, preventing lumps and ensuring a uniform batter. Cold ingredients will lead to a lumpy batter and potential overmixing, which can incorporate too much air, leading to cracks.
- **Don’t Overmix:** Once the cream cheese is smooth, add subsequent ingredients and mix only until just combined. Overmixing the batter, especially after adding eggs, can incorporate excess air, causing the cheesecake to puff up significantly in the oven and then fall and crack as it cools.
- **The Wobble Test:** Your cheesecake is done when the edges are set, but the very center still has a slight wobble, similar to a bowl of gelatin. It will continue to cook slightly from residual heat as it cools. Overbaking is a common culprit for dry cheesecakes and cracks.
- **Slow Cooling is Key:** This is perhaps the most crucial step for a crack-free cheesecake. After baking, turn off the oven, crack the oven door slightly, and let the cheesecake cool *inside* the oven for at least 30 minutes. This gradual temperature change prevents a sudden contraction that causes cracks. Then, remove it from the oven, allow it to cool completely to room temperature on a wire rack, and finally, transfer it to the refrigerator.
Serving and Storage Suggestions
Cheesecakes, including this decadent **Caramel Apple Cheesecake**, require a significant cooling and chilling period to set properly and develop their full flavor and texture. For optimal results, plan to make your cheesecake at least the day before you intend to serve it. It needs a minimum of 6 hours, but ideally overnight, in the refrigerator to become firm and perfectly sliceable.
The cinnamon apple topping, while delicious, is best enjoyed fresh. Therefore, I highly recommend preparing the apple topping just before you’re ready to serve. This ensures the apples are warm, tender, and beautifully glossy, providing a wonderful contrast to the cold, creamy cheesecake. You can either top the entire cheesecake with the apples if you plan to consume it all at once, or, for individual servings, slice the cheesecake first and then spoon a generous amount of warm apple topping over each slice. To achieve clean slices, use a sharp, thin knife (like a paring knife) and wipe it clean between each cut.
Leftover **Caramel Apple Cheesecake** should be stored covered in the refrigerator. It will remain fresh and delicious for up to 4 days. If you have leftover apple topping, store it separately in an airtight container in the fridge, as it tends to get softer over time. For best results, reheat the apple topping gently on the stovetop or in the microwave before serving with any remaining cheesecake slices.
More Delicious Apple Desserts to Try
If you’re a fan of apple desserts, be sure to explore these other delightful recipes:
- Apple Crisp Bars
- Caramel Apple Galette
- Apple Crisp
- Cinnamon Apple Coffee Cake
Caramel Apple Cheesecake
The ultimate apple dessert – this caramel apple cheesecake has a creamy cheesecake filling that’s infused with caramel and topped with cinnamon apples. Make it for a fall dessert and wow your guests.
By: Fiona Dowling
- Prep:
- 45 mins
- Cook:
- 1 hr
- Cooling & Chilling:
- 7 hrs
- Total:
- 8 hrs 45 mins
- Servings:
- 12 pieces
Pin Recipe
Equipment
- 9-inch (23 cm) springform pan
- Large roasting pan (large enough for the springform pan to fit inside)
- Aluminum Foil
Ingredients
Salted Caramel Sauce
- Here’s my favorite recipe, or feel free to use store bought or your favorite recipe
Crust
- 2 1/2 cups graham crumbs
- 1/4 cup brown sugar
- 1/2 teaspoon cinnamon
- 10 tablespoons unsalted butter, melted
Caramel Cheesecake
- 24 ounces full-fat cream cheese*, softened to room temperature
- 1 cup granulated sugar
- 3/4 cup salted caramel sauce
- 1 teaspoon vanilla extract
- 3/4 cup sour cream, room temperature
- 3 large eggs, room temperature
Cinnamon Apple Topping
- 3 large apples*, peeled, cored, and sliced into pieces
- 1 teaspoon cinnamon
- 2 tablespoons unsalted butter
- 2 tablespoons water
- 1/4 cup white sugar
- 1/4 cup salted caramel
Instructions
- Preheat the oven to 350F (180C) degrees.
- Wrap the outside of a 9-inch (23 cm) springform pan with aluminum foil. Wrap it at least 4 times so that all the seams are covered, preventing any water from seeping in during the water bath.
Crust
- In a medium bowl, stir together the graham crumbs, brown sugar, and cinnamon until well combined.
- Stir in the melted butter until the mixture resembles wet sand. Ensure all crumbs are moistened.
- Press the crumb mixture firmly into the bottom and up the sides (approximately 1/2 to 3/4 of the way up) of the prepared springform pan. Use the back of a spoon or your fingers to create an even, compact layer.
- Bake the crust in the preheated oven for 8-10 minutes. This pre-baking step helps create a sturdy, crunchy base. Remove from the oven and keep the oven turned on.
Cheesecake Filling
- In a large mixing bowl, beat the softened full-fat cream cheese with an electric mixer until it is completely smooth and creamy, with no lumps remaining.
- Add the granulated sugar, salted caramel sauce, and vanilla extract. Beat on low speed until just combined. Avoid overmixing.
- Gently mix in the room-temperature sour cream, scraping down the sides and bottom of the bowl as needed to ensure everything is fully incorporated.
- In a separate small bowl, whisk the eggs lightly. Gradually beat the whisked eggs into the cheesecake batter on low speed until just incorporated. Do not overmix once the eggs are added.
- Carefully place the prepared crust (with the springform pan still wrapped in aluminum foil) into a large roasting pan. Pour the creamy cheesecake filling into the crust and gently smooth the top with a spatula.
- Pour about 1/2 to 1 inch of hot water into the roasting pan, around the springform pan, creating the water bath. Be careful not to splash water into the cheesecake.
- Transfer the roasting pan (with the cheesecake inside) into the preheated oven (still at 350F degrees). Bake for 55-70 minutes, or until the edges of the cheesecake are set, but the very center still has a slight, gentle wobble when the pan is lightly nudged.
- Turn off the oven, open the oven door slightly (about 2-3 inches), and allow the cheesecake to cool inside the oven for 30 minutes. This slow cooling process is crucial for preventing cracks.
- Remove the roasting pan with the cheesecake from the oven. Carefully remove the springform pan from the water bath (it will still be wrapped in foil). Continue to cool the cheesecake on a wire rack until it reaches room temperature.
- Once cooled to room temperature, cover the cheesecake (still in the springform pan) tightly with aluminum foil or plastic wrap and refrigerate for at least 6 hours, or preferably overnight, to allow it to fully set and chill.
Apple Topping
- In a medium frying pan or saucepan, melt the unsalted butter over low heat. Add the cinnamon and stir to combine.
- Add the peeled, cored, and sliced apples, white sugar, and water to the pan. Stir gently to coat the apples in the butter and cinnamon mixture.
- Cover the pan and cook for 3-5 minutes, or until the apples begin to soften to your desired consistency. Stir occasionally to ensure even cooking.
- Once the apples have reached your preferred tenderness (I recommend a slight crunch for texture), remove the lid and stir in the salted caramel sauce. Cook for another minute, allowing the caramel to coat the apples and warm through. Remove from heat.
Serving
- When ready to serve, remove the chilled **Caramel Apple Cheesecake** from the refrigerator. Carefully run a thin knife around the inner edge of the springform pan to loosen the crust from the sides.
- Unclamp and remove the outer ring of the springform pan.
- You can choose to top the entire cheesecake with the warm cinnamon apple mixture, which is ideal if you plan to serve and consume the whole cake immediately. Alternatively, for individual slices, cut portions of the cheesecake using a sharp, thin knife (wiping the knife between each cut for clean slices), and then spoon a generous amount of warm cinnamon apples over each slice. Enjoy!
Notes
- A 9-inch (23 cm) springform pan is essential for this recipe. If you use a 10-inch springform pan, the crust will be thinner (only press it up about 1/3 of the way up the sides), and the bake time for the cheesecake will be shorter, typically between 40-55 minutes. This recipe yields too much filling for an 8-inch springform pan.
- For the salted caramel sauce, feel free to use my favorite homemade recipe, or choose a high-quality, thick store-bought salted caramel (dulce de leche can also work). Avoid thin caramel sauces that come in squeeze tubes, as their consistency is not suitable for the cheesecake filling.
- Always use full-fat, brick-style cream cheese. Low-fat or whipped cream cheese varieties have different water content and textures that will not yield the same rich, creamy results in your cheesecake.
- To ensure a smooth batter and prevent overmixing, take the cream cheese, sour cream, and eggs out of the refrigerator approximately 30 minutes to an hour before you begin preparing the crust. This allows them to come to room temperature, making them easier to incorporate evenly.
- Select a crunchy and flavorful apple variety for the topping. Sweet options like Honeycrisp, Fuji, or Gala work wonderfully. For a more tart contrast that cuts through the richness of the cheesecake, Granny Smith apples are an excellent choice. Avoid soft apples like McIntosh or Golden Delicious, as they can become mushy when cooked.
- For the best experience, I typically prepare the cheesecake (crust and filling) the night before serving, allowing it ample time to chill and set overnight in the refrigerator. Then, I prepare the cinnamon apple topping fresh, just before serving, to ensure maximum warmth and flavor.
- The nutritional information provided is an estimate only, based on 1 piece (including the caramel apple topping) assuming the recipe is divided into 12 equal slices. It should be used as a guide.
- Store any leftover **Caramel Apple Cheesecake** covered tightly in the refrigerator for up to 4 days. If you have any leftover apple topping, store it separately in an airtight container in the fridge. It maintains its best texture and flavor when stored on its own and can be gently reheated before serving.
Nutrition
- Calories: 456 kcal
- Carbohydrates: 64 g
- Protein: 13 g
- Fat: 18 g
- Saturated Fat: 10 g
- Cholesterol: 91 mg
- Sodium: 612 mg
- Potassium: 308 mg
- Fiber: 2 g
- Sugar: 39 g
- Vitamin A: 584 IU
- Vitamin C: 3 mg
- Calcium: 257 mg
- Iron: 1 mg