
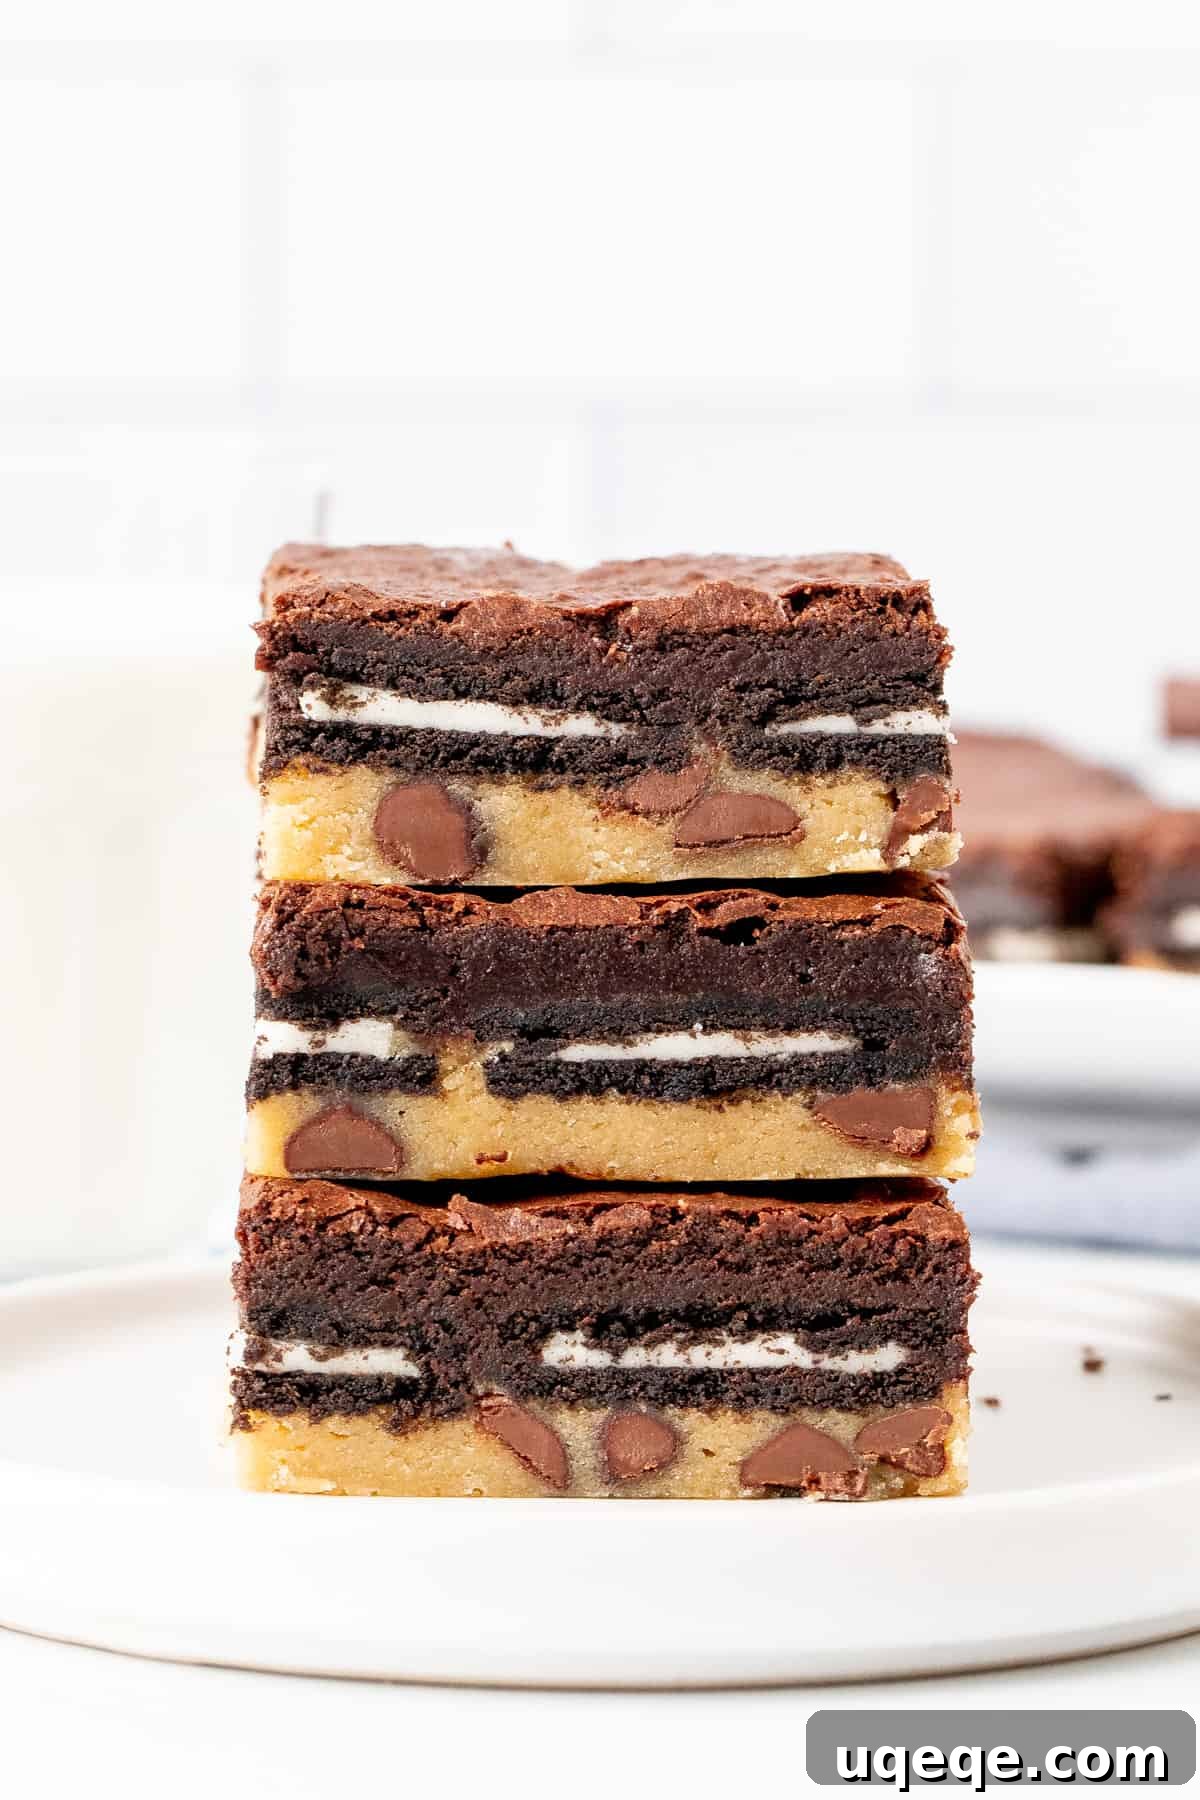
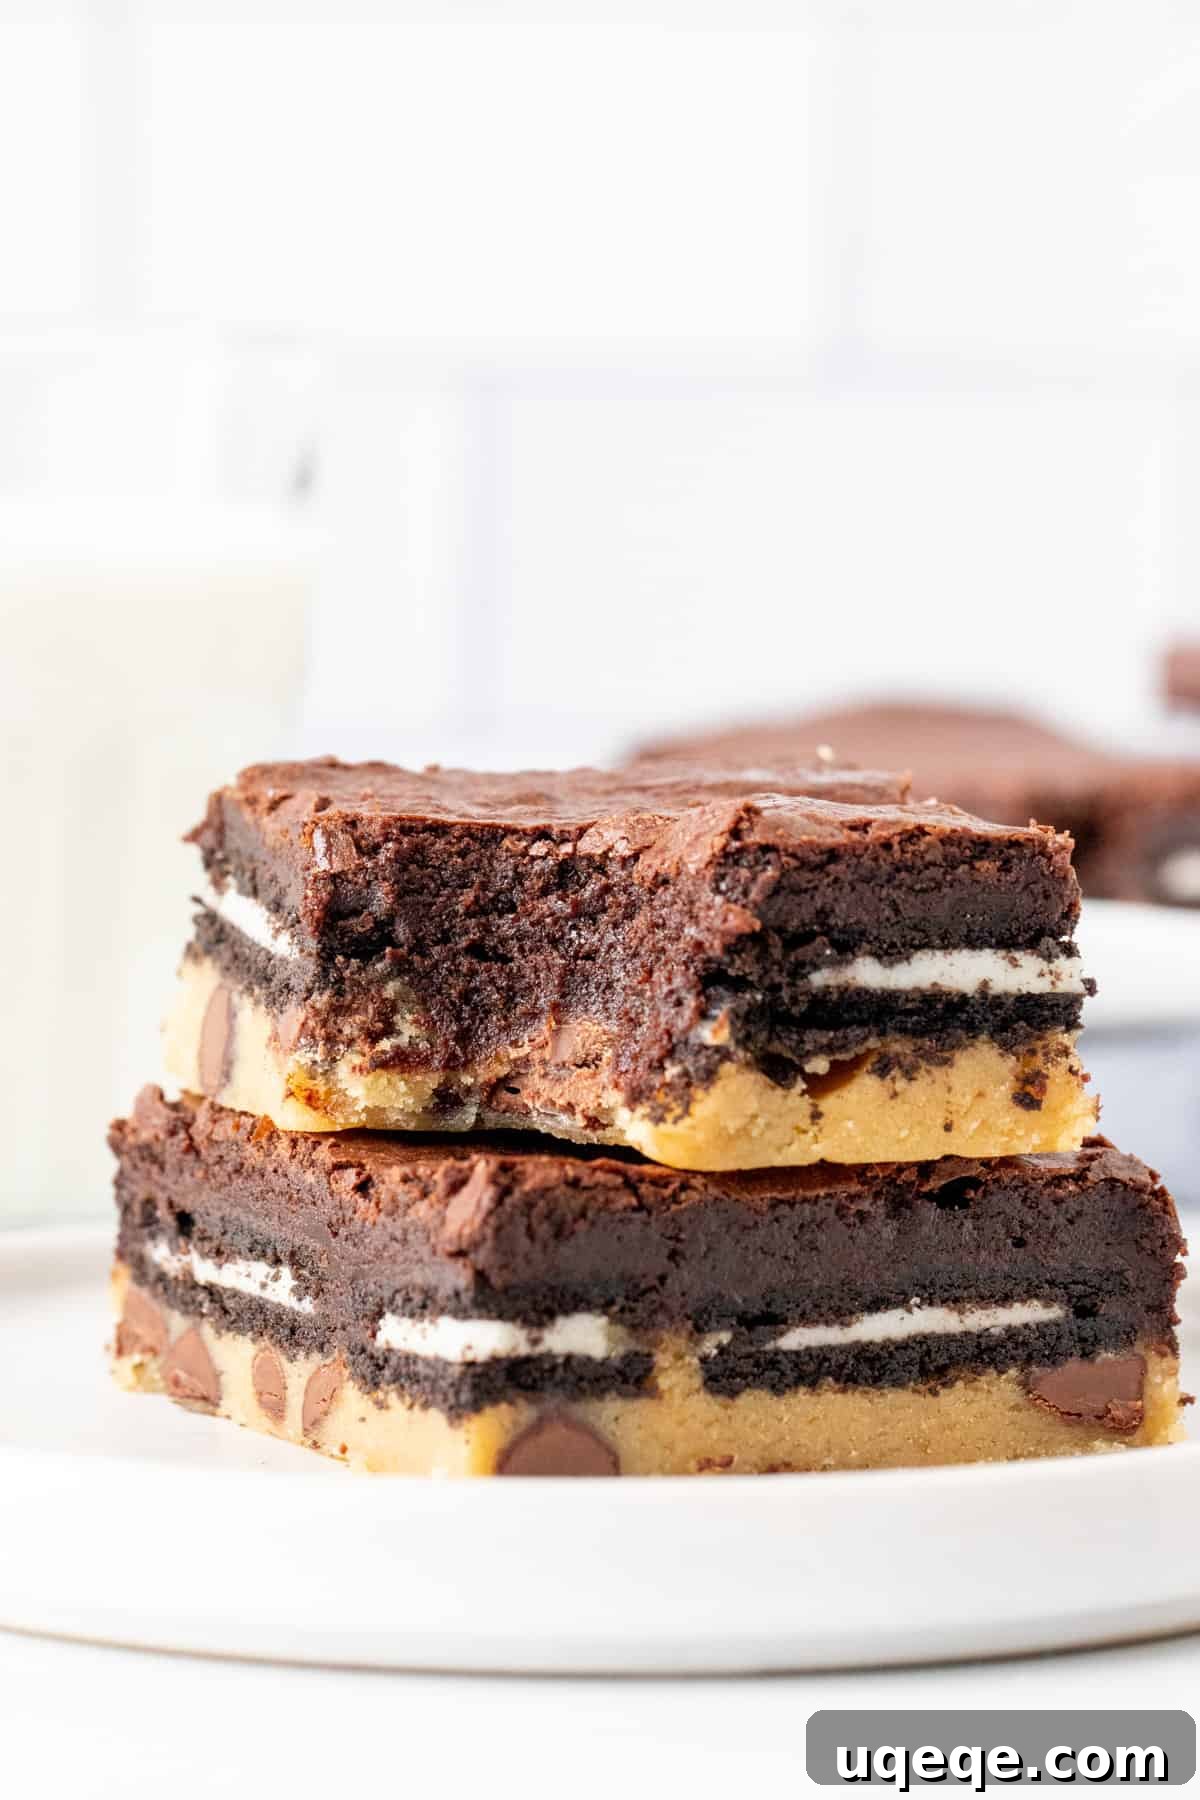
Prepare yourself for the most extravagant and utterly irresistible dessert experience: The Ultimate Layered Brownies. Often known by a more provocative name, these incredible treats redefine indulgence with their triple-layer construction. Imagine a soft, chewy chocolate chip cookie base, followed by a delightful crunch from a generous layer of Oreo cookies, all crowned with a rich, fudgy brownie top. This isn’t just a dessert; it’s a celebration of textures and flavors, and our 100% from-scratch recipe ensures every bite is pure bliss. While the popular moniker might grab attention, we prefer to call them what they are: simply the most indulgent layered brownies you’ll ever bake.
The Legendary Origin of Layered Brownies
For years, images of these decadent, multi-layered treats have captivated dessert lovers across the internet. The concept of combining several beloved desserts into one super-indulgent bar first gained widespread popularity in 2011. It was Amanda from www.kevinandamanda.com who pioneered the original recipe, inadvertently sparking a viral sensation. Her creation provided a definitive answer to the age-old dessert dilemma: what’s better, chocolate chip cookies or fudgy brownies? The undeniable winner emerged as a brilliant fusion: brownies that incorporate both chocolate chip cookies AND Oreo cookies.
This ingenious combination not only settles the debate but elevates it, offering an unparalleled dessert experience that satisfies every craving. It’s the ultimate crowd-pleaser, perfect for parties, potlucks, or simply treating yourself to something truly extraordinary.
What Makes Them The Ultimate Layered Brownies?
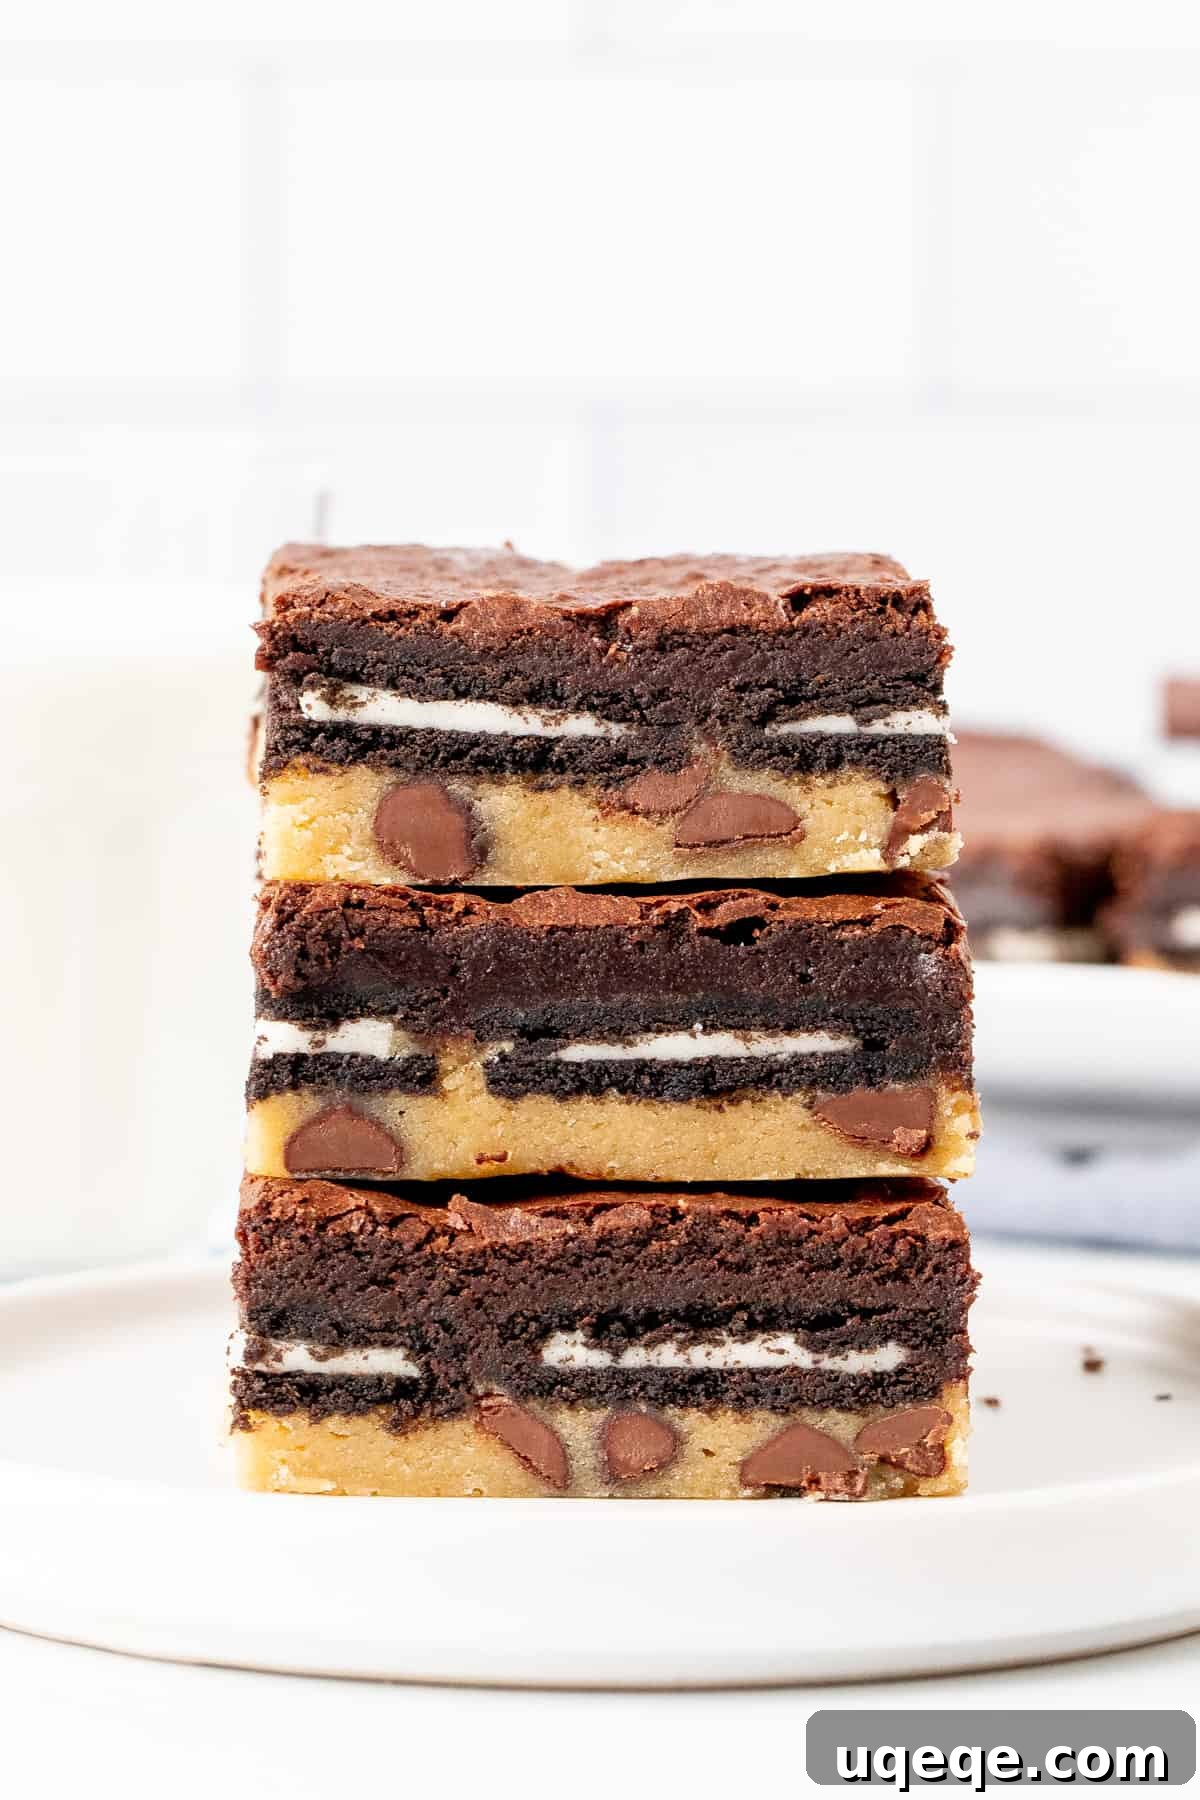
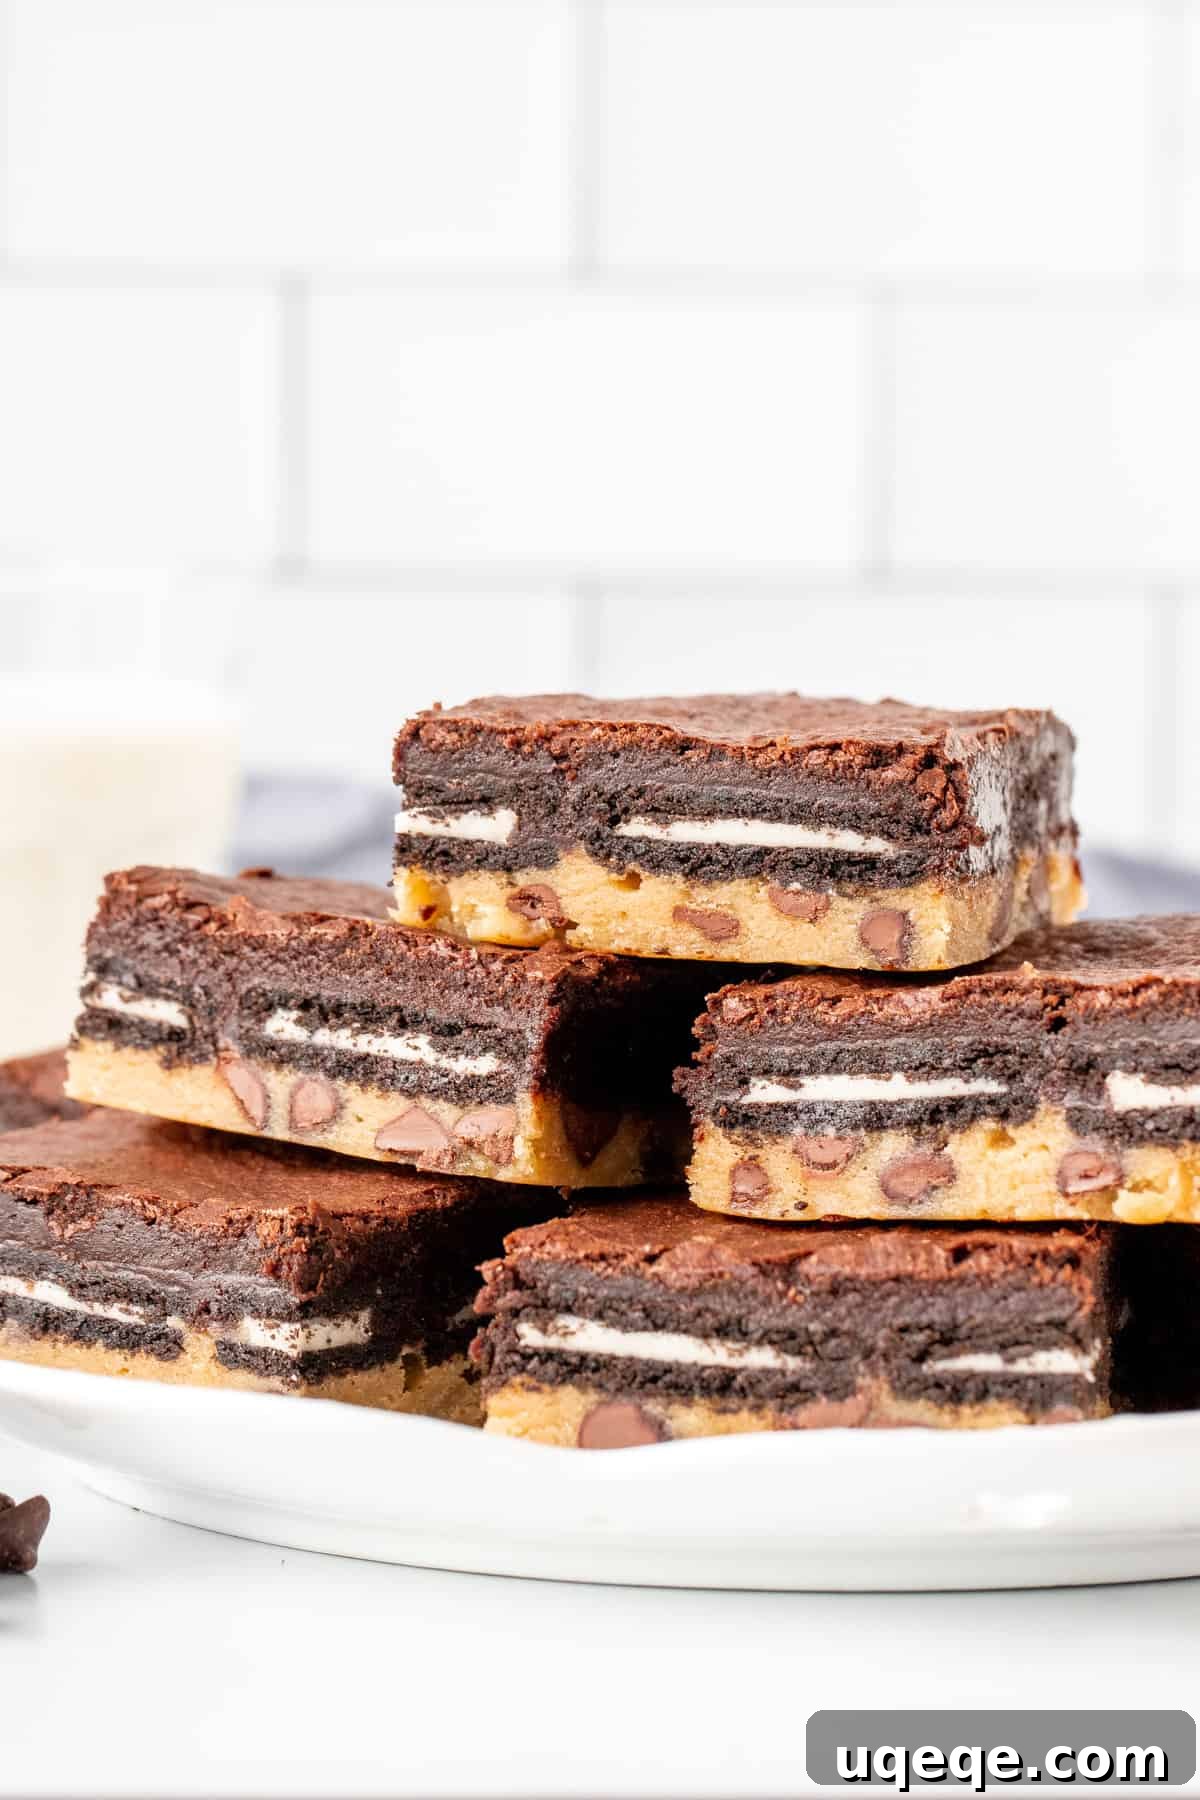
By definition, these show-stopping layered brownies are characterized by their distinct and delicious strata:
- A Chewy Chocolate Chip Cookie Dough Base: This forms the foundation, offering a soft yet substantial texture that holds up beautifully to the layers above. It’s the comforting, familiar taste of a classic chocolate chip cookie transformed into a robust base.
- A Crunchy Oreo Cookie Middle Layer: Nestled between the cookie dough and brownie, a full layer of Oreo cookies (whether double-stuffed, regular, or your favorite flavor) provides an irresistible crunch and that iconic cream-filled chocolate cookie flavor. This layer is crucial for both texture and taste contrast.
- A Rich, Fudgy Brownie Topping: The grand finale is a thick, intensely chocolatey brownie layer. Baked to perfection, it should be delightfully fudgy, moist, and deeply satisfying, tying all the components together with its decadent chocolate embrace.
Each layer contributes uniquely, creating a harmonious blend of chewy, crunchy, and fudgy sensations in every single bite. It’s a symphony of dessert components, designed to impress and delight.
Addressing the Name: Layered Brownies vs. “Slutty Brownies”
As fascinating as their taste is their history, particularly concerning their name. When Amanda first created this innovative recipe, she aptly named them “Cookie Dough Oreo Brownies.” However, as often happens on the internet, the recipe quickly gained a life of its own, and the more provocative, albeit memorable, name “Slutty Brownies” emerged and stuck.
While the catchy name undoubtedly contributed to their viral fame, many, including myself, prefer the original, more descriptive name, “Layered Brownies” or “Ultimate Cookie Oreo Brownies.” We believe that all delicious creations, even our brownies, deserve a respectful and accurate description. Regardless of what you call them, the essence of these brownies remains unchanged: a spectacular combination of flavors and textures that is simply divine. After all, a brownie by any other name would taste just as sweet and indulgent!
How to Make The Ultimate Layered Brownies From Scratch
Today’s recipe guides you through creating these masterpieces entirely from scratch, ensuring the freshest ingredients and most satisfying results. Moving past box mixes gives you unparalleled control over flavor and texture, resulting in a truly superior dessert. Below, you’ll find detailed step-by-step photos and essential baking tips to help you achieve perfection. If you’re ready to jump straight to the full recipe card with ingredient amounts, feel free to scroll down.
Crafting the Perfect Chocolate Chip Cookie Base
The journey to the ultimate layered brownie begins with a robust and chewy chocolate chip cookie base. This isn’t just any cookie dough; it’s designed to provide the ideal foundation without becoming too soft or crumbly during baking.
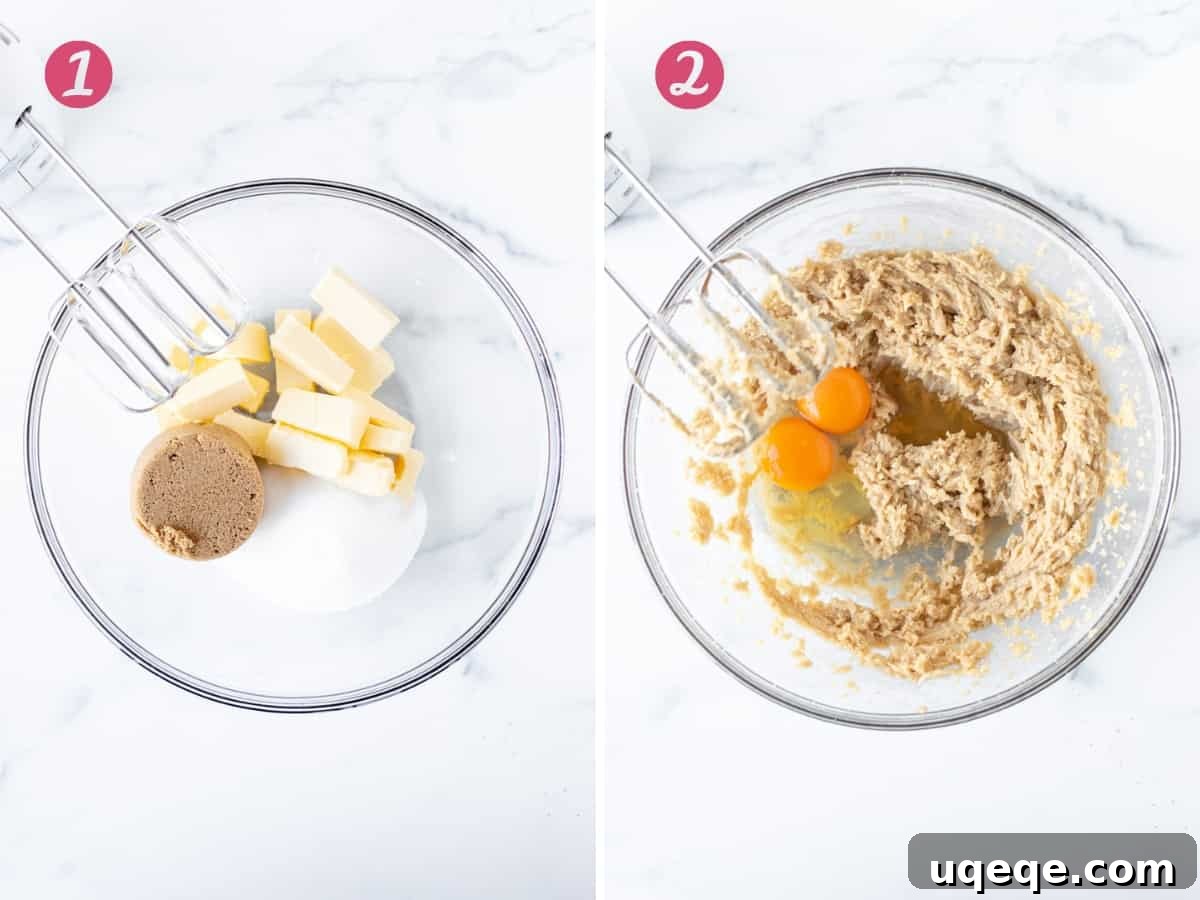
- Creaming the Fats and Sugars: In a large mixing bowl, combine your softened unsalted butter with both brown sugar and granulated sugar. Beat these together until the mixture is light and fluffy. This aeration process is key to a tender cookie texture.
- Adding Wet Ingredients: Next, beat in the large egg, an additional egg yolk, and vanilla extract. The extra egg yolk is a secret weapon here, contributing significantly to a chewier, denser cookie layer—more akin to a blondie than a traditional thin cookie. Remember, you’re not using two full eggs for this layer; the white of the second egg should be discarded.

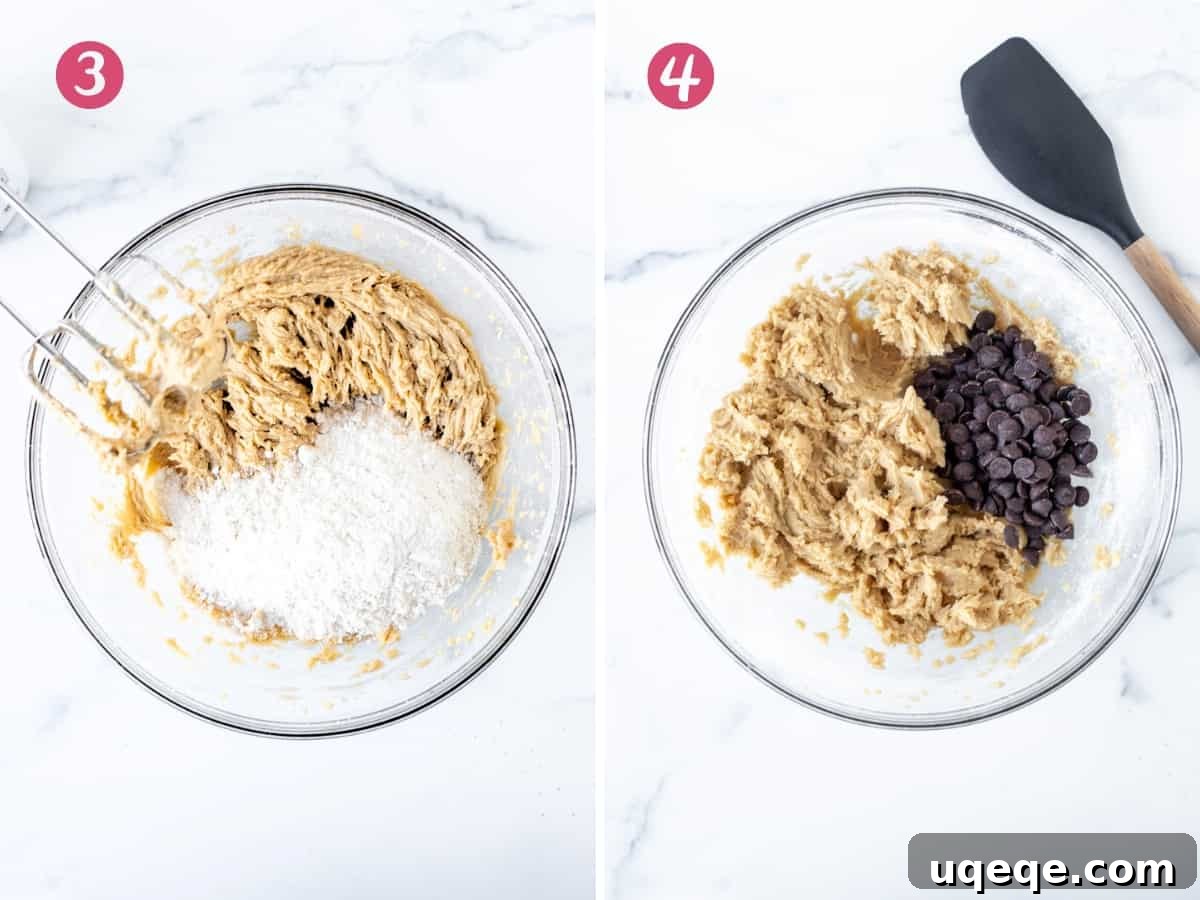
- Incorporating Dry Ingredients: Gradually add the all-purpose flour, a tiny touch of baking powder, and salt. The minimal amount of baking powder is intentional; we want the cookie layer to be chewy and slightly dense, mirroring the rich consistency of a brownie rather than a light and airy cookie. Mix on a low speed initially to prevent flour from scattering.
- Stirring in Chocolate Chips: Once the dry ingredients are just combined, turn off the mixer. Use a rubber spatula or wooden spoon to fold in the chocolate chips. Avoid overmixing, as this can lead to a tough cookie base.
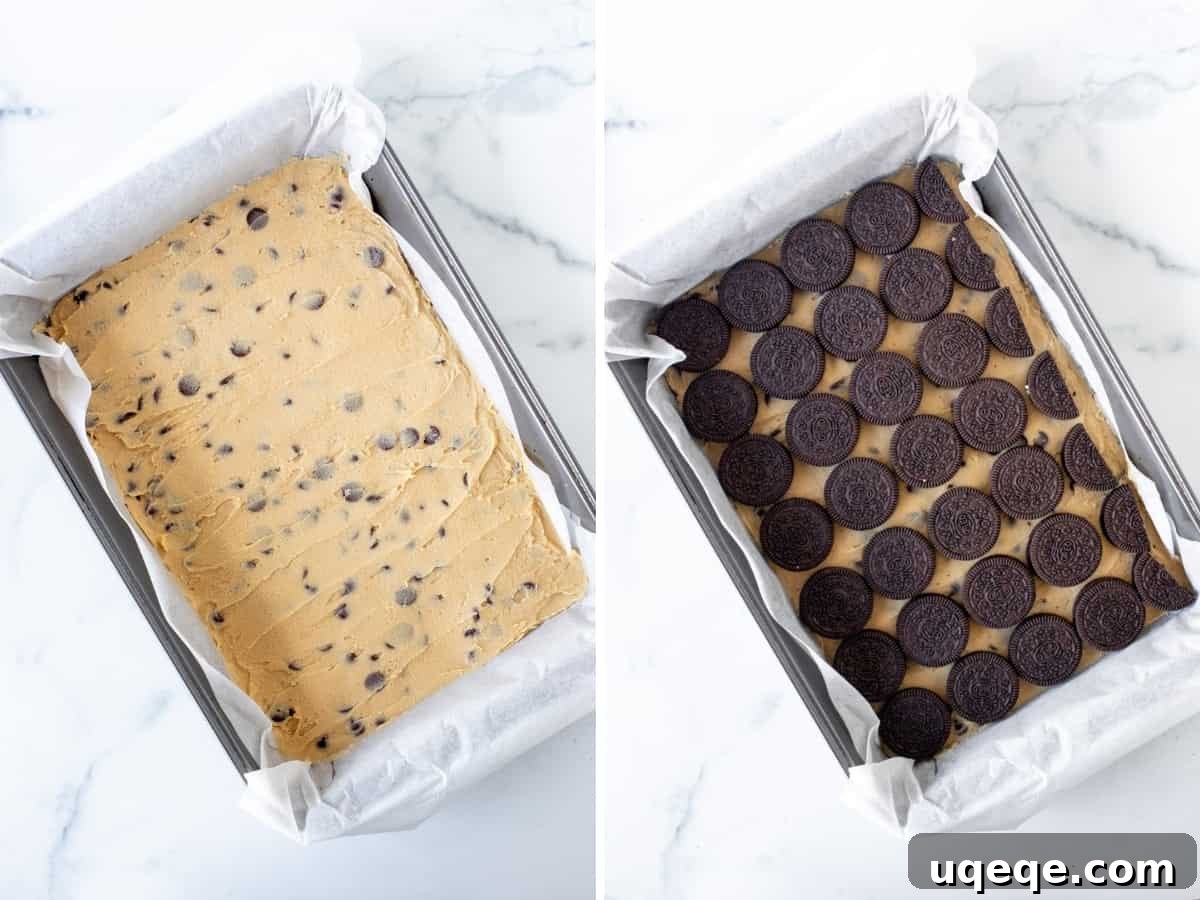
The prepared cookie dough is then evenly spooned into your baking pan and gently smoothed into an even layer. This provides a uniform foundation for the next exciting layer.
The Iconic Oreo Layer
With the cookie base in place, it’s time for the star of the middle: the Oreo cookies. Arrange them neatly over the cookie dough, pressing down lightly to ensure they adhere. For a standard 9×13 inch pan, you’ll typically use 7 rows of 4 Oreos. To ensure the entire pan is covered edge-to-edge, I often recommend strategically placing a few extra cookies cut in half to fill any gaps. This creates an unbroken layer of chocolatey, creamy goodness.
Mastering the Fudgy Brownie Batter
The top layer is a luscious, from-scratch brownie batter, designed for maximum richness and fudginess. This recipe uses a powerful duo of melted dark chocolate (or semi-sweet) and cocoa powder to achieve an intensely deep chocolate flavor and a luxurious texture.
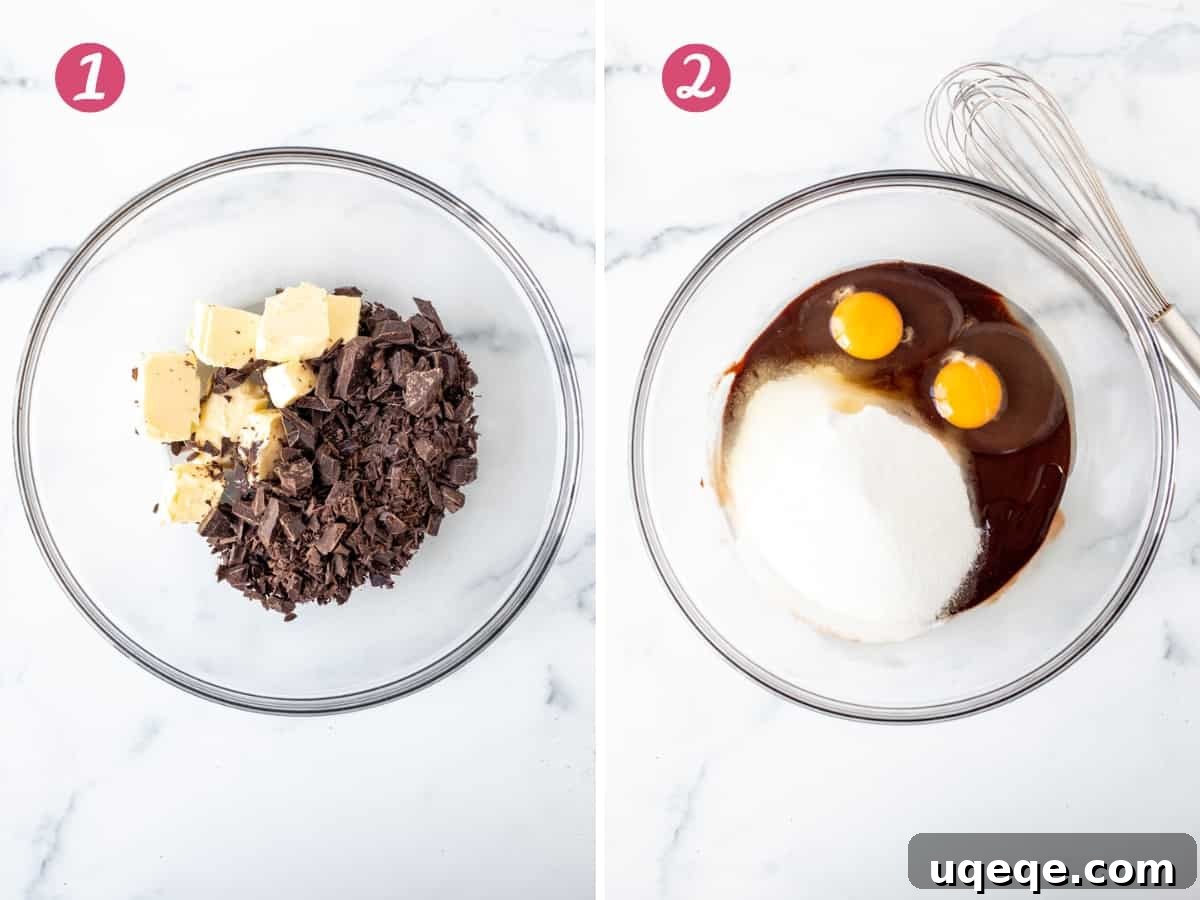
- Melting Chocolate and Butter: Combine cubed unsalted butter and finely chopped dark chocolate in a heatproof bowl. Melt them together in the microwave using 45-second intervals at medium power. Stir thoroughly after each interval, repeating until the mixture is completely smooth and glossy. Pro Tip: Never melt chocolate on high power, as this can easily cause it to seize, become grainy, or even burn. Patience here ensures a silky-smooth base.
- Whisking in Wet Ingredients: It’s crucial that the melted butter and chocolate mixture is not hot when you proceed to the next step. Allow it to cool for about 5 minutes. Once it’s warm to the touch (not hot!), whisk in the granulated sugar and eggs until well combined. Adding eggs to a hot chocolate mixture can inadvertently cook them, leading to a scrambled texture in your brownies.
- Adding Dry Ingredients for Brownie: Finally, whisk in the all-purpose flour, cocoa powder, and salt until just combined. If your cocoa powder or flour has lumps, I highly recommend sifting these ingredients beforehand to prevent overmixing the batter, which can lead to dry brownies.
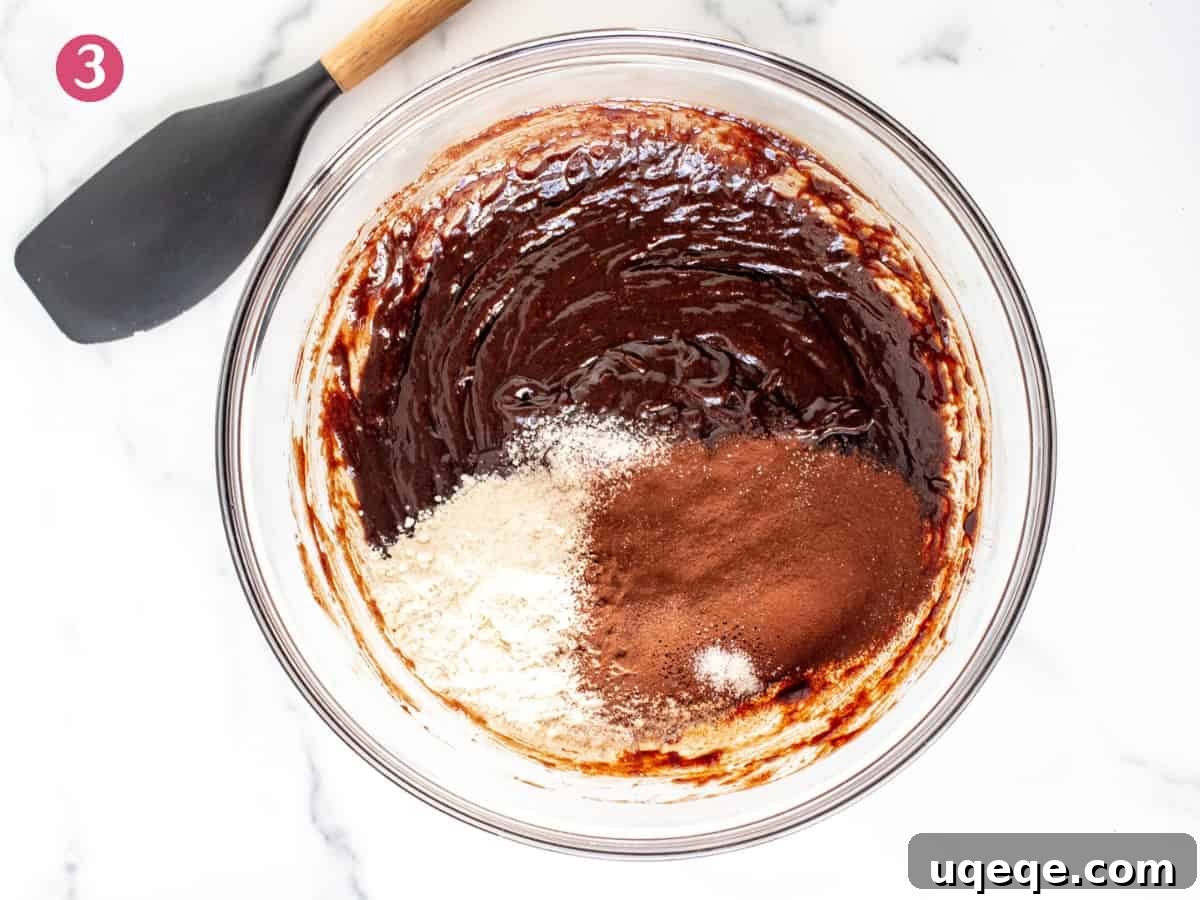
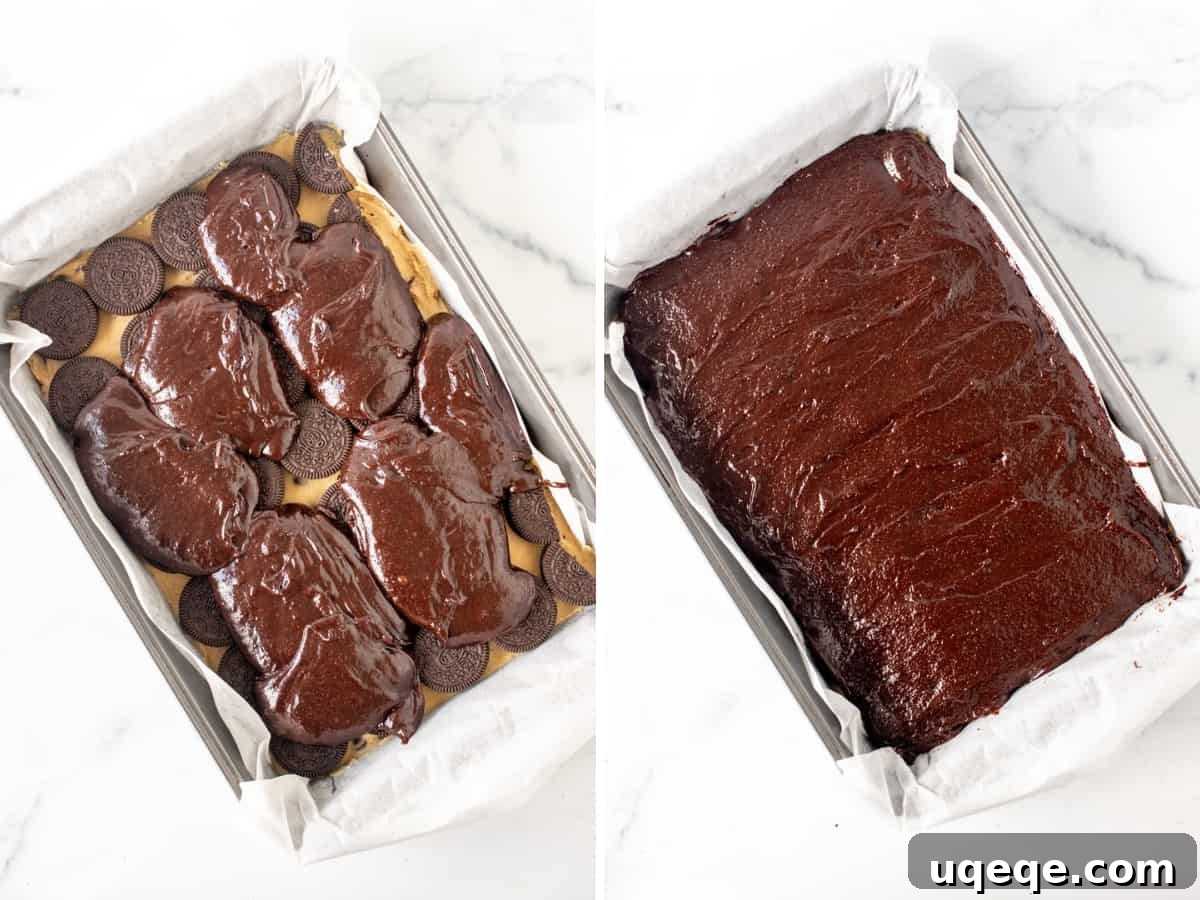
Now, carefully spoon the rich brownie batter over the Oreo layer. Instead of pouring it all in the center, drop spoonfuls evenly across the entire surface of the pan. This technique makes it significantly easier to spread the thick batter into a smooth, even layer without disturbing the delicate Oreo layer beneath. Use a spatula to gently spread the batter from edge to edge.
Baking to Perfection and The Crucial Cooling Stage
Due to their impressive thickness and multiple layers, these brownies require a longer bake time than standard brownies. Expect them to bake for approximately 35-45 minutes, though this can vary based on your oven and your preference for gooiness. A good indicator of doneness is when an inserted toothpick comes out clean or with only a few moist crumbs clinging to it. If the center of the pan significantly wobbles when gently nudged, they need more time in the oven. My batch typically bakes to perfection in about 38 minutes.
The Golden Rule for Slicing: This is arguably the most challenging part of the entire process – waiting! It is absolutely paramount to let these layered brownies cool completely before attempting to slice them. Attempting to cut them while warm will result in a glorious, but messy, heap of deliciousness. For clean, neat slices, allow them to cool for a minimum of 4 hours, or ideally overnight, at room temperature. The layers will set properly, making for picture-perfect squares. Trust us, the wait is worth it!
Pan Sizes and Scaling the Recipe
This recipe is perfectly scaled for a 9×13 inch (23×33 cm) baking pan, yielding a generous batch of about 18 indulgent slices. If you’re baking for a smaller crowd or prefer smaller portions, the recipe can be easily halved and baked in an 8×8 inch (20×20 cm) pan. For a halved recipe, the bake time will be slightly shorter, typically around 32-37 minutes.
A specific note for halving: because the chocolate chip cookie layer originally calls for 1 large egg plus an additional egg yolk, when halving the recipe, you can simplify this by simply using 1 large egg for the cookie dough. While not an exact half, it works wonderfully without compromising the texture. It’s important to note that a halved batch of batter is not quite enough to adequately fill a 9×9 inch (23×23 cm) pan for proper thickness and layering.
Variations and Serving Suggestions
Once you master these classic layered brownies, feel free to experiment! You can swap out regular Oreos for different flavors like Golden Oreos, Mint Oreos, or Peanut Butter Oreos to create unique variations. Consider adding a sprinkle of sea salt on top of the brownie layer before baking for a delicious sweet and salty contrast. You could also mix in different types of chocolate chips (white chocolate, peanut butter chips) into the cookie dough or brownie batter.
These decadent bars are fantastic on their own, but for an extra special treat, consider serving them warm with a scoop of vanilla bean ice cream, a drizzle of caramel sauce, or a dollop of whipped cream. They also pair wonderfully with a cold glass of milk or a hot cup of coffee.
More Decadent Dessert Recipes You’ll Love
If you’re a fan of these ultimate chocolate chip cookie Oreo brownies, be sure to explore some of our other irresistibly rich recipes:
- Oreo Brownies: For those who can’t get enough of that iconic cookie and cream flavor, these fudgy brownies are packed with crushed Oreos.
- Chocolate Chip Cookie Bars: All the chewy goodness of chocolate chip cookies in an easy-to-make bar form, perfect for sharing.
- Peanut Butter Blondies: A rich, chewy blonde brownie base bursting with creamy peanut butter flavor. (Consider adding chocolate chips for a classic pairing!)
The Ultimate Layered Brownies
By: Fiona Dowling
These ultimate layered brownies are the most over-the-top dessert you’ll ever try. They feature a soft and chewy chocolate chip cookie base, a crunchy layer of Oreo cookies, and a rich, fudgy brownie on top! This recipe is 100% from scratch and undoubtedly the most indulgent brownie recipe around.
Prep Time: 30 mins
Cook Time: 50 mins
Total Time: 1 hr 20 mins
Servings: 18 slices
Equipment
- 9×13 inch (23×33 cm) baking pan*
Ingredients
Chocolate Chip Cookie Layer
- 3/4 cup unsalted butter (168 grams), softened
- 1/2 cup brown sugar (105 grams)
- 1/2 cup white sugar (100 grams)
- 1 large egg
- 1 large egg yolk, discard the white
- 1 teaspoon vanilla extract
- 1 1/2 cups all-purpose flour (188 grams), aka plain flour
- 1/4 teaspoon salt
- 2/3 cups chocolate chips (120 grams)
Oreo Layer
- 28 Oreo cookies (about 1 standard package)
Fudgy Brownie Layer
- 1/2 cup unsalted butter (112 grams), cubed
- 6 oz dark chocolate (170 grams), 50-70% cacao or semi-sweet, finely chopped
- 1 cup granulated sugar (200 grams)
- 2 large eggs
- 1/2 cup all-purpose flour (63 grams)
- 1/4 cup cocoa powder (23 grams)
- 1/2 teaspoon salt
Instructions
Preparation
- Preheat your oven to 350°F (180°C).
- Lightly grease a 9×13 inch (23×33 cm) baking pan. Line it with parchment paper, leaving an overhang on the sides for easy lifting. Greasing first helps the paper stick. Alternatively, simply grease the pan well.
Chocolate Chip Cookie Layer
- In a large bowl, beat together the softened butter, brown sugar, and granulated sugar until well combined and fluffy.
- Next, beat in the large egg, the additional egg yolk (discarding the white), and vanilla extract until fully incorporated.
- With your mixer on low speed, gradually beat in the all-purpose flour and salt until just combined. Be careful not to overmix.
- Turn off the mixer and use a rubber spatula or wooden spoon to stir in the chocolate chips evenly.
- Spoon the cookie dough mixture into the prepared pan and gently spread it into an even, smooth layer using a spatula.
Oreo Layer
- Arrange the Oreo cookies in a single layer directly on top of the cookie dough, pressing them down ever so slightly. Aim for 7 rows of 4 cookies, adding half cookies as needed to completely cover the cookie dough base.
Fudgy Brownie Layer
- Finely chop the dark chocolate. Place the chopped chocolate and cubed butter into a large heatproof bowl.
- Microwave the mixture on medium power for 45-second intervals. Remove from the microwave and stir thoroughly between each interval. Continue this process until the chocolate and butter are completely melted and smooth. Important: Do not microwave on high power, as this can cause the chocolate to burn or become grainy.
- Allow the melted chocolate mixture to cool for about 5 minutes until it is no longer hot. Then, whisk in the granulated sugar and eggs until smooth. Ensure the mixture isn’t hot to prevent cooking the eggs.
- Whisk in the all-purpose flour, cocoa powder, and salt into the batter until just combined. If the flour or cocoa powder has lumps, sift them before adding to avoid overmixing.
- Spoon the brownie batter over the Oreo layer, distributing spoonfuls across the pan. This method, rather than dumping all the batter in the middle, makes it much easier to gently spread the batter smoothly and evenly over the Oreos without shifting them.
Baking and Cooling
- Bake the layered brownies in your preheated oven for 37-45 minutes. The precise bake time will depend on your oven and your preference for how gooey you like your brownies. They are done when an inserted toothpick comes out clean or with a few damp crumbs. The center should not wobble excessively when the pan is gently nudged.
- This step is crucial: allow the brownies to cool fully at room temperature for at least 4 hours before slicing. For best results and clean cuts, cooling them overnight is ideal. Once cooled, use the parchment paper overhang to lift the entire slab of brownies from the pan and transfer to a cutting board for easy slicing.
- Store any leftover brownies in an airtight container at room temperature for up to 4 days.
Notes
- Pan Sizes: This recipe is designed for a 9×13 inch (23×33 cm) baking pan. For a smaller batch, it can be halved and baked in an 8×8 inch (20×20 cm) pan, with a slightly reduced bake time of approximately 32-37 minutes. When halving the cookie dough layer, simply use 1 large egg (instead of 1 full egg + 1 yolk) for convenient scaling. A half batch is not sufficient for a 9×9 inch pan.
- Chocolate Chips: While tempting, avoid adding extra chocolate chips to the cookie layer as it can make the brownies more difficult to slice cleanly once set.
- Dark Chocolate Selection: I typically use dark chocolate with 50% cacao for this recipe, as the brownies are already incredibly rich. I do not recommend using chocolate with a cacao percentage higher than 70%. Semi-sweet chocolate also works wonderfully.
- Recipe Update: This recipe was slightly updated on May 5, 2023. The ingredient quantities were adjusted to make the brownies slightly less thick, reducing the overall bake time and addressing feedback about the tops browning too quickly before the centers were fully cooked.
- Storage: Store the cooled brownies in an airtight container at room temperature for up to 4 days to maintain their freshness and fudgy texture.
Nutrition (Estimate)
Calories: 446kcal, Carbohydrates: 56g, Protein: 5g, Fat: 23g, Saturated Fat: 13g, Polyunsaturated Fat: 2g, Monounsaturated Fat: 7g, Trans Fat: 1g, Cholesterol: 76mg, Sodium: 192mg, Potassium: 169mg, Fiber: 3g, Sugar: 37g, Vitamin A: 472IU, Vitamin C: 0.04mg, Calcium: 37mg, Iron: 5mg
Details provided are an estimate only and based on 1 brownie, assuming the recipe yields 18 equal brownies.