
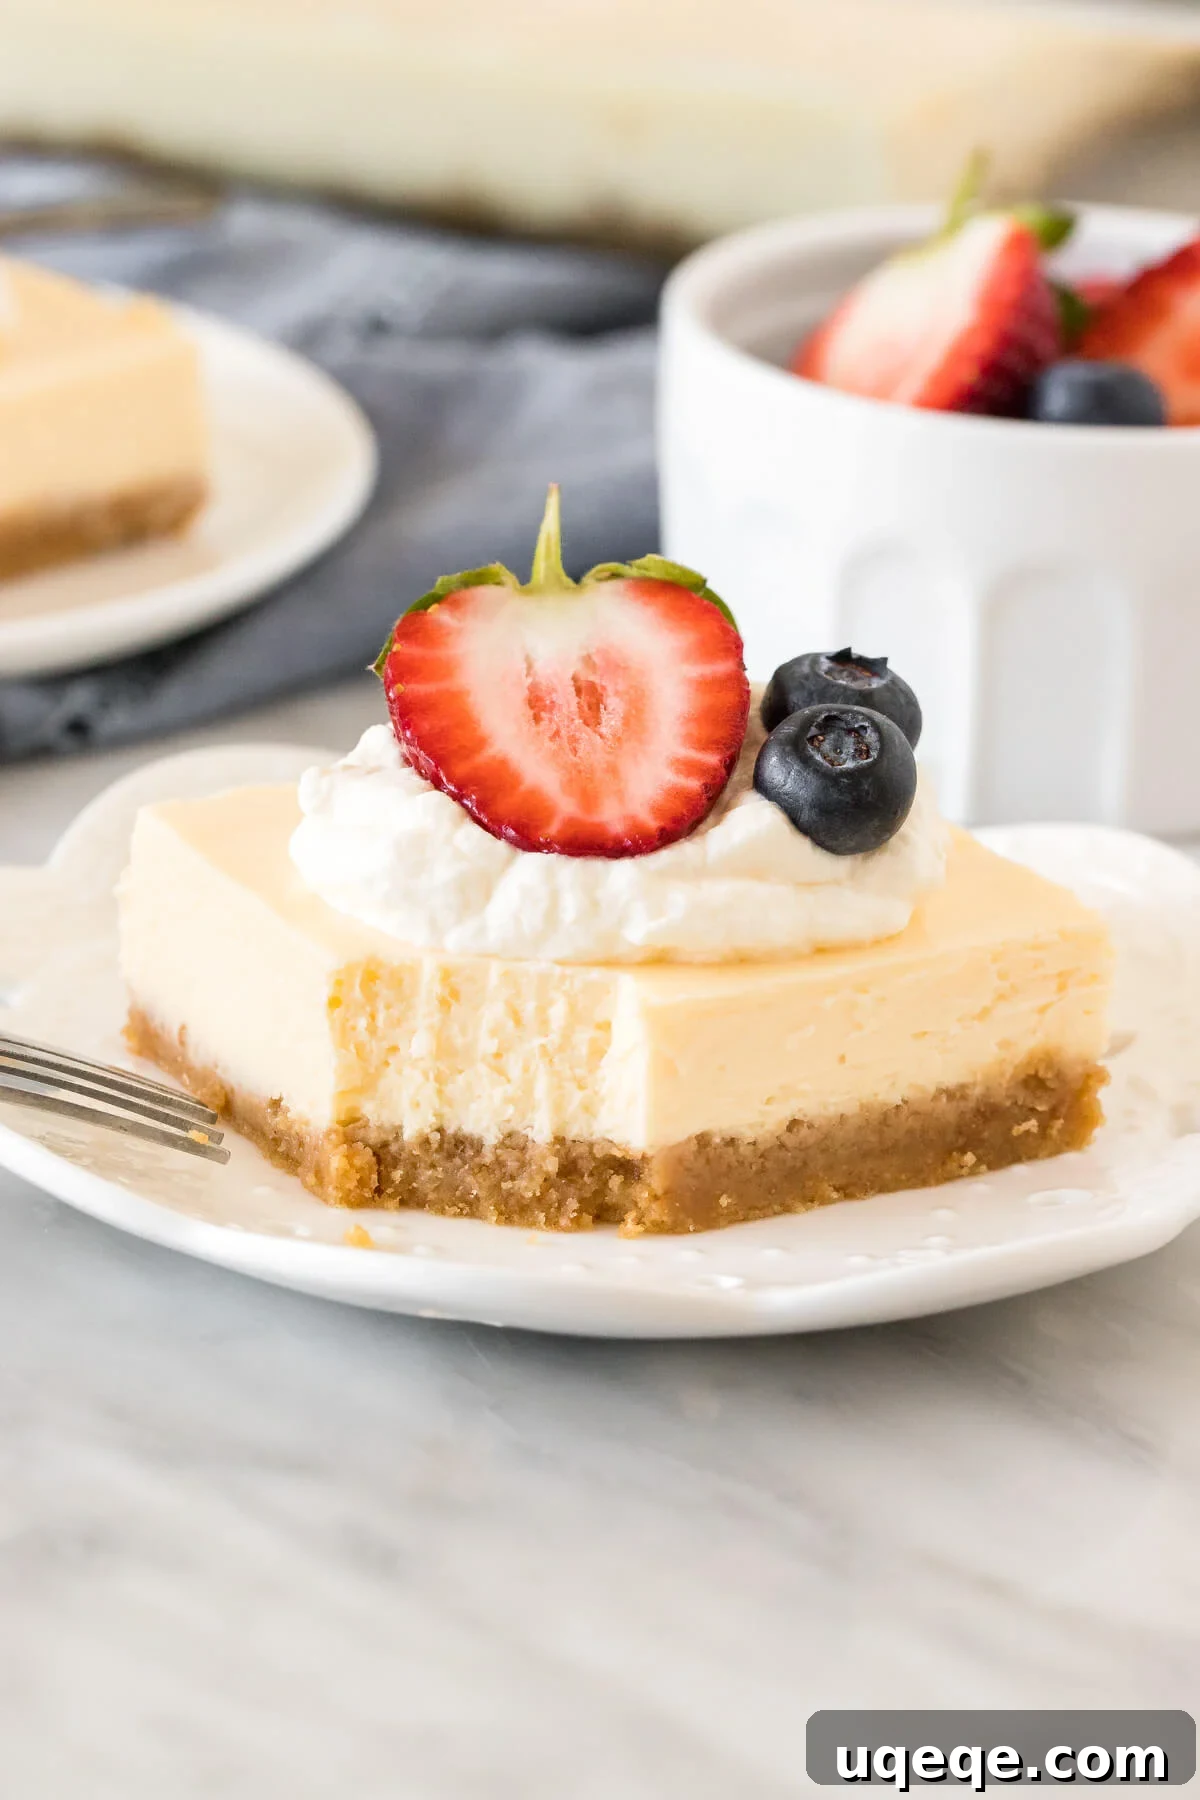
Indulge in the irresistible charm of classic cheesecake bars – a dessert that effortlessly combines creamy, velvety smoothness with a delightful tangy flavor, all nestled atop a wonderfully thick graham cracker crust. These bars are your go-to solution for potlucks, parties, or any occasion demanding a show-stopping yet remarkably easy treat. What’s more, this foolproof recipe bypasses the need for a complicated water bath, promising perfect results every single time. Get ready to impress with minimal fuss and maximum deliciousness!
Why Cheesecake Bars Are Your New Favorite Dessert
Today, we’re transforming the beloved classic New York Cheesecake into an incredibly convenient and even more approachable form: easy-to-serve cheesecake bars. Forget the intimidation of a springform pan and the often-fussy water bath method that many traditional cheesecake recipes require. This recipe streamlines the entire process, allowing you to create a simple bar form that is utterly delicious and completely fuss-free, perfect for any home baker.
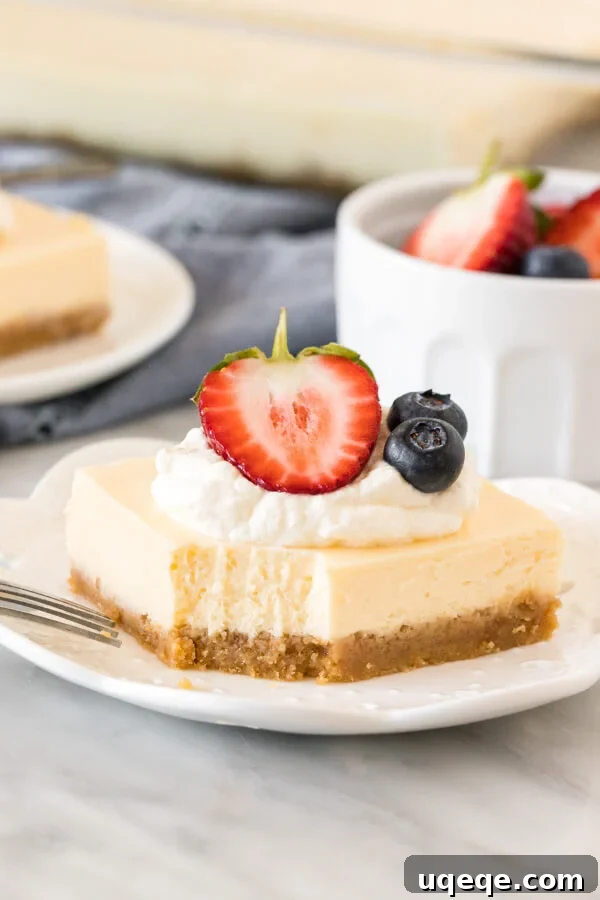
We’ve meticulously crafted the perfect balance with an extra-thick graham cracker crust that provides a delightful textural contrast to the sumptuously creamy cheesecake layer. The generous crust-to-cheesecake ratio ensures that these squares are never overwhelmingly rich, making them ideal for those who adore the crunchy, buttery foundation of a great cheesecake. This thoughtful design means every bite delivers both the crumbly goodness of the crust and the decadent creaminess of the filling.
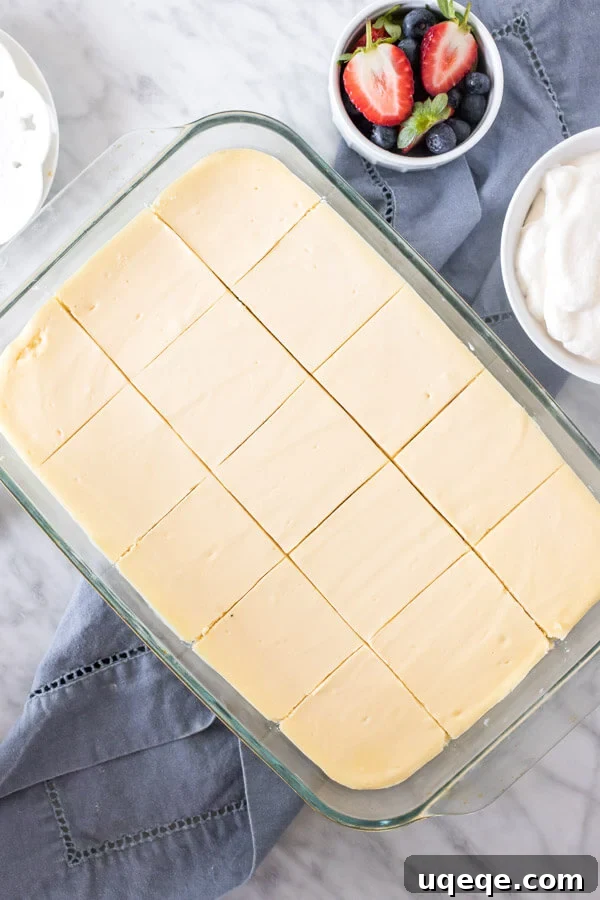
Cheesecake bars offer numerous advantages over traditional round cheesecakes. They are inherently easier to slice and serve, requiring no special cutting techniques or concerns about presentation. Simply cut into neat squares, and they’re ready to go! This makes them exceptionally portable and perfect for sharing at any gathering, from casual backyard BBQs to elegant holiday parties. Moreover, baking cheesecake in a rectangular pan often reduces the risk of cracks, a common challenge with larger, round cheesecakes. This simplified baking method ensures a flawless, smooth top every time, allowing you to focus on enjoying your creation rather than fretting over imperfections. Their individual portion size also makes them excellent for portion control and easy distribution.
Expert Tips for Making Flawless Cheesecake Bars Every Time
While this recipe is designed for simplicity and success, following a few key tips will elevate your cheesecake bars from great to absolutely legendary. These aren’t just suggestions; they’re essential steps for achieving that perfect creamy texture, preventing common cheesecake mishaps, and ensuring your dessert is a true masterpiece.
- Choose the Right Pan: Glass, Ceramic, or Pyrex is Best: For optimal and even baking, we highly recommend using a glass, ceramic, or Pyrex baking dish (9×13 inch) instead of a metal pan. Glass retains heat more consistently and distributes it gently, leading to a more uniformly cooked cheesecake filling without over-browning the edges. This contributes significantly to the overall smooth, custardy texture and prevents potential dryness in the outer layers, ensuring every bite is moist and tender.
- Room Temperature Ingredients are Non-Negotiable: This is perhaps the most crucial tip for a perfectly smooth cheesecake. Ensure your cream cheese, sour cream, and eggs are at true room temperature (take them out of the fridge at least 30 minutes, or even an hour, before you start mixing). Cold ingredients don’t emulsify properly with sugar, leading to a lumpy batter and necessitating overmixing. Overmixing, in turn, incorporates too much air, which can cause unsightly cracks during baking and a less dense, desirable texture. Softened ingredients blend effortlessly into a silky-smooth, lump-free filling, which is the foundation of a perfect cheesecake.
- Always Use Full-Fat, Brick-Style Cream Cheese: For that signature rich, dense, and luxuriously creamy cheesecake consistency, full-fat, brick-style cream cheese is absolutely essential. Avoid using “lite” or spreadable varieties, as their higher water content and different stabilizers will result in a much thinner, runnier filling that won’t set properly or deliver the opulent mouthfeel you expect from a classic cheesecake. Quality, full-fat ingredients truly make a monumental difference here.
- The Secret Tang: A Touch of Fresh Lemon Juice: A small amount of freshly squeezed lemon juice (just one tablespoon!) is a subtle yet powerful game-changer. It doesn’t impart a noticeable lemon flavor to the cheesecake but rather brightens and enhances the natural tang of the cream cheese, adding depth and complexity to the overall flavor profile. It cuts through the richness, creating a more balanced, vibrant, and irresistible taste. Always use fresh juice for the best results; bottled lemon juice often contains preservatives and less vibrant flavor that can compromise your dessert.
- Cornstarch: Your Anti-Cracking Ally: This recipe thoughtfully incorporates a single tablespoon of cornstarch, and it plays a surprisingly vital role. Cornstarch acts as a binder and stabilizer, helping to solidify the cheesecake filling’s structure and significantly reducing the likelihood of unsightly cracks forming on the surface during baking and cooling. It provides a little extra insurance for that perfectly smooth top. If cornstarch isn’t available, an equal amount of all-purpose flour can be used as a substitute, offering similar binding properties.
- Bake Low and Slow at 300°F: Resist the urge to crank up the oven temperature! Baking these bars at a consistently lower temperature of 300°F (150°C) is absolutely crucial for cheesecake success. A gentler, more gradual heat allows the cheesecake to cook slowly and evenly from the edges to the center, preventing the rapid expansion and contraction that often leads to cracks. This low-and-slow approach ensures a smooth, custardy texture throughout the entire bar.
- Master the Art of Slow Cooling: Rapid temperature changes are the ultimate enemy of a perfect cheesecake. Once the cheesecake bars are baked and the top looks just set (a slight jiggle in the very center is normal), turn off the oven but prop open the oven door slightly (you can use a wooden spoon to keep it ajar). Allow the cheesecake bars to cool slowly inside the turned-off oven for 30 minutes. This gradual cool-down period prevents a sudden, drastic drop in temperature, which can cause the cheesecake to sink dramatically or crack severely. After this, remove them and let them cool completely on the counter until they reach true room temperature before transferring to the refrigerator.
- The Golden Rule: Chill, Chill, Chill (at least 6 hours): Patience is a profound virtue when it comes to cheesecake. Chilling the bars in the refrigerator for a minimum of 6 hours (or even better, overnight) is non-negotiable for optimal results. This extended chilling time allows the cheesecake to fully set, firming up to that desirable sliceable consistency. Moreover, the flavors meld and deepen significantly during this period, resulting in a much more delicious, complex, and satisfying dessert. A well-chilled cheesecake is also considerably easier to cut cleanly, providing those picture-perfect slices.
Serving Suggestions and Creative Topping Ideas
These classic cheesecake bars are incredibly versatile and serve as a perfect canvas for a variety of delicious toppings. While they are phenomenal on their own, a little embellishment can elevate them to another level, allowing you to customize them for any taste or occasion.
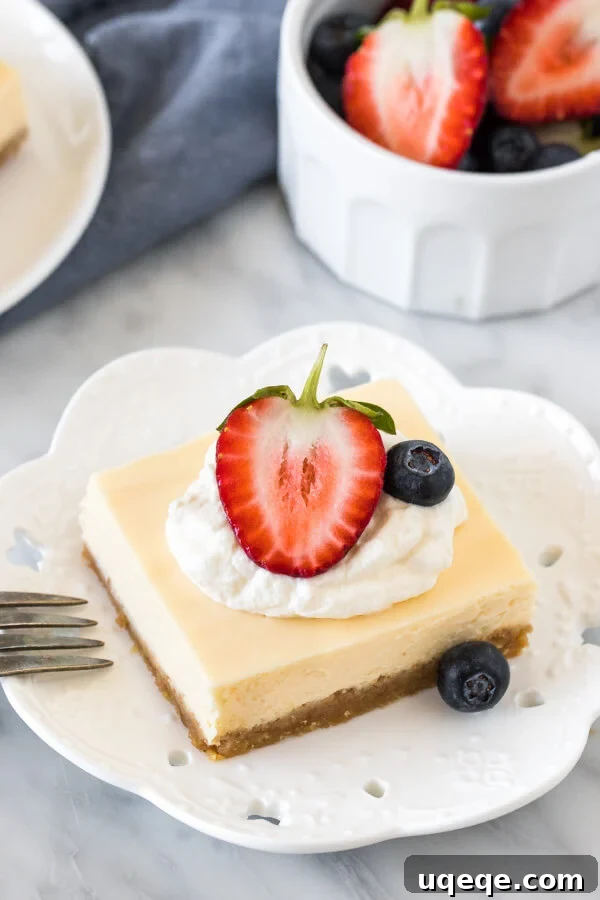
- Classic & Simple Elegance: We love to serve these bars simply topped with a dollop of freshly whipped cream and a handful of vibrant, fresh berries (strawberries, blueberries, raspberries, or a mix are all fantastic choices). The refreshing tartness of the fruit and the delicate lightness of the cream perfectly complement the rich, tangy cheesecake.
- Fruity Delights for Extra Zing: For an extra burst of flavor and visual appeal, consider drizzling them with a homemade (or high-quality store-bought) strawberry sauce, a tangy blueberry topping, or a rich cherry compote. These fruit additions provide a wonderful layer of natural sweetness and acidity that balances the creaminess of the cheesecake.
- Chocolate Lover’s Dream: Indulge your chocolate cravings by drizzling warm chocolate fudge or ganache over the bars. A sprinkle of chocolate shavings, mini chocolate chips, or even a dusting of cocoa powder can transform these into an utterly decadent treat.
- Caramel & Nut Extravaganza: For a sophisticated twist, swirl a generous amount of homemade or gourmet salted caramel sauce across the top. A scattering of toasted pecans, walnuts, or even macadamia nuts adds a delightful crunch and nutty flavor.
- Tropical Touch: For a unique and exotic flavor profile, top with a spoonful of bright passion fruit curd, finely diced fresh mango, or a sprinkle of toasted coconut flakes.
No matter how you choose to adorn them, these easy, creamy, and undeniably delicious cheesecake bars are hard to beat. They embody simplicity and sophisticated flavor in every bite, making them a consistent crowd-pleaser. And for those moments when baking isn’t an option, or you need an even quicker fix, our no-bake cherry cheesecake bars offer a fantastic alternative that requires zero oven time.
More Irresistible Cheesecake Bar Recipes to Explore
If you’ve fallen in love with the convenience, versatility, and sheer deliciousness of cheesecake bars, you’re in luck! There’s a whole world of delightful variations to discover, perfect for expanding your baking repertoire and satisfying every craving. Explore these other fantastic recipes from our collection:
- Cheesecake Brownies: Experience the best of both dessert worlds – rich, fudgy brownie meets a swirl of creamy, tangy cheesecake. A truly indulgent hybrid treat!
- Pumpkin Cheesecake Bars: A delightful seasonal offering, perfect for autumn gatherings with its warm spices and velvety pumpkin-infused cheesecake layer.
- Peanut Butter Cheesecake Bars: Indulge in the decadent and irresistible combination of smooth peanut butter and creamy cheesecake – a truly addictive treat for nut butter enthusiasts.
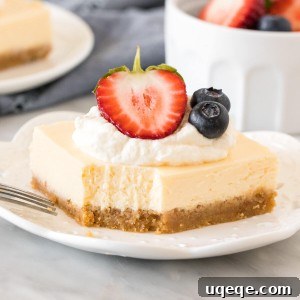
Classic Cheesecake Bars
By: Fiona Dowling
These classic cheesecake bars are renowned for their creamy, velvety smooth texture and delightfully tangy flavor, all built upon a substantial graham cracker crust. Ideal for sharing at potlucks or parties, this recipe simplifies the process by eliminating the need for a water bath, ensuring perfect results without fail.
Prep Time: 30 minutes
Cook Time: 35 minutes
Chilling Time: 6 hours
Total Time: 7 hours 5 minutes
Servings: 15 pieces
Rate Recipe
Print Recipe
Equipment
- 9×13 inch glass, ceramic, or Pyrex baking pan
- Large mixing bowls
- Electric mixer (stand or hand-held)
- Measuring cups and spoons
- Rubber spatula
- Wire cooling rack
- Sharp knife for slicing
Ingredients
For the Graham Cracker Crust
- 2 cups graham cracker crumbs*
- 3 tablespoons brown sugar
- 1/2 cup unsalted butter, melted
For the Creamy Cheesecake Filling
- 24 ounces full-fat cream cheese*, softened to room temperature (typically 3 blocks, 8 oz each)
- 1 1/4 cups white sugar
- 1 tablespoon cornstarch (or all-purpose flour)
- 1 tablespoon fresh lemon juice, freshly squeezed (do not use bottled juice for best flavor)
- 1 teaspoon vanilla extract
- 1 cup sour cream*, full-fat and at room temperature
- 3 large eggs*, at room temperature
*Note on Crust: For a slightly thinner crust, you can adjust the ingredients to 1 1/2 cups graham cracker crumbs, 2 tablespoons brown sugar, and 6 tablespoons of melted unsalted butter.
Instructions
Preparing the Perfect Graham Cracker Crust
- Prepare Oven & Pan: Preheat your oven to 325°F (160°C). Lightly grease a 9×13 inch glass, ceramic, or Pyrex baking pan. This ensures the crust doesn’t stick and releases cleanly.
- Combine Dry Ingredients: In a medium-sized mixing bowl, combine the graham cracker crumbs and brown sugar. Stir thoroughly with a fork or whisk to ensure the sugar is evenly distributed throughout the crumbs.
- Add Melted Butter: Pour the melted unsalted butter into the crumb mixture. Stir thoroughly with a fork or spatula until all the crumbs are moistened and resemble wet sand. Every crumb should be coated to form a cohesive crust.
- Press into Pan: Transfer the moistened crumb mixture into the prepared baking pan. Using the bottom of a flat-bottomed glass or your fingers, firmly press the mixture into an even, compact layer across the bottom of the pan. Ensure it’s tightly packed and uniform.
- Pre-bake Crust: Bake the crust in the preheated oven for 10 minutes. This essential step helps to set the crust, making it sturdy and preventing it from becoming soggy. Remove the pan from the oven, but leave the oven turned on, reducing the temperature to 300°F (150°C) in preparation for the cheesecake filling.
Crafting the Creamy Cheesecake Filling
- Cream Cheese Base: In a very large mixing bowl, using an electric mixer on medium speed, beat the softened cream cheese, white sugar, and cornstarch together. Beat until the mixture is completely soft, smooth, and utterly free of any lumps. It’s crucial to scrape down the sides and bottom of the bowl frequently with a rubber spatula to ensure everything is thoroughly combined and no lumps remain.
- Incorporate Liquids & Flavorings: Carefully mix in the fresh lemon juice, vanilla extract, and sour cream. Beat on low speed until they are just combined into the cream cheese mixture. Avoid overmixing at this stage to prevent incorporating too much air.
- Add Eggs Gradually: With the mixer on its lowest speed, beat in the large eggs, one at a time. Mix each egg just until it is fully incorporated into the batter before adding the next. It is absolutely crucial not to overmix once the eggs are added, as this can introduce excessive air, leading to cracks on the cheesecake’s surface during baking. Stop mixing as soon as the last egg is just combined.
- Pour & Bake: Gently pour the creamy cheesecake filling over the pre-baked graham cracker crust in the pan. Carefully smooth the top with a rubber spatula to create an even surface.
- Bake Cheesecake: Place the pan back into the preheated oven (now at 300°F / 150°C) and bake for 30-35 minutes. The cheesecake is done when the edges appear set, and the very center still has a slight jiggle when you gently shake the pan. The top should look just set, not browned.
- Initiate Slow Cooling Process: Once baked, turn off the oven and immediately prop open the oven door slightly (you can use a wooden spoon to keep it ajar). Allow the cheesecake bars to cool slowly inside the turned-off oven for 30 minutes. This crucial gradual cooling is vital for preventing cracks and significant sinking of the cheesecake.
- Complete Room Temperature Cool Down: After the initial oven cooling, remove the pan from the oven and transfer it to a wire rack on your counter. Continue cooling at room temperature until the bars are completely cool to the touch. This step is important and can take anywhere from 1-2 hours depending on your kitchen’s ambient temperature.
- The Essential Chill: Once completely cooled, cover the pan tightly with plastic wrap or aluminum foil. Transfer the cheesecake bars to the refrigerator and chill for a minimum of 6 hours, or ideally, overnight. This extended chilling period allows the cheesecake to fully set, firming up to that desirable sliceable consistency, and permits the flavors to fully develop and meld.
- Slice & Serve: When you’re ready to serve, remove the chilled pan from the fridge. For clean, neat slices, use a sharp, thin-bladed knife (a chef’s knife or carving knife works best; avoid using a table knife). For impeccably clean edges, run the knife under hot water and wipe it clean between each cut. Serve as desired with your favorite toppings and enjoy!
Recipe Notes & Pro-Tips for Success
- Crust Thickness Adjustment: For those who prefer a slightly thinner crust than the one specified in the main recipe, you can easily adjust the ingredients. Use 1 1/2 cups graham cracker crumbs, 2 tablespoons brown sugar, and 6 tablespoons of melted unsalted butter.
- Graham Cracker Alternatives: If traditional graham crackers are difficult to find in your region or you wish to experiment with different flavors, digestive biscuits, shortbread cookies, or even vanilla wafers can be excellent substitutes for the crust. Simply crush them finely to achieve the required crumb consistency.
- Room Temperature Reminders: Reiterate the paramount importance of bringing cream cheese, sour cream, and eggs to room temperature before beginning. This critical step ensures a smooth, lump-free batter, prevents overmixing, and contributes significantly to the final creamy texture of your cheesecake.
- Cream Cheese Type: Always opt for full-fat, block-style cream cheese for this recipe. Low-fat, whipped, or spreadable varieties have different compositions (higher water content, different stabilizers) that will negatively alter the texture and setting of your cheesecake, leading to a less desirable result.
- Storage & Freezing Instructions:
- Refrigeration: Store any leftover cheesecake bars tightly covered in an airtight container in the refrigerator. They will remain fresh and delicious for up to 4 days.
- Freezing: For longer storage, cheesecake bars freeze beautifully. Wrap individual bars tightly in plastic wrap, then again in aluminum foil to prevent freezer burn. Place them in a freezer-safe bag or container. They can be frozen for up to 2 months. To thaw, simply transfer frozen bars to the refrigerator and allow them to thaw overnight before serving.
- Nutrition Information Disclaimer: The provided nutrition facts are an estimate only. They are based on 1 bar, assuming the recipe yields 15 equal pieces. Actual nutritional values may vary depending on the specific brands of ingredients used and precise portion sizes. This information is intended for general guidance.
Nutrition Information (Estimated Per Serving)
- Calories:
- 263 kcal
- Carbohydrates:
- 32g
- Protein:
- 9g
- Fat:
- 11g
- Saturated Fat:
- 6g
- Cholesterol:
- 65mg
- Sodium:
- 417mg
- Potassium:
- 179mg
- Fiber:
- 1g
- Sugar:
- 24g
- Vitamin A:
- 339 IU
- Vitamin C:
- 1mg
- Calcium:
- 190mg
- Iron:
- 1mg
Love This Recipe?
We’d be absolutely thrilled if you could take a moment to rate this recipe and share your thoughts in the comments below! Your valuable feedback helps us continuously improve our recipes and inspires other home bakers in our community to try new delicious creations.