
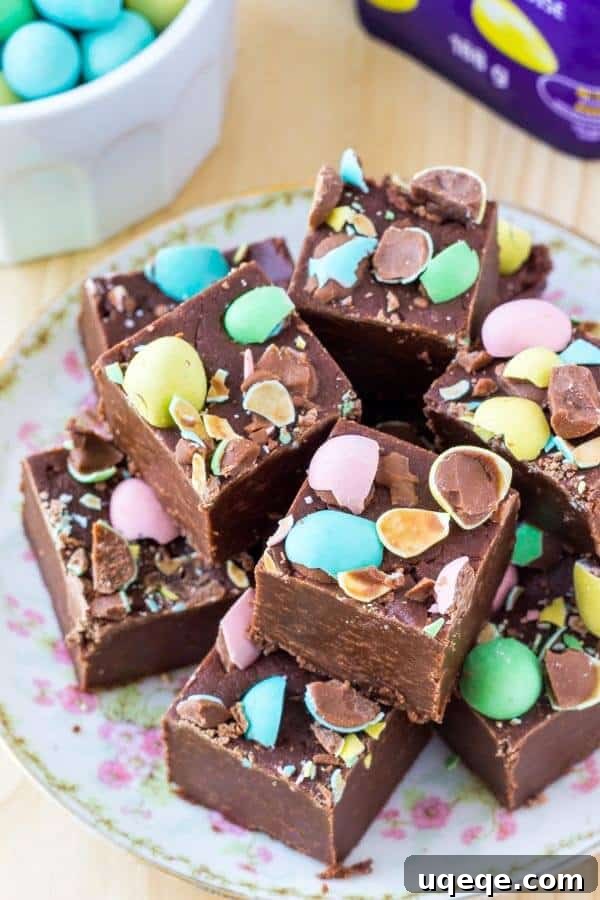
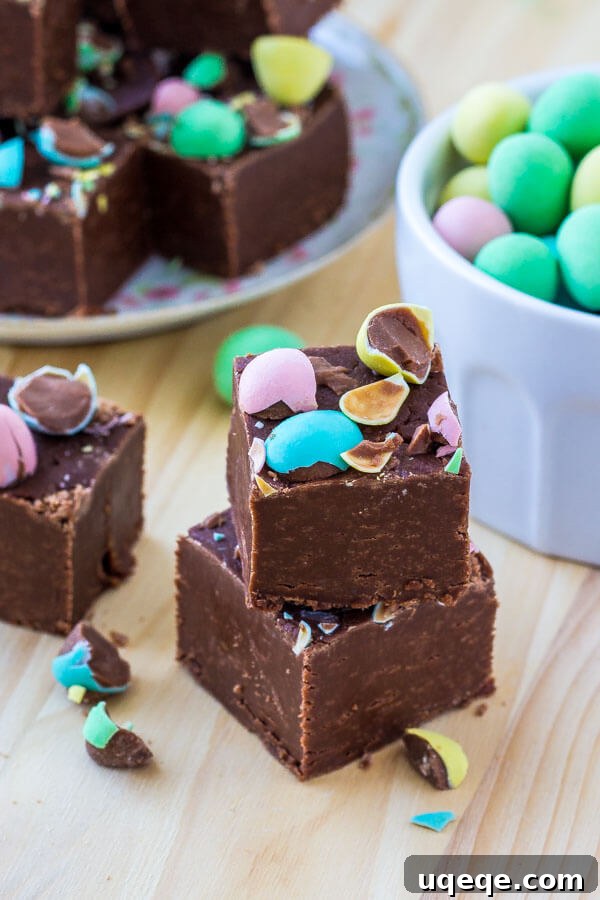
Indulge in the irresistible delight of creamy, smooth chocolate fudge, generously adorned with vibrant mini eggs – the quintessential treat for your Easter celebrations.
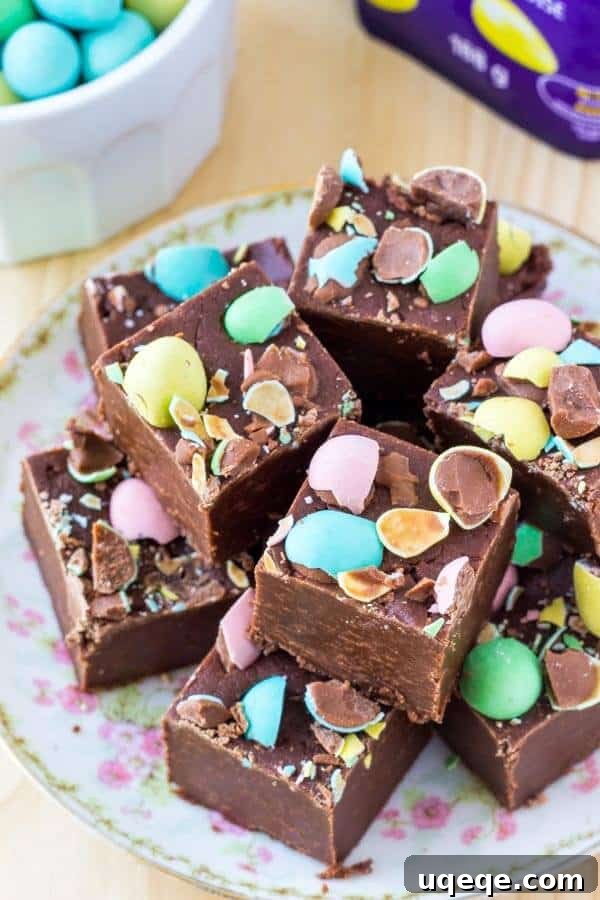
The Ultimate Easy Easter Chocolate Fudge
Easter is a time for joy, renewal, and, most importantly, delicious treats! As the days grow longer and the first signs of spring emerge, our thoughts naturally turn to festive baking. This year, get ready to delight your taste buds and impress your loved ones with this incredible homemade chocolate fudge recipe. It’s incredibly creamy, wonderfully smooth, and the delightful crunch of crushed mini eggs on top makes it truly irresistible – a perfect embodiment of the season’s sweet spirit.
While the last vestiges of winter might still cling to some parts of the world, Easter is indeed just around the corner, bringing with it the promise of sunshine and a flurry of festive baking. In anticipation of the arrival of my favorite rabbit (and all the chocolate he brings!), I decided to whip up a batch of this special Easter Chocolate Fudge. Because let’s be honest, the combination of deliciously creamy homemade chocolate fudge and cheerful Easter candy is an absolute winning formula!
Why Homemade Fudge is a Must for Easter
There’s something uniquely satisfying about homemade treats, especially during holidays. While store shelves are overflowing with pre-made confections, nothing compares to the warmth, flavor, and personal touch of a dessert crafted in your own kitchen. This Easter chocolate fudge isn’t just a dessert; it’s an experience. It’s an opportunity to create lasting memories, fill your home with a wonderful aroma, and share a tangible piece of your effort and love with family and friends.
Beyond the sentiment, homemade fudge offers unparalleled freshness and the ability to customize. You control the quality of the chocolate, the creaminess of the texture, and the generous sprinkle of toppings. This recipe, in particular, stands out for its simplicity and the consistently smooth results it delivers, making it an ideal project for bakers of all skill levels – even those who might shy away from traditional candy making.
The Magic of Marshmallow Cream: A Foolproof Fudge Method
If you’ve ever attempted traditional fudge, you might be familiar with the challenges: the precise temperature monitoring, the constant stirring, and the dreaded grainy texture that can result from even a slight misstep. Fear not! This recipe ingeniously bypasses those common pitfalls by incorporating marshmallow cream, transforming fudge making into a remarkably easy and enjoyable process.
Marshmallow cream is the secret ingredient that guarantees a velvety smooth, melt-in-your-mouth texture every single time. It acts as a stabilizer, preventing sugar crystallization and ensuring that your fudge is never gritty. This means you don’t need to be a seasoned candymaker or possess a high-tech candy thermometer (though one is helpful for precision). The marshmallow cream essentially creates a more forgiving base, allowing you to achieve perfectly creamy results with minimal effort and maximum satisfaction. It truly makes achieving professional-quality fudge completely attainable.
Easter Indulgences and Sweet Traditions
When it comes to Easter, I confess I can’t resist the allure of copious amounts of candy. Chocolate eggs, fluffy marshmallow bunnies, vibrant jelly beans – my shopping cart inevitably overflows. If truth be told, as a child, my mother would often bribe me with chocolate to ensure I sat quietly through the Good Friday service at church. And now, with a little more than allowance money at my disposal, my Easter candy intake has only, shall we say, “matured.”
But for whatever reason, if I bake candy into a homemade treat, I can convince myself that indulging in these sweets somehow becomes a virtuous act. It’s an act of culinary creativity, after all! So today, we’re combining the deliciousness of classic Easter chocolate with a delightful homemade confection. It’s a chocolate fudge that’s creamy, intensely chocolatey, incredibly smooth, and just plain delicious. And what better way to celebrate the vibrant spirit of Easter than by sprinkling it generously with miniature candy-coated chocolate eggs? They add both a playful pop of color and an extra layer of delightful texture, making this fudge truly special for the holiday.
The Essential Easter Chocolate Fudge Recipe
This remarkable recipe is a testament to the simplicity and effectiveness of marshmallow cream fudge, drawing inspiration from the well-loved Joy of Baking’s Chocolate Marshmallow Fudge. Unlike more temperamental traditional fudge recipes that demand precise sugar crystal control, this method is straightforward and guarantees an exceptionally smooth and creamy texture. Here’s a quick overview of the process:
- **Prepare Your Pan:** First, line an 8×8 inch square baking pan with aluminum foil, extending the foil over the edges to create “handles.” Lightly grease the foil with butter or cooking spray. This step is crucial for easy removal and cutting later.
- **Melt the Base:** In a large, heavy-bottomed saucepan, combine the unsalted butter, granulated sugar, rich whipping cream, and the magical marshmallow fluff. Place the saucepan over medium heat.
- **Bring to a Gentle Boil:** Stir the mixture gently but consistently as it heats. Bring it to a rolling boil, continuing to stir for approximately 5 minutes, or until a candy thermometer registers 235°F (113°C). The marshmallow cream helps to prevent scorching and ensures a consistent boil.
- **Combine with Chocolate:** Once the desired temperature or boil time is reached, immediately remove the saucepan from the heat. Carefully pour this hot sugar concoction over your coarsely chopped semi-sweet chocolate, which should be waiting in a large, heatproof bowl.
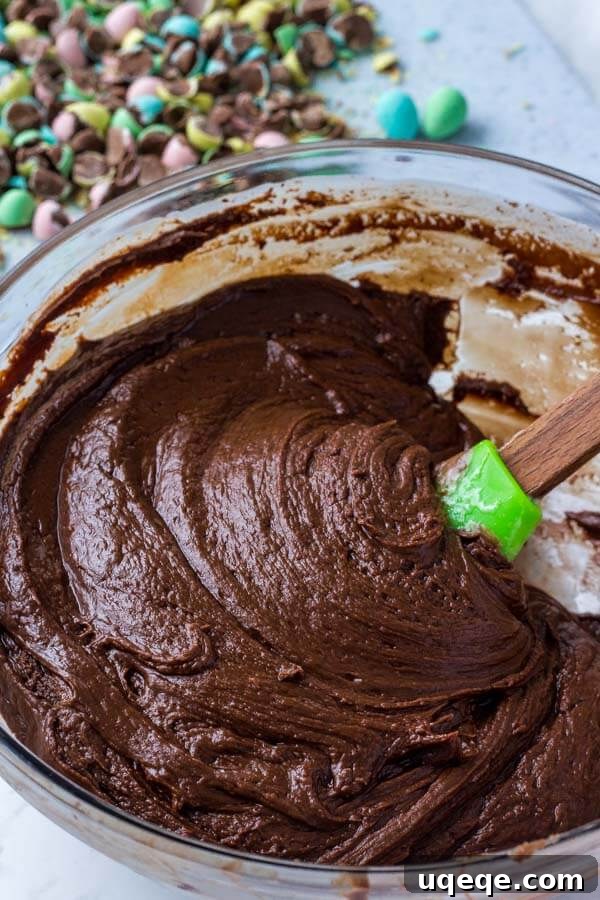
- **Stir to Smoothness:** Begin stirring vigorously with a sturdy wooden spoon or rubber spatula. The residual heat from the sugar mixture will melt the chocolate, transforming it into a luxurious, glossy fudge. If, by any chance, you notice the mixture starting to separate or appear oily, don’t panic! Simply beat the mixture briefly with an electric mixer until it comes back together and achieves that perfectly smooth consistency.
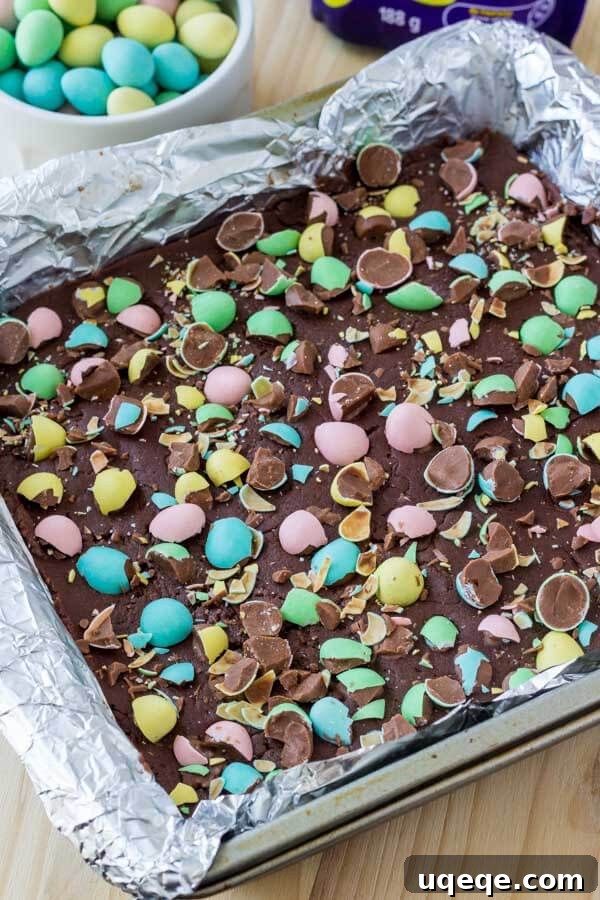
- **Finish and Decorate:** Last but certainly not least, pour the warm, decadent fudge mixture into your prepared pan. Work quickly to spread it evenly. Immediately sprinkle the top generously with your crushed miniature candy-coated chocolate eggs. The warmth of the fudge will help them adhere beautifully.
- **Cool and Cut:** Allow the fudge to cool completely at room temperature, or expedite the process by placing it in the refrigerator. Once fully set and firm (this can take up to 4 hours), use the foil handles to lift the fudge from the pan. Peel away the foil and cut the fudge into perfect squares. For an extra festive touch, you can even use Easter-shaped cookie cutters to create fun shapes before the fudge completely hardens.
This incredible fudge comes together in about 10 minutes of active preparation, followed by the essential cooling and hardening time. The result is a truly delicious chocolate fudge, so easy to make, and perfectly ready for the Easter bunny’s arrival. Clearly, springtime has officially arrived!
Ingredients Breakdown for Perfect Fudge
Each ingredient in this recipe plays a vital role in creating its superior taste and texture:
- **Semi-Sweet Baking Chocolate (12 oz, coarsely chopped):** The star of the show! High-quality chocolate will yield the best flavor. Chopping it coarsely helps it melt evenly and quickly when the hot sugar mixture is added.
- **Unsalted Butter (3 tablespoons):** Adds richness and contributes to the smooth, luxurious mouthfeel of the fudge.
- **Granulated Sugar (2 cups):** Provides the essential sweetness and structure. The key is to dissolve it completely and bring it to the correct temperature for proper setting.
- **Whipping Cream (2/3 cups, about 35%):** Contributes to the creamy texture and richness, preventing the fudge from becoming too dense or dry.
- **Marshmallow Cream (1 – 7 oz jar):** This is your secret weapon! It ensures the fudge is incredibly smooth, prevents graininess, and makes the whole process much more forgiving. Don’t substitute with regular marshmallows unless you adjust the recipe significantly.
- **Miniature Candy Coated Chocolate Eggs (for decorating):** These are essential for the Easter theme! They add a festive visual appeal and a delightful crunch. You can gently crush them for a finer topping or leave them whole for a bolder statement.
Tips for Flawless Easter Fudge Every Time
Even with a foolproof recipe, a few extra tips can elevate your fudge from great to absolutely extraordinary:
- **Prep is Key:** Have all your ingredients measured and ready before you start cooking (this is known as “mise en place”). Chop your chocolate, line your pan, and open your marshmallow cream jar. Fudge making moves quickly once the heat is on!
- **Use a Heavy-Bottomed Pan:** This helps distribute heat evenly and prevents the mixture from scorching on the bottom, which can affect the flavor and texture.
- **Stir Continuously but Gently:** While boiling the sugar mixture, gentle but consistent stirring prevents crystallization and ensures even heating. Avoid scraping the sides of the pan too much, as stray sugar crystals can cause the fudge to become grainy.
- **Don’t Overcook or Undercook:** The 235°F (113°C) mark is important for setting. If you don’t have a thermometer, relying on the 5-minute rolling boil is a good approximation, but a thermometer offers the most accuracy. Undercooking might result in fudge that doesn’t set firmly; overcooking can make it too hard or crumbly.
- **Patience During Cooling:** Resist the urge to cut the fudge before it’s completely set. Rushing this step can lead to messy, crumbly pieces. Room temperature cooling often produces a slightly softer, creamier fudge, while chilling in the fridge will make it set faster and firmer.
- **Clean Cuts:** For neat squares, use a sharp knife and clean it with hot water and dry it between cuts, especially after the first few pieces.
Creative Variations and Customization Ideas
While this Easter Chocolate Fudge is perfect as is, feel free to get creative with variations:
- **Different Toppings:** Beyond mini eggs, consider other festive sprinkles, chopped nuts (like pecans or walnuts), shredded coconut, or even a drizzle of white chocolate.
- **Flavor Boosts:** Add a teaspoon of vanilla extract (or other extracts like almond or peppermint) with the chocolate chips for an extra layer of flavor. A pinch of sea salt sprinkled on top can beautifully enhance the chocolate notes.
- **Chocolate Choices:** Experiment with different types of chocolate – dark chocolate for a richer, less sweet fudge, or milk chocolate for an even milder flavor. A combination can also be delightful!
- **Layered Fudge:** For an impressive presentation, consider making a batch of white chocolate fudge (adapting this recipe with white chocolate) and layering it with the milk chocolate fudge.
Storing Your Homemade Easter Fudge
Your delicious Easter fudge can be stored in an airtight container at room temperature for up to a week. For longer storage, wrap it tightly in plastic wrap and then in aluminum foil, and freeze for up to three months. Thaw frozen fudge in the refrigerator before serving. This makes it a fantastic make-ahead treat for the busy Easter season!
Easter Chocolate Fudge Recipe Summary
Easter Chocolate Fudge
By: Fiona Dowling
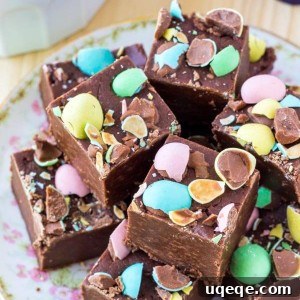
Creamy, smooth Easter Chocolate Fudge that’s super easy to make & so pretty. You’ll love that this recipe using marshmallow cream only takes 10 minutes of active prep!
Prep Time: 10 mins | Total Time: 4 hrs (includes setting) | Servings: 36 pieces
Ingredients
- 12 oz semi-sweet baking chocolate, coarsely chopped
- 3 tablespoons unsalted butter
- 2 cups granulated sugar
- 2/3 cups whipping cream (about 35% fat)
- 1 (7 oz) jar marshmallow cream
- Miniature candy-coated chocolate eggs, for decorating
Instructions
- Line an 8×8 inch pan with aluminum foil, allowing excess to hang over the sides for easy removal. Lightly grease the foil.
- Place the coarsely chopped semi-sweet chocolate in a large, heatproof bowl. Set aside.
- In a medium-sized, heavy-bottomed saucepan, melt the butter over medium heat. Add the granulated sugar, whipping cream, and marshmallow cream. Stir gently to combine.
- Bring the mixture to a gentle boil over medium heat, stirring continuously. Continue to boil for exactly 5 minutes, or until a candy thermometer reads 235°F (113°C).
- Remove the saucepan from the heat immediately. Pour the hot sugar and marshmallow mixture directly over the chopped chocolate in the prepared bowl.
- Stir with a large wooden spoon or rubber spatula until the chocolate is completely melted and the mixture is smooth and glossy. If the mixture appears to separate or look oily, beat it briefly with an electric mixer until it becomes smooth again.
- Pour the fudge mixture into the prepared 8×8 inch pan. Spread it evenly with your spatula.
- Immediately sprinkle the top generously with the miniature candy-coated chocolate eggs. You can lightly press them into the fudge if desired.
- Allow the fudge to cool completely at room temperature for several hours, or chill in the refrigerator until firm (this may take 2-4 hours).
- Once fully set, use the foil overhangs to lift the fudge from the pan. Peel off the foil and cut the fudge into squares. For extra fun, use Easter-themed cookie cutters to make festive shapes.
Notes
*This homemade Easter chocolate fudge can be stored in an airtight container at room temperature for up to one week. For longer preservation, wrap it tightly and freeze. Thaw in the refrigerator before serving.
Nutrition
(Approximate values per piece, based on 36 servings)
Calories: 131 kcal
This Easter, skip the store-bought and treat yourself and your loved ones to a batch of this unforgettable homemade chocolate fudge. It’s truly a celebration in every bite!
What are your favorite Easter treats to make or enjoy during the holiday season? Share your traditions in the comments below!