
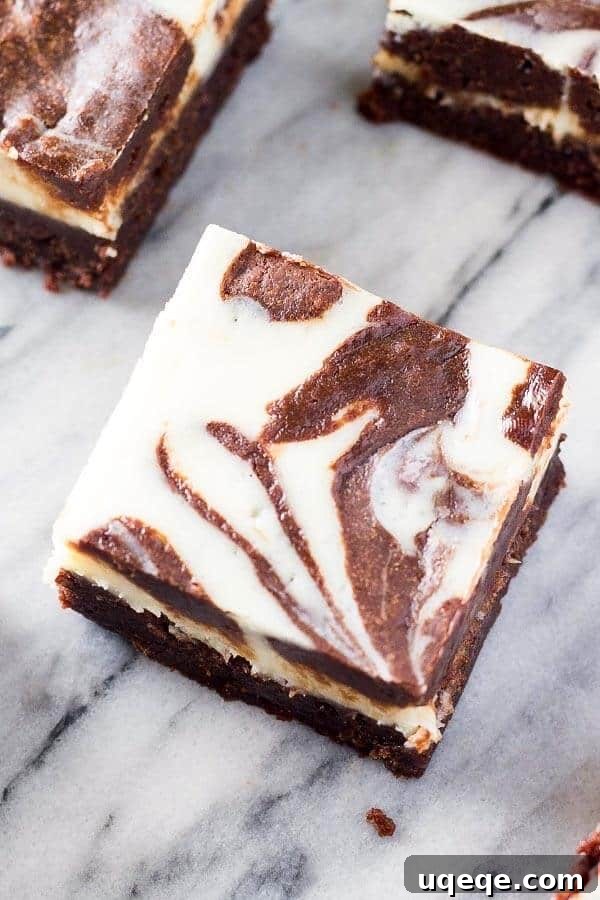
Decadent Cream Cheese Brownies: The Ultimate Fudgy Swirl Delight
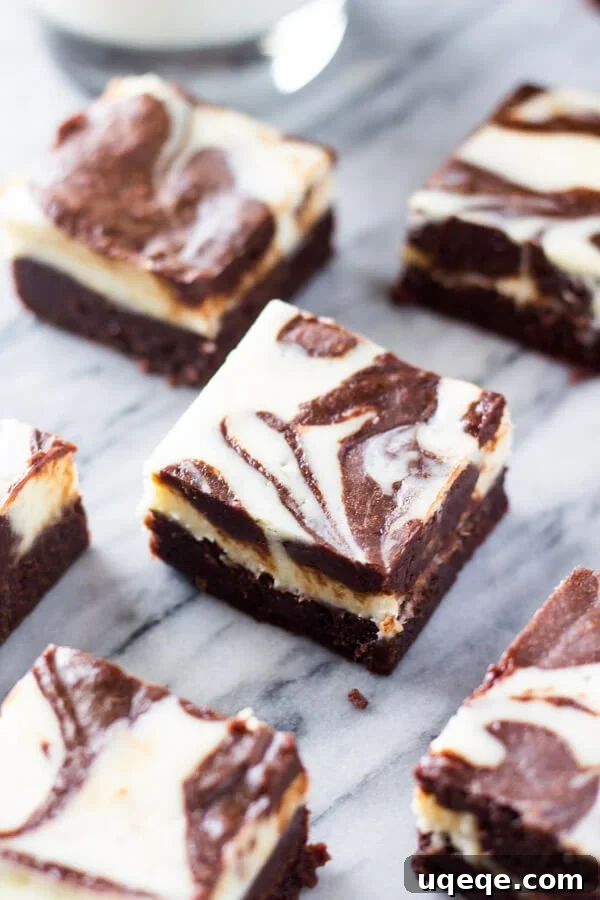
Prepare to be enchanted by these incredible Cream Cheese Brownies. They are the epitome of indulgence, combining the deep, rich flavor of fudgy chocolate brownies with the light, tangy creaminess of a classic cheesecake. The stunning swirl pattern on top makes them as visually appealing as they are delicious, ensuring they stand out at any gathering or satisfy that intense dessert craving. This recipe offers a perfect harmony of flavors and textures, proving that some combinations are simply meant to be.
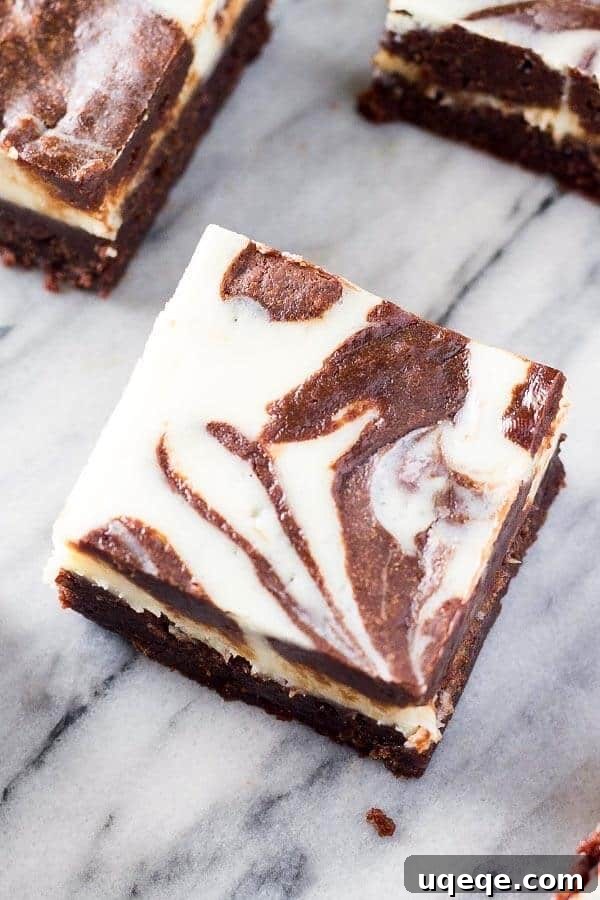
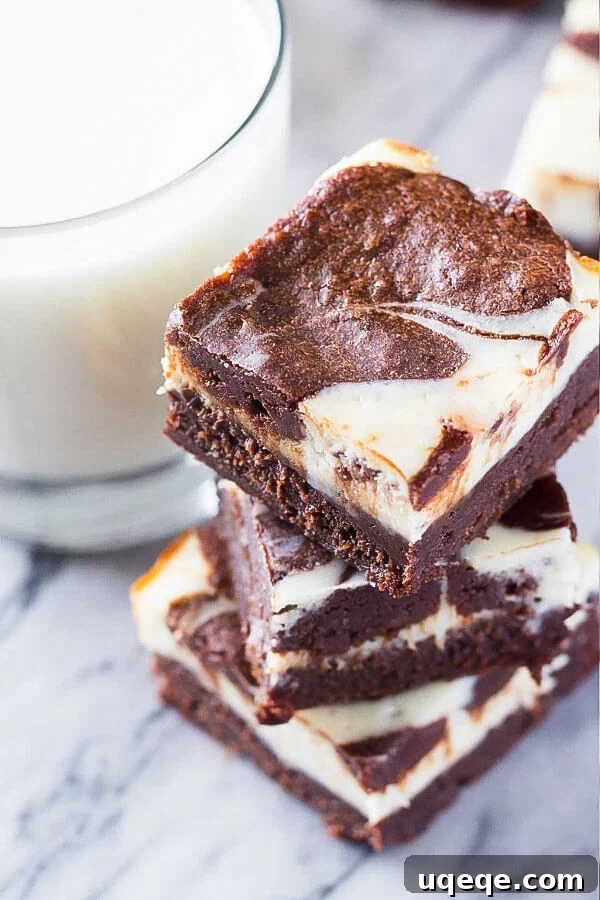
Merging two beloved desserts into one creates a masterpiece that is greater than the sum of its parts. The intense chocolate of the brownie layer is beautifully complemented by the subtle tang of the cheesecake, preventing the dessert from becoming overly sweet. Each bite delivers a delightful contrast: the dense, moist brownie meeting the smooth, airy cheesecake. This isn’t just a brownie; it’s an experience, elevated by its elegant appearance and complex flavor profile.
The Story Behind These Irresistible Cream Cheese Brownies
My journey to perfecting these cream cheese brownies began with a challenge – one born out of love, and a touch of competitive spirit. When I first mentioned to my fiancé that I was making cheesecake, his reaction was one of outright dislike. “Cheesecake? No thanks,” he said, much to my disbelief. How could anyone not love one of the most divine desserts ever created? I was genuinely surprised, and perhaps a little offended by his immediate dismissal.
After the initial shock wore off, a different emotion took over: determination. I saw it not as a setback, but as an opportunity. A challenge was accepted: I was going to change his mind about cheesecake, and I knew just the way to do it. Sometimes, to win someone over, you have to be a little clever. And what better way to introduce a cheesecake skeptic to its wonders than by cleverly disguising it within something universally adored – a fudgy, chocolate brownie?
These cream cheese brownies became my secret weapon. The familiar comfort of a rich brownie, with its deep chocolate notes, provides the perfect entry point. Then, subtly, comes the creamy, tangy swirl of cheesecake, offering a delightful surprise that slowly but surely won him over. It’s proof that a little culinary persuasion, especially when it involves chocolate and cheesecake, can conquer even the most stubborn palates. Since then, these brownies have become a cherished favorite, and our kitchen always smells wonderful when they’re baking.
Mastering the Art of Cream Cheese Brownies: A Step-by-Step Guide
Crafting these extraordinary brownies involves two distinct yet harmonious components: the rich brownie base and the creamy cheesecake swirl. Each layer plays a crucial role in achieving the perfect balance of flavor and texture. Follow these detailed steps to create your own batch of irresistible cream cheese brownies.
Creating the Fudgy Brownie Layer
- Melt Butter and Chocolate: In a heatproof bowl, combine 1/2 cup (113g) unsalted butter with 4 oz (113g) dark chocolate. For the best flavor, aim for dark chocolate with a cocoa content between 50-70%. Avoid bittersweet chocolate, as it can make the brownies too bitter, and semi-sweet might result in a less intense chocolate flavor. Melt them together gently over a double boiler or in a microwave using short 30-second bursts, stirring well after each interval, until the mixture is smooth and fully combined.
- Whisk in Sugar: Once the chocolate and butter are melted, whisk 1 cup (200g) of granulated sugar into the warm mixture until thoroughly incorporated. The sugar will dissolve slightly, contributing to the glossy texture of the brownies.
- Incorporate Eggs and Vanilla: Allow the chocolate mixture to cool slightly for 3-5 minutes before adding the eggs. This step is crucial to prevent the eggs from scrambling. Once cooled, whisk in 2 large eggs, one at a time, until just combined, followed by 1 teaspoon of vanilla extract. The eggs add richness and bind the batter, while vanilla enhances the overall flavor.
- Fold in Dry Ingredients: Gently fold in 1/2 cup (60g) of all-purpose flour and 1/4 teaspoon of salt. Use a rubber spatula or wooden spoon for this. Be careful not to overmix, as overworking the flour can lead to tough, dry brownies rather than the desired fudgy texture. Mix just until no streaks of flour remain.
Preparing the Smooth Cheesecake Layer
The cheesecake layer is wonderfully simple, requiring just three key ingredients to create its signature creamy texture and tangy taste.
- Beat Cream Cheese and Sugar: In a medium bowl, use an electric mixer to beat together 8 oz (226g) of full-fat, brick-style cream cheese with 1/3 cup (67g) of granulated sugar. Ensure your cream cheese is at room temperature before you begin; this is essential for achieving a lump-free, perfectly smooth cheesecake batter. Beat until light and fluffy, scraping down the sides of the bowl as needed.
- Add the Egg: Beat in 1 large egg until it is just incorporated. Again, do not overmix at this stage; overbeating can introduce too much air, which might cause the cheesecake layer to crack during baking.
Assembling and Swirling for a Beautiful Finish
Now comes the fun part: combining the layers and creating that mesmerizing swirl effect that makes these brownies so special.
- Prepare the Pan: Preheat your oven to 350°F (175°C). Line an 8×8 inch (20×20 cm) metal baking pan with parchment paper or aluminum foil, leaving an overhang on the sides. Lightly grease the paper/foil for easy removal later.
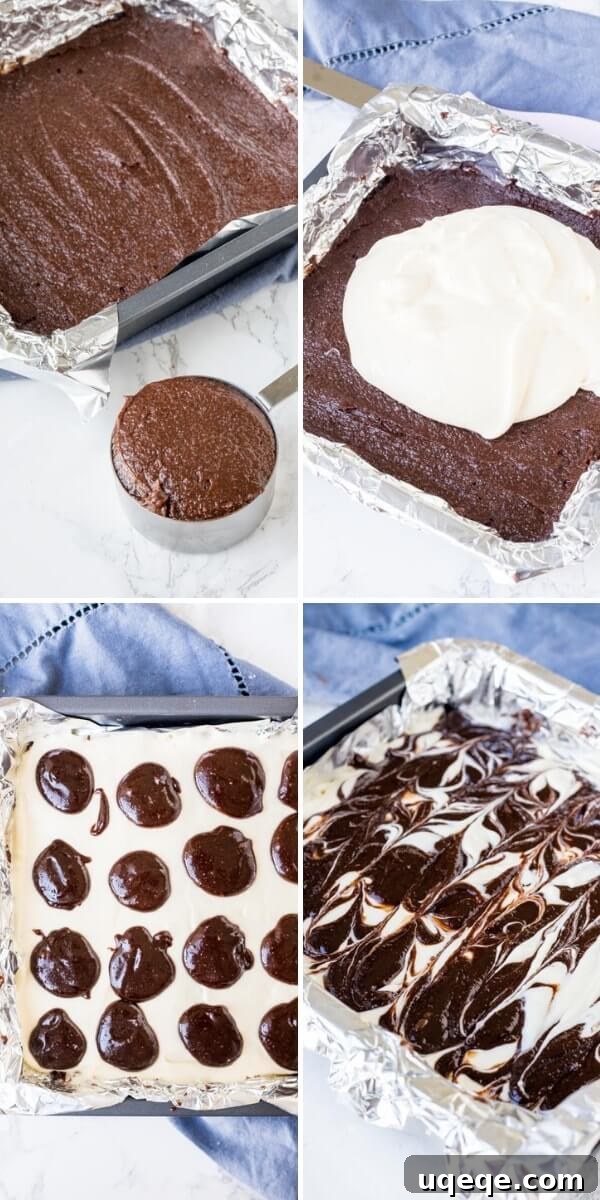
- Brownie Base: Reserve about 1/2 cup of the brownie batter in a separate bowl. Pour the remaining brownie mixture into your prepared pan and spread it evenly to cover the bottom.
- Cheesecake Top: Carefully pour the cheesecake batter over the brownie layer, gently spreading it with a spatula to create an even white surface.
- Add Reserved Brownie Batter: Take the reserved 1/2 cup of brownie batter and drop small spoonfuls evenly over the cheesecake layer. I find it easiest to create a grid pattern, such as 4 rows with 4 spoonfuls in each row, for consistent swirling.
- Create the Swirls: Using a toothpick, a thin skewer, or the tip of a small knife, gently swirl the batters together. Drag your tool through the cheesecake and brownie layers in S-shapes or figure-eights, being careful not to overmix, which would blend the colors too much. The goal is distinct, elegant swirls.
Baking Your Brownies to Perfection
With the layers assembled, your brownies are ready for the oven. They will bake for approximately 28-32 minutes in an oven preheated to 350°F (175°C). You’ll know they are done when the edges are set and a toothpick inserted into the center (avoiding a large chocolate chunk) comes out clean or with just a few moist crumbs attached. Be careful not to overbake, as this can lead to dry brownies.
The Secret to Flawless Cream Cheese Brownies: Chilling and Cutting
Patience is a virtue, especially when it comes to these cream cheese brownies. For truly perfect slices with clean edges and the best flavor, proper cooling and chilling are paramount. This step is non-negotiable for an optimal brownie experience.
Why Chilling is Crucial
After baking, it’s absolutely imperative that you cool the brownies completely at room temperature, then transfer them to the refrigerator to chill for at least 4 hours, or preferably overnight. Chilling allows the brownie and cheesecake layers to fully set and firm up. This not only prevents crumbling when cut but also significantly improves the overall flavor and texture. The chocolate flavor deepens, and the cheesecake becomes even creamier and more integrated with the brownie, creating a richer, more harmonious dessert.
Expert Tips for Cutting Brownies
Achieving clean, professional-looking slices is easy with the right technique:
- Always Chill: As mentioned, never attempt to cut warm or even room-temperature brownies if you want sharp edges. The colder they are, the cleaner your cuts will be.
- Use a Sharp, Thin Knife: A sharp chef’s knife or a long, thin slicing knife is ideal. Avoid using a butter knife or serrated knife, as they tend to tear the delicate layers.
- Clean Cuts, Not Saws: Press the knife straight down through the brownies in a single, decisive motion. Avoid sawing back and forth, as this will create messy edges and drag the cheesecake layer.
- Wipe Between Cuts: For immaculate edges, wipe your knife clean with a damp cloth or paper towel after each cut. This removes any sticky residue, ensuring every slice is pristine.
Frequently Asked Questions About Cream Cheese Brownies
- Can I make these cream cheese brownies in a 9×13 inch pan? Yes, absolutely! To adapt this recipe for a larger 9×13 inch (23×33 cm) pan, simply double all the ingredient quantities. When it comes to assembly, remember to reserve 1 cup of the brownie batter for swirling instead of 1/2 cup. The bake time will remain approximately the same, but always keep an eye on them and perform the toothpick test.
- Can I use a box mix brownie batter for this recipe? While technically possible, I generally do not recommend using a box brownie mix. Box mixes often have a different consistency than homemade batter, which can make it challenging to achieve distinct, beautiful swirls with the cheesecake layer. For the best results and the prettiest presentation, sticking to the homemade brownie batter is advised.
- Can I freeze cream cheese brownies? Yes, these brownies freeze beautifully! Once fully chilled and cut into squares, place them in a single layer on a baking sheet and freeze until firm (about 1-2 hours). Then, transfer the frozen brownies to an airtight container, separating layers with parchment paper, and freeze for up to 2-3 months. Thaw in the refrigerator overnight before serving.
- How do I ensure my cream cheese layer is lump-free? The key is using room temperature cream cheese. If it’s too cold, it won’t blend smoothly with the sugar and will result in lumps. Take your cream cheese out of the fridge at least an hour (or even two) before you plan to start mixing.
Variations and Customizations for Your Swirl Brownies
While these cream cheese brownies are perfect as is, they also lend themselves beautifully to various customizations. Feel free to experiment and make them truly your own!
- Nutty Crunch: Fold 1/2 cup of chopped walnuts or pecans into the brownie batter for an added textural element and nutty flavor.
- Chocolate Chip Delight: Sprinkle a handful of mini chocolate chips over the cheesecake layer before swirling for extra pockets of chocolate goodness.
- Espresso Kick: Add 1 teaspoon of instant espresso powder to the brownie batter to deepen the chocolate flavor without making it taste like coffee.
- Zesty Twist: For a brighter cheesecake flavor, add 1 teaspoon of lemon zest to the cream cheese mixture.
- Toppings Galore: Once cooled, drizzle with a simple chocolate ganache, a dusting of powdered sugar, or a sprinkle of flaky sea salt for an extra touch of gourmet elegance.
Storage and Make-Ahead Tips
These cream cheese brownies are fantastic for making ahead, and they store well, making them a convenient dessert option.
- Storage: Store any leftover brownies in an airtight container in the refrigerator for up to 4 days. The flavors actually develop and meld even further after a day or two, making them taste even better!
- Make-Ahead: This is truly the perfect recipe to prepare the day before you plan to serve them. Since they require a minimum of 4 hours (and ideally overnight) of chilling, baking them the evening before an event means they’ll be perfectly set and ready to cut and serve when you need them.
Other Brownie Favorites You’ll Love
If you’ve enjoyed these incredible cream cheese brownies, be sure to explore some of my other beloved brownie recipes for more decadent indulgence:
- Peanut Butter Brownies: A classic combination of chocolate and peanut butter in a fudgy square.
- Brownie Cheesecake: For those who love the layered experience of a full cheesecake on a brownie base.
- White Chocolate Brownies: A lighter, sweet alternative to traditional dark chocolate brownies.
5 from 3 votes
Cream Cheese Brownies Recipe
Fiona Dowling
These cream cheese brownies are rich and fudgy with a beautiful swirl of tangy cheesecake. The contrasting textures and flavors create a truly decadent and satisfying dessert.
20 mins
50 mins
4 hrs
1 hr 10 mins
16 brownies
Rate Recipe
Print Recipe
Ingredients
For the Brownie Layer
- 1/2 cup unsalted butter
- 4 oz dark chocolate*, (I used 70%)
- 1 cup granulated sugar
- 2 large eggs**
- 1 teaspoon vanilla extract
- 1/4 teaspoon salt
- 1/2 cup all purpose flour, (spooned & leveled)
For the Cheesecake Layer
- 8 oz cream cheese**
- 1/3 cup granulated sugar
- 1 large egg**
- 1/4 teaspoon salt
Instructions
-
Preheat the oven to 350°F (175°C). Line an 8×8 inch (20×20 cm) metal pan with parchment paper or aluminum foil, leaving an overhang on the sides. Lightly grease the paper/foil.
Brownie Layer
-
In a large microwave-safe bowl, melt together the butter and dark chocolate in short 30-second bursts, stirring vigorously between each until entirely melted and smooth.
-
Whisk in the granulated sugar until well combined.
-
Allow the mixture to cool for 3-5 minutes. Then, whisk in the eggs and vanilla extract until just incorporated. Ensure the mixture is not too hot to prevent scrambling the eggs.
-
Gently fold in the all-purpose flour and salt using a rubber spatula or wooden spoon, mixing just until no dry streaks of flour remain. Avoid overmixing.
Cheesecake Layer
-
In a medium bowl, beat the room temperature cream cheese and sugar together using an electric mixer until the mixture is smooth and completely lump-free.
-
Beat in the large egg until it is just incorporated into the cream cheese mixture. Do not overmix.
Swirling & Baking
-
Reserve 1/2 cup of the brownie batter. Spoon the rest of the brownie batter into the prepared pan and smooth the top evenly.
-
Carefully pour the cheesecake batter over the brownie layer, spreading it gently to cover the surface.
-
Drop small spoonfuls of the reserved brownie batter on top of the cheesecake layer. I recommend arranging them in a grid, such as 4 rows with 4 spoonfuls in each row.
-
Using a toothpick, a thin skewer, or a sharp, thin knife, gently swirl the brownie and cheesecake batters together to create an attractive marbled pattern. Be careful not to overmix.
-
Bake for 28-32 minutes in the preheated oven, or until the edges appear set and the center looks just slightly jiggly. A toothpick inserted into the center should come out clean or with only a few moist crumbs attached.
-
Cool the brownies fully at room temperature. Then, cover the pan and refrigerate for at least 4 hours, or ideally overnight, to allow them to set completely and for flavors to develop.
-
When ready to serve, remove the brownies from the fridge. Use the parchment paper/foil overhang to lift them out of the pan. Place on a cutting board and slice into squares using a sharp, clean knife, wiping the blade after each cut for clean edges.
Notes
*I highly recommend using dark chocolate with a cocoa content between 50%-70% for a balanced chocolate flavor. Using semi-sweet chocolate will result in sweeter brownies with less chocolate intensity. Avoid bittersweet chocolate, as it can make the brownies too bitter.
**Ensure all dairy ingredients (eggs, cream cheese) are at room temperature. Take them out of the fridge at least 20 minutes before you start mixing for the best results, ensuring a smooth, lump-free batter.
Store any leftover brownies in an airtight container in the fridge for up to 4 days.
Make Ahead Tips: This recipe is perfect for preparing the day before, or the morning before you plan to serve them. The essential chilling time means they’ll be perfectly set and ready to enjoy when you need them.
Nutrition Information (per brownie)
Calories:
246kcal