

These irresistibly soft gingerbread cookies are an absolute essential for making your holidays brighter. Each cookie is beautifully spiced, boasting a delightfully soft and chewy center, and an authentic gingerbread flavor that truly captures the spirit of the season. Prepare to fall in love with what might just be the best gingerbread men you’ve ever tasted!

The holiday season isn’t complete without the warm, inviting aroma of gingerbread wafting through the kitchen. For years, baking gingerbread cookies has been a cherished Christmas tradition in my home. So, I was quite surprised to learn that many people don’t share the same enthusiasm for them. After a little informal culinary investigation, a common complaint emerged: most gingerbread cookies are simply too hard.
Today, I’m delighted to put an end to that age-old gingerbread dilemma! I’m sharing my absolute favorite recipe for soft, chewy gingerbread cookies. This recipe guarantees a moist, tender texture and a rich, deep brown sugar and molasses flavor that is utterly delicious. Plus, to make your holiday baking even more exciting, I’m including instructions for two distinct types of icing, perfect for decorating your festive creations. Whether you prefer intricate designs or a creamy finish, these gingerbread cookies are destined to become a new holiday favorite.

Mastering Soft Gingerbread Cookies: A Detailed Guide
Let’s dive into the specifics of crafting these perfect soft gingerbread cookies. If you’re eager to jump straight to the recipe, feel free to scroll down. However, if you appreciate the science behind baking and want to ensure your gingerbread turns out flawlessly every time, I highly recommend continuing to read through these detailed tips and tricks.
The Perfect Blend: Achieving Optimal Spice and Flour Ratios
Our journey to soft gingerbread begins with the precise combination of dry ingredients: all-purpose flour, fragrant ginger, warm cinnamon, earthy nutmeg, pungent cloves, reliable baking soda, and a touch of salt. The secret to that iconic gingerbread flavor lies in the right ratio of these spices. Too little, and your cookies will lack their characteristic warmth; too much, and they can become overpowering. Equally crucial is the flour measurement. An excess of flour leads to dry, crumbly cookies, while too little results in a sticky dough that’s nearly impossible to roll and cut. To measure your flour accurately for perfect results:
- **Whisk it First:** Before scooping, whisk the flour in its container to aerate it and break up any clumps.
- **Spoon it into a Dry Measuring Cup:** Gently spoon the flour into your measuring cup until it overflows. Avoid packing it down.
- **Level Off the Top:** Use the straight edge of a knife or an offset spatula to level off the excess flour, ensuring an accurate measure.
- **For Ultimate Accuracy, Use a Kitchen Scale:** 3 cups of all-purpose flour should weigh approximately 390 grams. This method eliminates variability and is highly recommended for consistent baking outcomes.
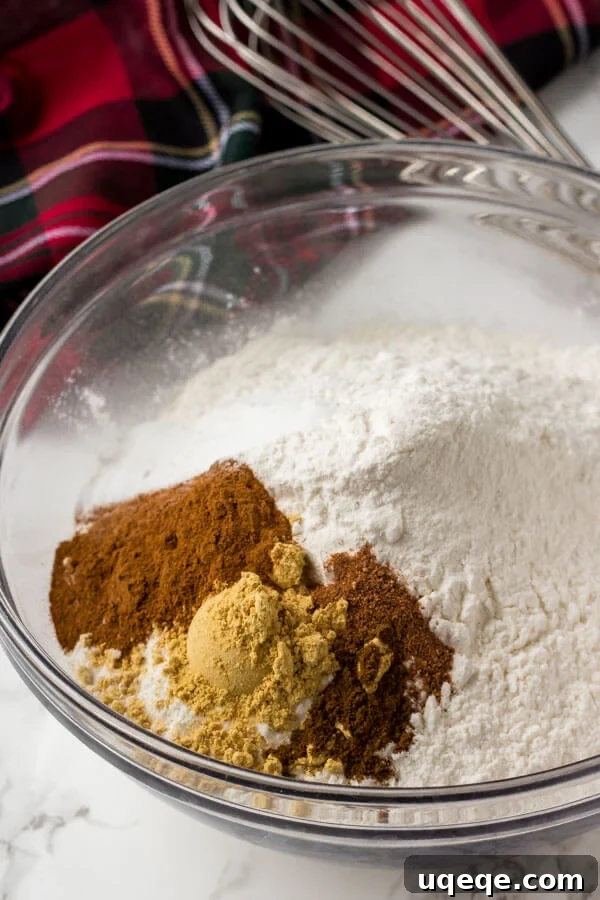
Wet Ingredients: Building Flavor and Chewy Texture
In a separate, large bowl, we’ll cream together the butter and sugar. For this recipe, we exclusively use brown sugar, and for good reason. Brown sugar not only imparts a rich, delicious caramel flavor but also contributes significantly to the cookies’ desirable chewiness due to its higher moisture content compared to white sugar. After creaming, an egg is mixed in for binding, followed by a splash of vanilla extract to enhance the overall sweetness. Finally, molasses is incorporated. It’s important to use **unsulfured molasses** for baking, as sulfured molasses can have an overly strong and sometimes bitter flavor that can detract from the delicate balance of spices. Unsulfured molasses provides that deep, signature gingerbread complexity without being overwhelming.
Once the wet ingredients are well combined, gradually mix the dry spice-flour mixture into the molasses mixture, about half at a time. This gentle incorporation ensures that the dough remains tender and prevents overmixing, which can lead to tough cookies.
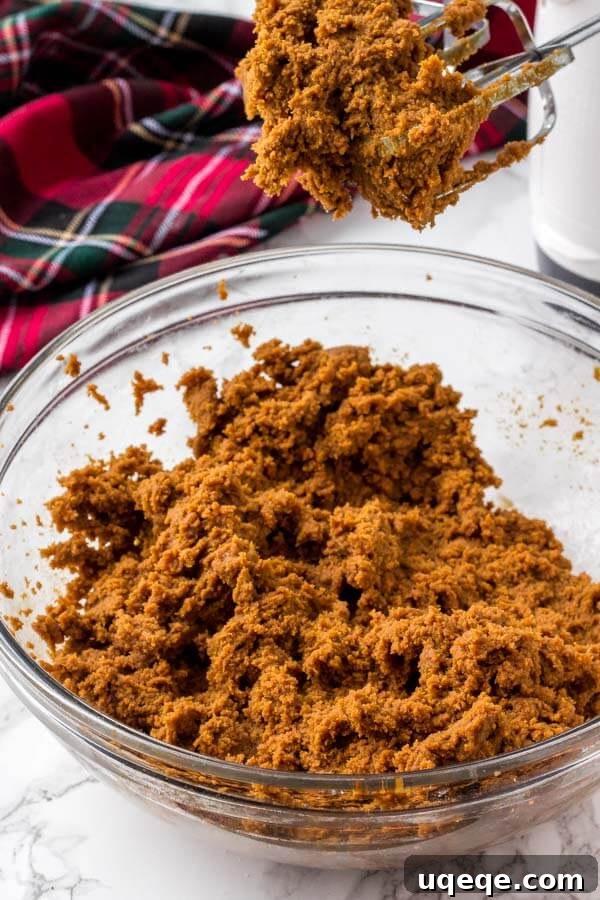
The Crucial Step: Chilling Your Gingerbread Dough
After preparing the dough, it is absolutely essential to **chill it for at least 4 hours**, or ideally overnight, before attempting to roll it out and cut shapes. Skipping this step will result in a dough that is far too sticky and difficult to handle, making successful cookie cutting nearly impossible. Proper chilling firms up the butter in the dough, preventing the cookies from spreading too much during baking and helping them retain their crisp edges and distinct shapes. To prepare for chilling, divide the dough into two equal pieces. Form each portion into a round, flat disc shape, wrap them tightly in plastic wrap, and then place them in the refrigerator.
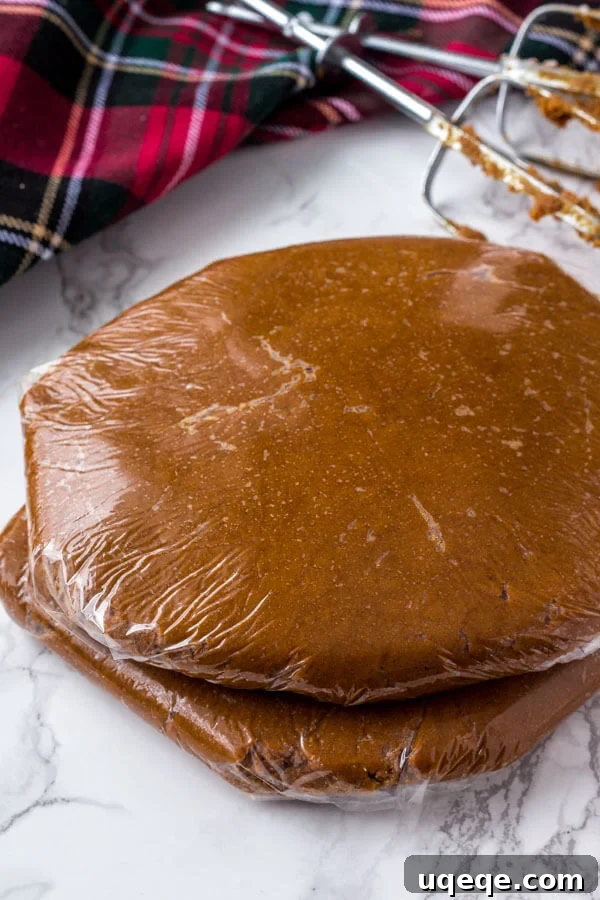
Rolling and Cutting for Perfect Gingerbread Shapes
When you’re ready to bake your beautiful gingerbread cookies, work with one chilled piece of dough at a time, keeping the other refrigerated. It’s also helpful to let the dough sit at room temperature for about 10 minutes to soften slightly, making it easier to roll without cracking, but not so long that it becomes sticky again. Always remember to flour generously:
- **The Countertop:** Lightly dust your clean kitchen counter with flour to prevent the dough from sticking.
- **Your Rolling Pin:** Give your rolling pin a good dusting of flour. You may need to re-flour it periodically as you roll to maintain a non-stick surface.
- **The Dough Itself:** Before rolling, sprinkle a light layer of flour on both the top and bottom of the dough disc. This creates a barrier, ensuring smooth rolling.
- **Your Cookie Cutters:** Dip your cookie cutters into flour before each use. This prevents the dough from adhering to the cutter and helps achieve clean, precise shapes.
Roll the dough to an even thickness of about 1/8 to 1/4 inch. This uniform thickness is key to ensuring all your cookies bake evenly. Once cut, carefully transfer the cookie shapes to a baking sheet lined with parchment paper.
Baking for Optimal Softness: The Key to a Chewy Center
The cookies will bake on a lined cookie sheet in a preheated oven for approximately 7-9 minutes. For truly soft gingerbread cookies, the timing is critical. You want the tops of the cookies to be just set – they shouldn’t look wet, but they also shouldn’t be browned or crispy. The edges might be very lightly golden, but the center should still feel slightly soft to the touch. They will continue to firm up as they cool on the baking sheet. Overbaking is the primary culprit behind hard gingerbread, so watch them closely!
Gingerbread Cookie Icing: Two Delicious Options

Royal Icing: For Classic Shine and Intricate Designs
Traditionally, gingerbread cookies are adorned with royal icing. This classic icing is perfect for decorating because it dries to a beautiful, hard, glossy finish and allows for incredibly intricate and detailed designs. The result is cookies with a perfectly polished top, ideal for creating festive patterns, delicate outlines, or even edible artwork.
Traditionally, royal icing is made with raw egg whites. However, if you’re uncomfortable with raw eggs, an excellent and safe alternative is meringue powder. Meringue powder can often be found at craft stores that carry baking equipment, specialty baking shops, or even in the baking aisle of larger supermarkets.
Buttercream Icing: For Creaminess and Ease
While royal icing offers stunning visual appeal, it is very sweet and, by nature, not creamy. For those who prioritize a rich, creamy texture over perfect, crisp lines in their cookie decorating, I’ve also included a recipe for a delightful buttercream icing. This option is wonderfully smooth and velvety, making it a fantastic choice if you’re all about creaminess and a softer bite. It’s also an easier and quicker alternative if you’d prefer to avoid working with egg whites or meringue powder altogether. For the photos accompanying this recipe, I used royal icing to achieve those classic, defined decorations.
These soft gingerbread cookies, whether simply glazed or elaborately decorated, are truly perfect for Santa’s plate and a delightful treat for everyone else. They embody such a delicious, comforting gingerbread flavor, with the rich notes of brown sugar and molasses, and a symphony of warm spices that instantly evoke the magic of Christmas. Baking them is not just about making cookies; it’s about creating memories and filling your home with holiday cheer.

Looking for more classic Christmas cookie recipes to complete your holiday spread? Try these other irresistible favorites:
- Soft Batch Sugar Cookies
- Chewy Ginger Molasses Cookies
- Melt-in-Your-Mouth Whipped Shortbread
Soft Gingerbread Cookies Recipe

Soft Gingerbread Cookies
Fiona Dowling
45 minutes
10 minutes
4 hours
55 minutes
35 cookies*
Rate Recipe
Print Recipe
Ingredients
Gingerbread Cookies
- 3 cups all-purpose flour
- 2 teaspoons ginger powder
- 1 teaspoon cinnamon
- 1/4 teaspoon nutmeg
- 1/4 teaspoon ground cloves
- 3/4 teaspoon baking soda
- 1/4 teaspoon salt
- 1/2 cup unsalted butter, softened
- 2/3 cup brown sugar, packed
- 1 large egg
- 1 teaspoon vanilla extract
- 2/3 cup molasses, unsulfured
Royal Icing
- 2 large egg whites, or 3 tablespoons meringue powder & 1/4 cup water
- 1 teaspoon fresh lemon juice
- 3-4 cups powdered sugar
Buttercream Icing
- 1/2 cup unsalted butter, softened
- 2 cups powdered sugar, sifted
- 1 teaspoon vanilla extract
- 1-2 tablespoons milk or cream
Instructions
Gingerbread Cookies
-
In a medium bowl, whisk together the flour, ginger, cinnamon, nutmeg, cloves, baking soda, and salt until well combined. Set aside.
-
In a large bowl, using an electric mixer, beat together the softened unsalted butter and packed brown sugar until light and fluffy, about 2 minutes.
-
Beat in the large egg and vanilla extract until fully incorporated. Then, mix in the unsulfured molasses until the mixture is smooth.
-
With the mixer on low speed, gradually add the whisked flour mixture to the butter mixture, about half at a time, mixing until just combined and no dry streaks remain. Be careful not to overmix.
-
Divide the dough into 2 equal pieces. Form each into a round, flat disc shape, and wrap each tightly in plastic wrap. Chill in the fridge for at least 4 hours, or preferably overnight. This step is crucial for easy rolling and preventing spread.
-
When ready to bake, preheat your oven to 350°F (175°C) and line cookie sheets with parchment paper.
-
Take one disc of dough out of the fridge at a time to work with. Let it warm up for about 10 minutes at room temperature to make it more pliable.
-
Lightly flour your kitchen counter and rolling pin. Unwrap the dough disc and sprinkle flour on both sides. Roll out the dough to an even thickness of about 1/8 to 1/4 inch. Cut into your desired shapes using cookie cutters, dipping cutters in flour between cuts.
-
Carefully transfer the cut cookies to the prepared baking sheets. Bake for 8-10 minutes, or until the tops of the cookies look just set and the edges are very lightly golden. Do not overbake for soft centers.
-
Remove from oven and let cool on the baking sheet for 5 minutes before transferring to a wire rack to cool completely. Repeat with the remaining dough, being careful not to re-roll dough scraps too many times, as this can make the cookies tough.
Royal Icing
-
If using egg whites: In a clean, dry bowl, beat the egg whites with an electric mixer until frothy. If using meringue powder: Whisk meringue powder with 1/4 cup water until dissolved.
-
Add the lemon juice and 3 cups of powdered sugar to the bowl. If using meringue powder, add it now.
-
Beat on medium-high speed for a full 5 minutes, or until stiff peaks form and the icing is glossy. Add a little more powdered sugar for a thicker consistency or a few drops of water for a thinner consistency, as needed.
-
Transfer to a piping bag with a fine tip and decorate the cooled cookies as desired. Allow icing to dry completely before stacking or storing.
Buttercream Icing
-
In a medium bowl, beat the softened unsalted butter with an electric mixer until it’s smooth and creamy.
-
Add in the vanilla extract, then gradually beat in the sifted powdered sugar about 1/2 cup at a time until the desired sweetness and consistency are reached.
-
Mix in the milk or cream, 1 tablespoon at a time, until the desired piping or spreading consistency is reached. Add a little more powdered sugar if the icing becomes too thin.
-
Transfer to a piping bag to decorate your cooled cookies with festive designs, or simply spread with a knife for a smooth, creamy finish.