
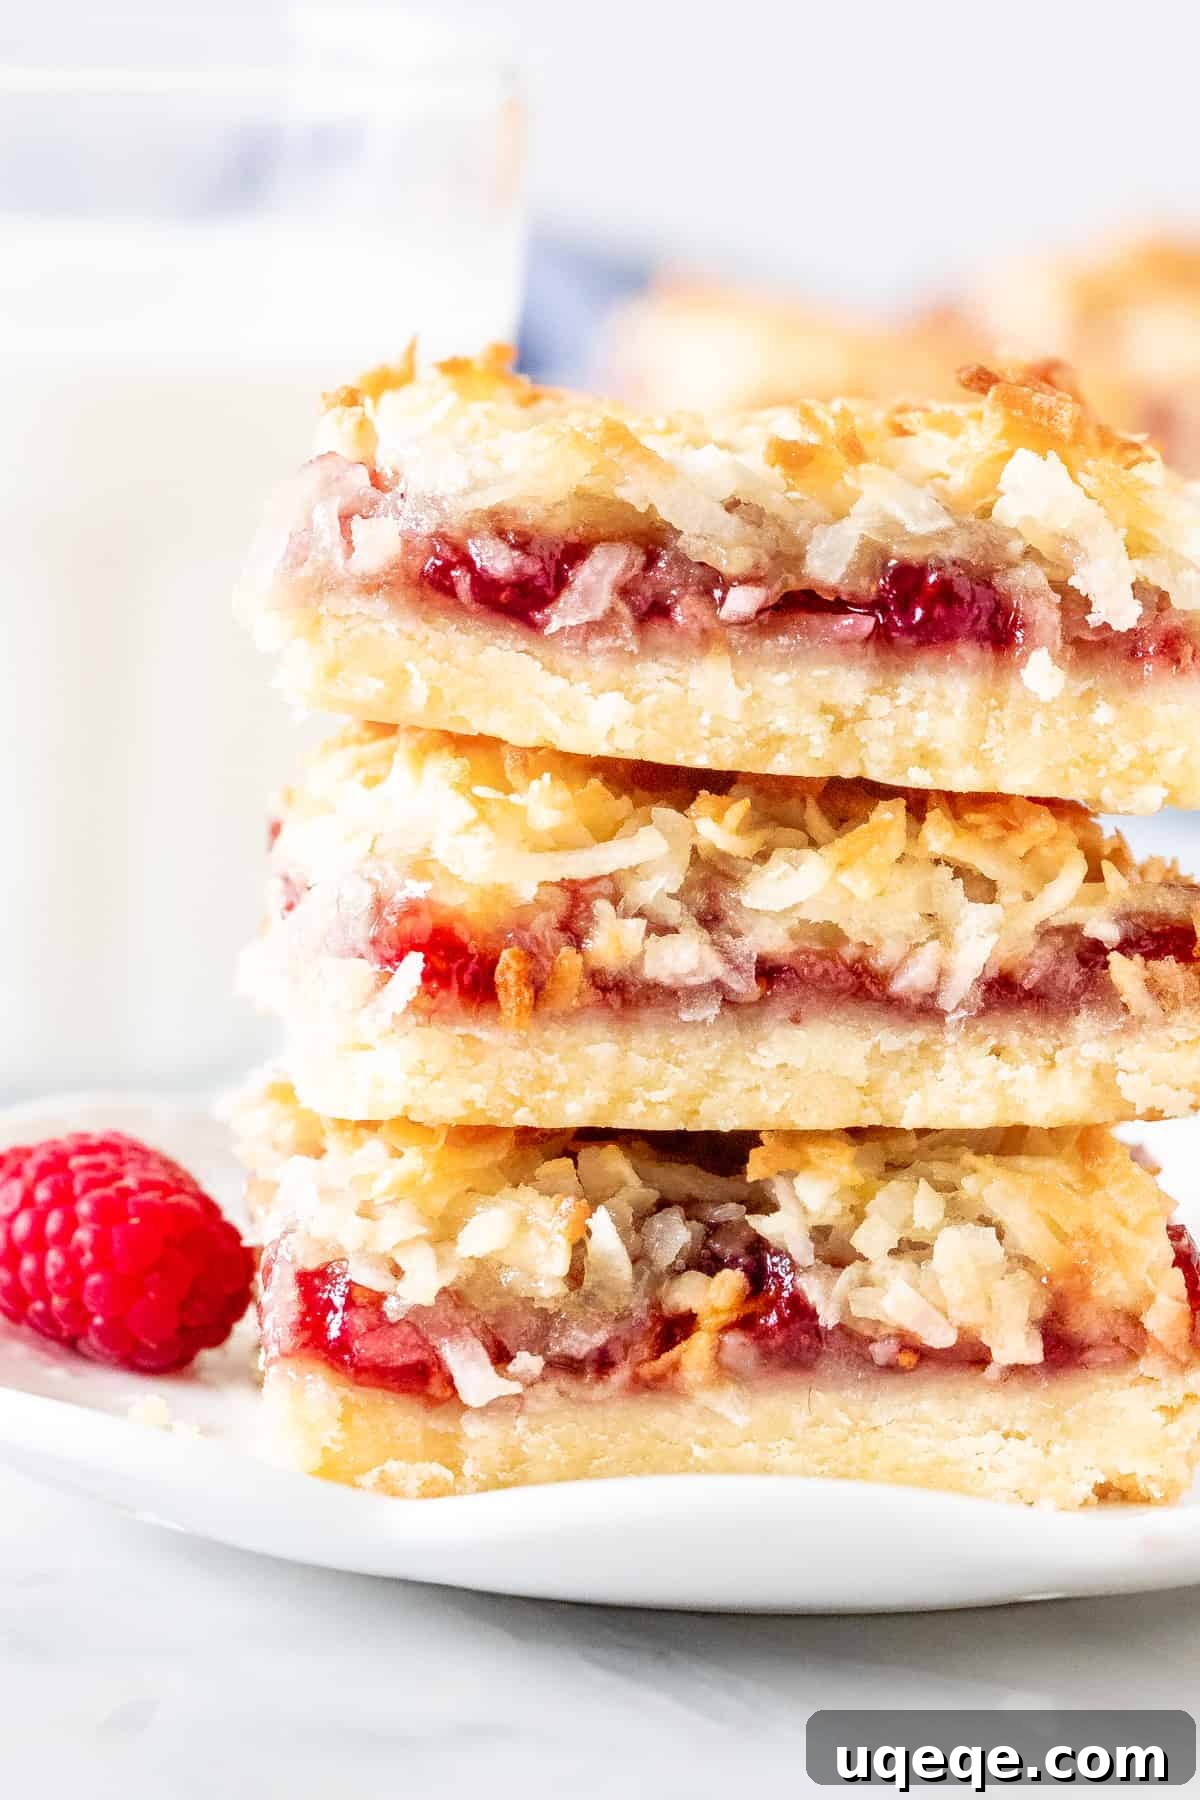
These delightful Raspberry Coconut Bars, also affectionately known as Raspberry Coconut Slice, offer a perfect harmony of textures and flavors. They feature a rich, buttery shortbread base, generously topped with a layer of sweet and tart raspberry jam, and finished with an irresistible, chewy coconut macaroon topping. This old-fashioned recipe is renowned for its simplicity, making it an ideal choice for bakers of all skill levels, and an absolute dream for anyone who adores the sweet, tropical taste of coconut. These bars are not just a dessert; they’re a nostalgic journey, a comfort food that brings back cherished memories with every bite.
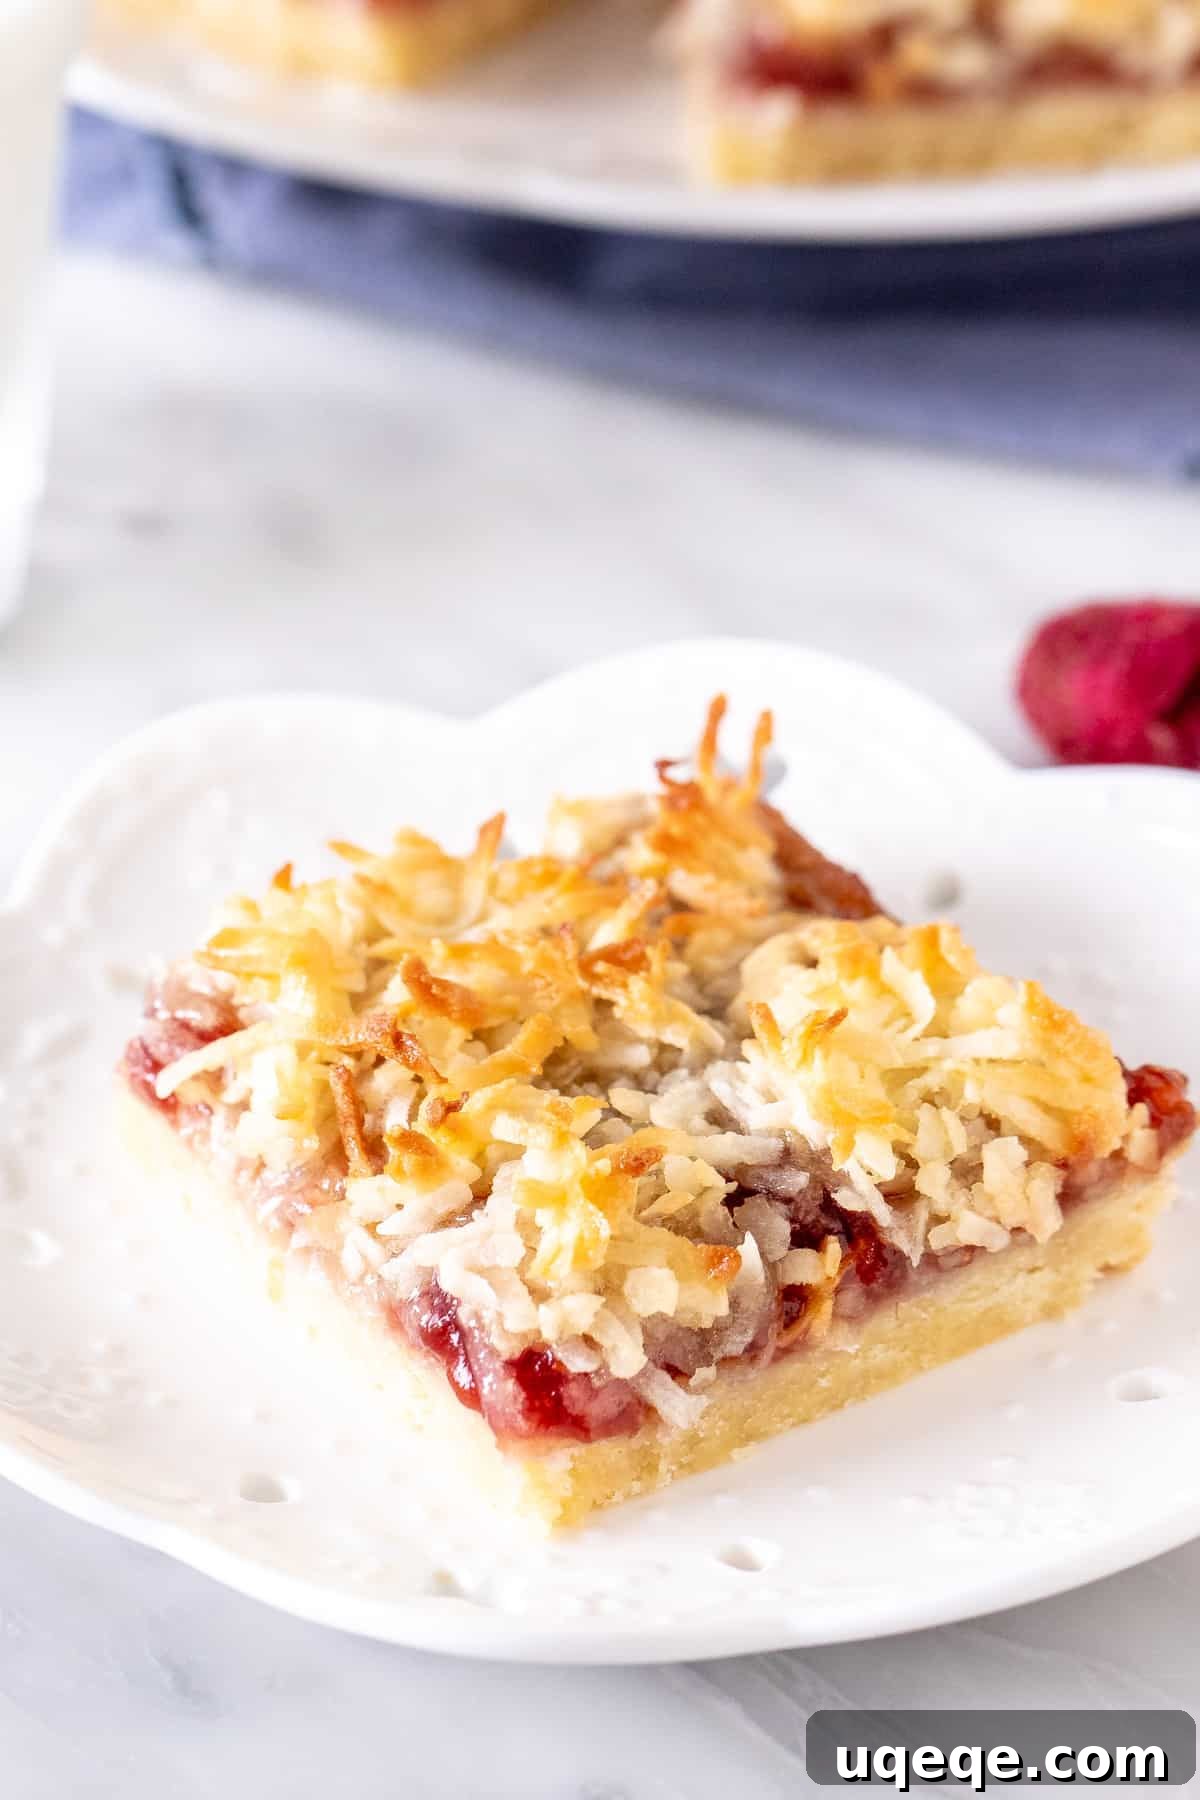
For many, these classic raspberry coconut bars evoke a sense of heartwarming nostalgia. I fondly remember my aunt preparing them every Christmas, filling her kitchen with an enticing aroma that signaled the start of festive celebrations. Upon moving to Brisbane, I discovered their immense popularity extends across Australia, where they are lovingly referred to as a “raspberry coconut slice.” Regardless of the name, the essence remains the same: a thick, tender shortbread crust, a vibrant burst of raspberry jam, and a crowning layer of sweetened, chewy coconut – a component I personally find utterly irresistible. This recipe consistently delivers on its promise of a simple yet profoundly satisfying dessert, making it a perfect addition to any baking repertoire.
The Anatomy of a Perfect Raspberry Coconut Bar: Layers of Delight
Crafting these delectable bars is a straightforward process, relying on fundamental baking principles and simple, readily available ingredients. Each layer plays a crucial role in building the bar’s unique character, contributing to its harmonious blend of textures and tastes. By understanding the purpose of each step and ingredient, you can ensure every bite is as delicious and perfectly balanced as the last.
The Buttery Shortbread Base: The Foundation of Rich Flavor
The journey to creating these irresistible bars begins with a truly exceptional shortbread-style base. Much like any traditional shortbread, its magic lies in the simplicity and quality of its core ingredients: butter, granulated sugar, and all-purpose flour. To achieve that signature melt-in-your-mouth tenderness while ensuring a soft, yet sturdy, crumbly texture, we incorporate a touch of cornstarch. This often-overlooked ingredient works wonders, preventing the base from becoming too dense or hard, ensuring it remains delicate under the subsequent layers.
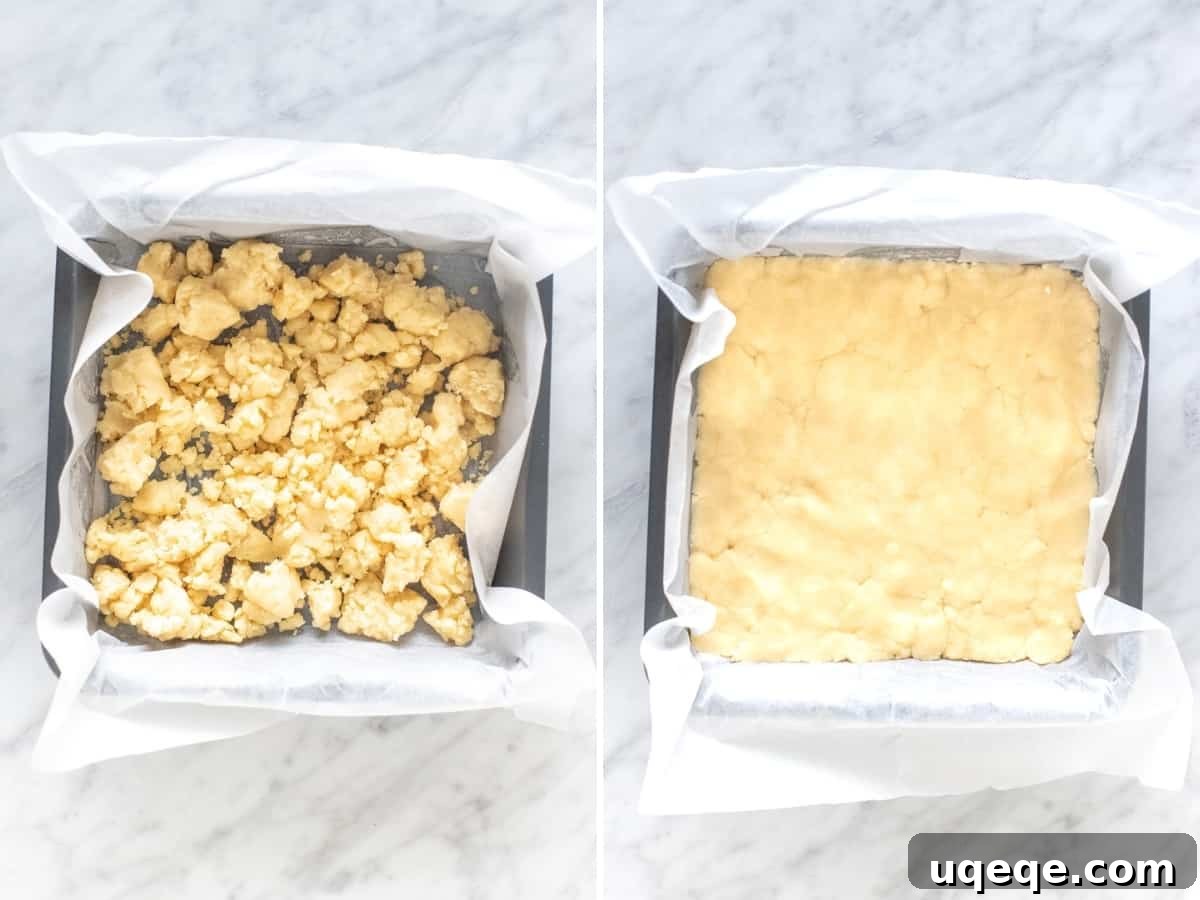
You’ll combine these few ingredients into a delightful, rich dough that comes together with ease. This mixture is then pressed firmly and evenly into the bottom of an 8×8 inch (20×20 cm) baking pan. Lining your pan with parchment paper, leaving a slight overhang around the sides, is a small but mighty trick that makes removing the cooled bars a breeze – a definite time-saver and stress-reducer! Once pressed, this base layer takes a solo trip to a preheated oven, baking for approximately 20 minutes, or until it achieves a delicate golden hue around the edges and appears set to the touch. This crucial pre-baking step is absolutely essential; it ensures the shortbread bakes through thoroughly, developing its structural integrity and delightful crumb, thereby preventing any sogginess or raw spots once the additional, moisture-rich layers are added. Skipping this step would compromise the integrity and delightful texture of your finished bars, resulting in a less-than-perfect treat.
The Vibrant Raspberry Jam Layer: A Burst of Fruity Sweetness
Once your shortbread base emerges from the oven, fragrant and perfectly set, it’s time for the next exciting layer: the raspberry jam. This middle layer introduces a wonderful contrast of sweet and tart, cutting through the richness of the butter and perfectly complementing the tropical notes of coconut. I’ve found that precisely 3/4 cup of good quality raspberry jam offers the ideal balance, providing a generous yet not overpowering fruit layer that brightens the entire bar. However, if you’re a true jam enthusiast and prefer an extra-thick, luscious layer, feel free to increase the amount to a full cup for an even more pronounced fruitiness. For context, a standard 10.5 ounce (300 gram) jar of raspberry jam will typically yield close to this quantity, so you might use almost the entire jar to achieve the desired fruit explosion.
When spreading the jam, take care to distribute it evenly across the warm shortbread. A gentle touch ensures you don’t disturb the delicate, freshly baked base. The residual warmth of the shortbread will slightly soften the jam, making it easier to spread smoothly and uniformly, creating a seamless and inviting foundation for the final topping. This careful application ensures that every slice boasts a consistent, vibrant ribbon of raspberry goodness.
The Chewy Coconut Macaroon Topping: The Crowning Glory
Now for what many consider the best part, and undoubtedly my personal favorite: the wonderfully chewy coconut topping. This layer transforms these ordinary bars into something truly special, reminiscent of a delicate, golden-brown coconut macaroon. To create this luxurious and textural topping, you’ll whisk together one large egg, an additional large egg white (the yolk can be discarded or saved for another culinary endeavor), and three tablespoons of granulated sugar. This precise combination provides the perfect binding and sweetness, ensuring a cohesive and flavorful mixture for the star ingredient: 1 2/3 cups of sweetened shredded coconut. These specific proportions are meticulously balanced to achieve a topping that is thick, delightfully chewy, and boasts just the right level of sweetness without being cloying, allowing the natural coconut flavor to shine through.
I highly recommend using shredded coconut over finely desiccated coconut for this recipe. The shredded variety provides significantly more texture, lending a beautiful, almost rustic appearance to the baked bars. As it bakes, the coconut shreds toast to a lovely golden brown, developing a slightly crispy exterior and an incredibly satisfying chew. This process enhances both the visual appeal and the deep, rich, satisfying flavor of the coconut. Once mixed, this rich coconut layer is carefully applied over the vibrant raspberry jam.
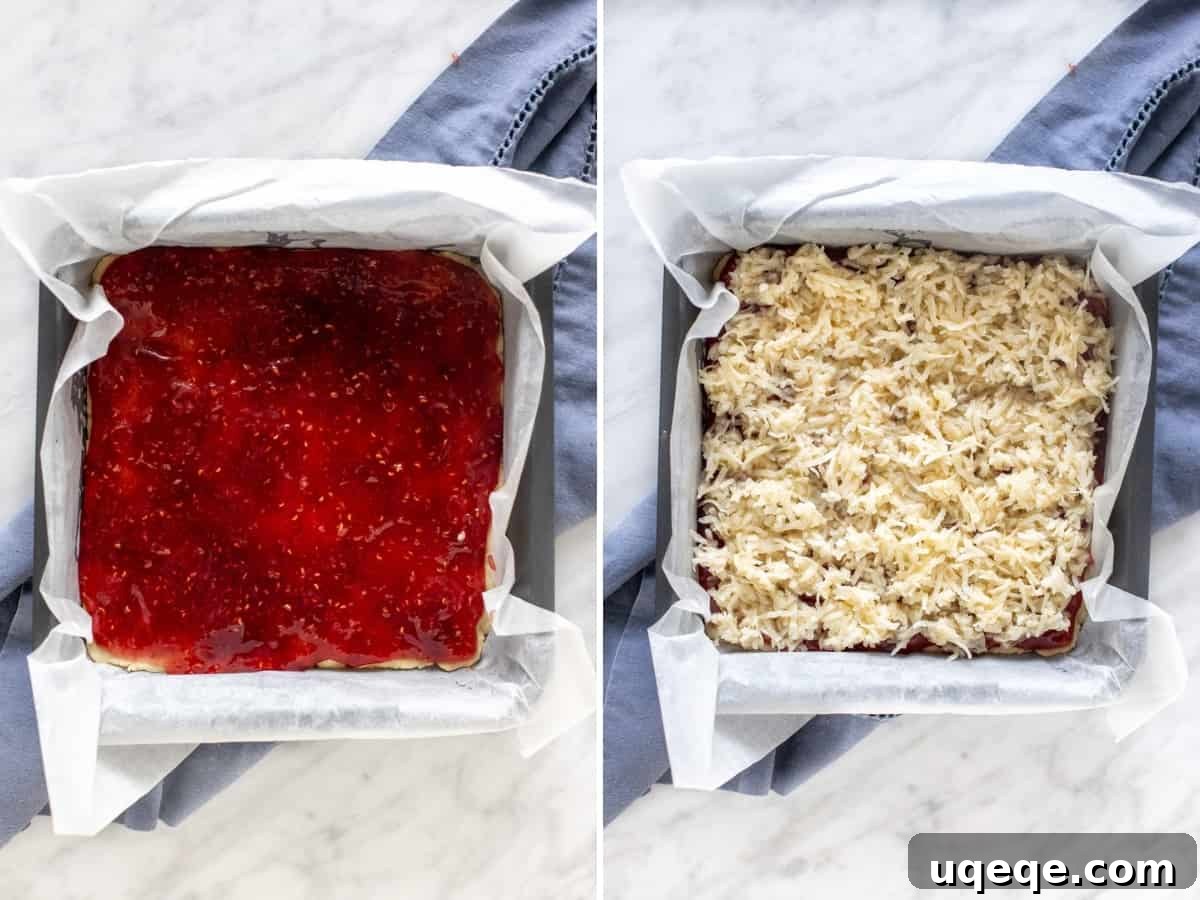
Pro Tip for a Perfect Topping Application: Spreading the sticky coconut mixture evenly over the jam can sometimes be a bit tricky, as the jam layer is still somewhat soft and prone to shifting. Instead of attempting to dump the entire amount onto the jam and then spread it, which can easily push the jam to the pan’s edges and create an uneven distribution, try this technique: spoon small, dollop-sized amounts of the coconut mixture evenly over the entire jam layer first. Once distributed, gently and carefully spread each dollop outwards until you have an even layer covering the jam completely, or mostly. This method significantly helps prevent the jam from shifting and mixing with the coconut, ensuring a beautifully consistent layer in your finished bars.
The Final Bake and Patient Cooling: Keys to Success
With all the delightful layers meticulously assembled, the bars are ready to return to the oven for their final bake. This second baking phase typically lasts about 30 to 35 minutes, or until the coconut topping transforms into a gorgeous, inviting golden brown. The sweet, tropical aroma filling your kitchen at this stage will be absolutely divine and truly hard to resist! Once baked to perfection, remove the pan from the oven. This is where patience truly becomes a virtue, and it’s a critical step that cannot be rushed.
It is absolutely paramount to allow the raspberry coconut bars to cool *completely* in the pan before attempting to slice them. This cooling period may take anywhere from 2 to 3 hours, or even longer depending on the ambient temperature of your kitchen. Rushing this step will almost certainly result in crumbling, uneven bars and a messy experience. The shortbread needs ample time to firm up and set its structure, and the jam and coconut layers need to cool and solidify properly, allowing them to bind together. A perfectly cooled bar will slice cleanly and effortlessly, revealing its beautiful, distinct layers in a visually appealing cross-section.
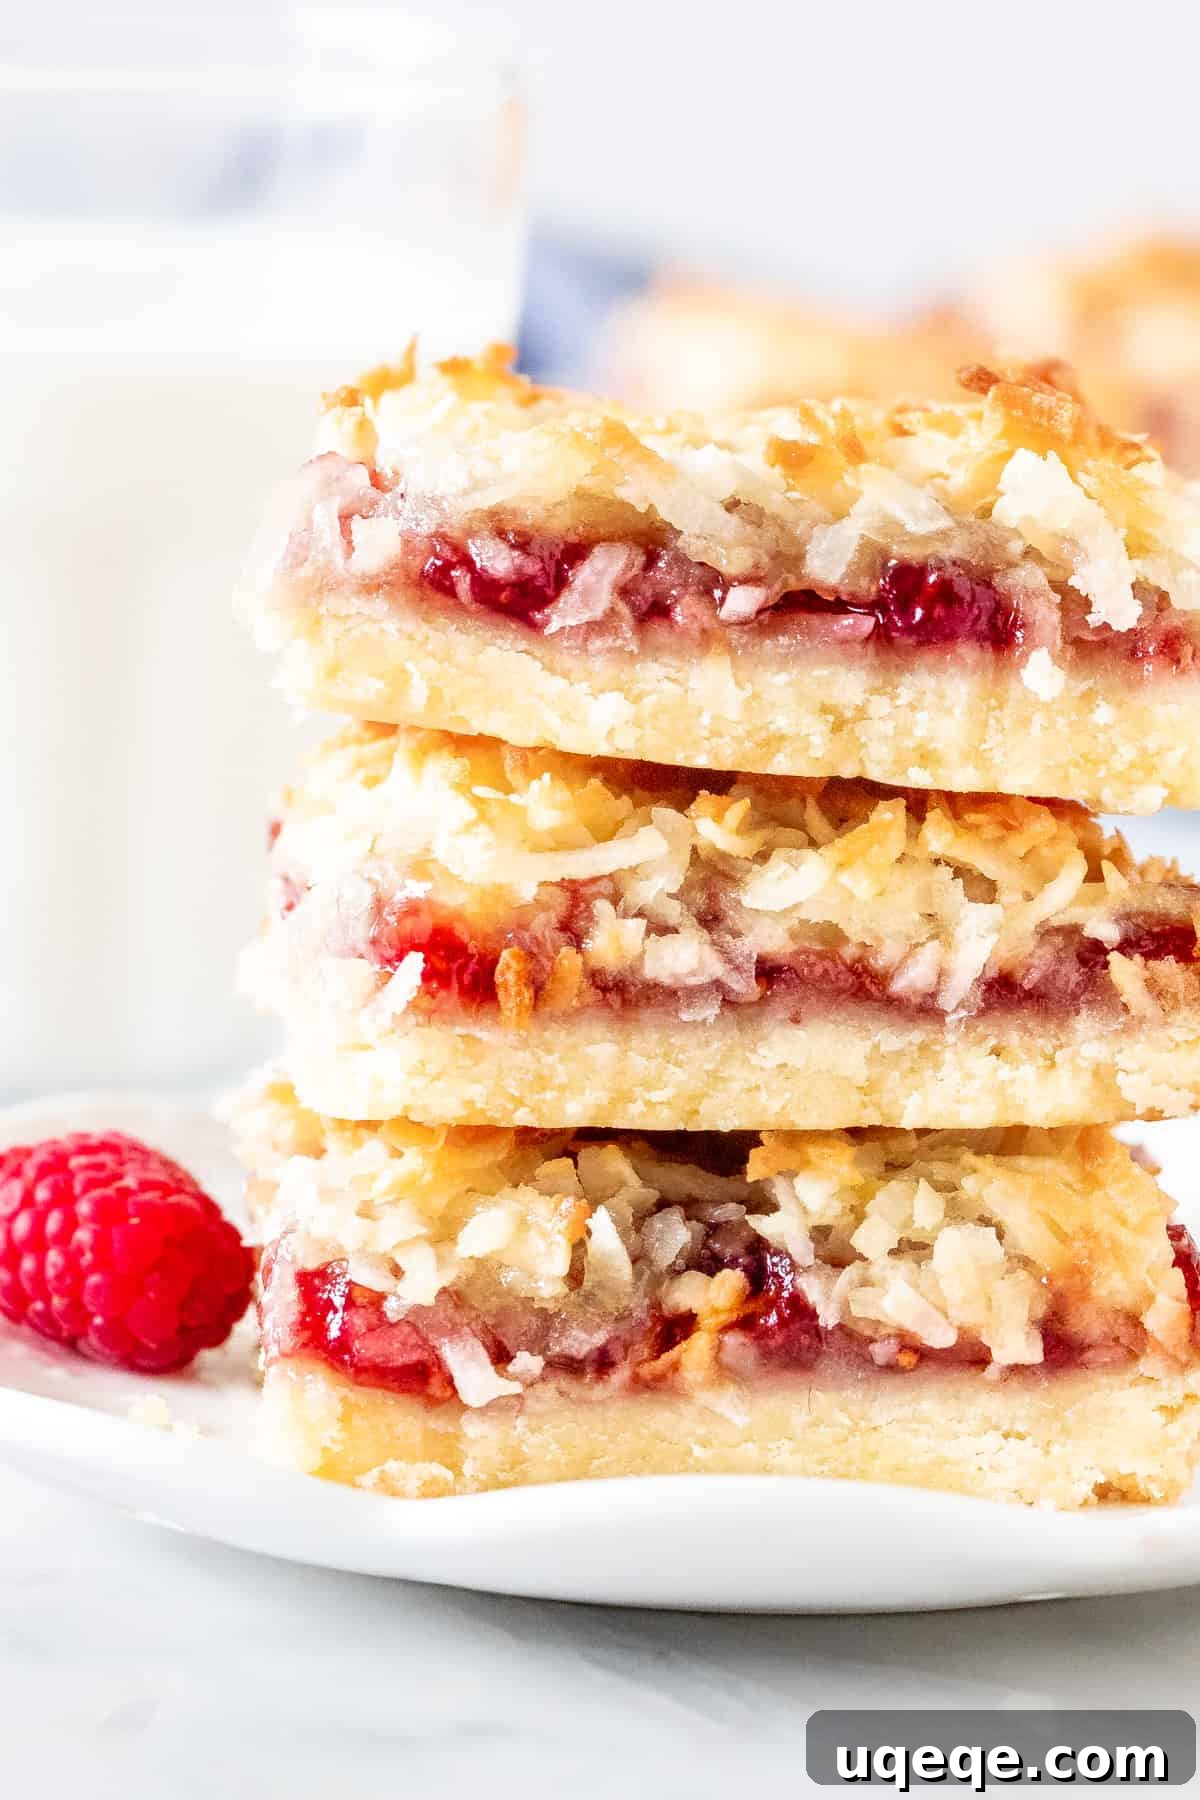
Cooling and Slicing Pro Tip: To achieve impeccably neat, bakery-worthy slices, ensure your bars are completely chilled. Once fully cooled, use the parchment paper overhang to gently lift the entire slab of bars out of the pan. Transfer it to a sturdy cutting board. For the cleanest cuts, use a sharp, non-serrated knife. Press down firmly and steadily rather than sawing back and forth. Wiping the knife blade clean with a damp cloth between each cut can also significantly help prevent sticking and ensure crisp, defined edges, beautifully showcasing each delightful layer.
Why These Raspberry Coconut Bars Are Simply Irresistible
The harmonious combination of a tender, buttery shortbread base, the sweet and tangy burst of vibrant raspberry jam, and the unique chewiness of the flaky coconut topping makes these bars truly irresistible. Their layered complexity, born from simple, wholesome ingredients, creates a dessert that appeals to a wide range of palates. What makes them even more delightful is their versatility and convenience; you can easily whip up a batch any time of the year without worrying about fresh fruit seasonality, thanks to the magic of readily available raspberry jam. The classic flavor pairing of sweet raspberry and tropical coconut is a match made in culinary heaven, offering a taste of sunshine and comfort even on the cloudiest days. These old-fashioned dessert bars are perfect for sharing at gatherings, packing in lunchboxes, or simply enjoying as a well-deserved treat after a long day. Whether enjoyed with a morning coffee, an afternoon tea, or as a sweet ending to a meal, these bars are guaranteed to bring smiles and satisfy any sweet craving.
Variations and Serving Suggestions to Elevate Your Bars
While the classic raspberry and coconut combination is a timeless favorite, these bars also lend themselves beautifully to various creative variations, allowing you to personalize them to your taste. Don’t hesitate to experiment with different jams – apricot, strawberry, blueberry, or even a mixed berry blend can offer a delightful twist on the fruity middle layer. For an extra layer of flavor in the shortbread base, consider adding a hint of vanilla extract, a pinch of lemon zest, or even a dash of almond extract to enhance its richness. The coconut topping can also be enhanced for added texture and flavor; a sprinkle of finely chopped nuts (like almonds, pecans, or walnuts) before baking, or a decadent drizzle of melted dark chocolate after cooling, can introduce new dimensions of taste and visual appeal.
These easy dessert bars are excellent enjoyed on their own, making them perfect for potlucks, bake sales, or a simple afternoon treat. However, they also pair wonderfully with a scoop of creamy vanilla ice cream or a dollop of fresh whipped cream for a more indulgent dessert experience. For longer storage, keep them in an airtight container at room temperature for up to three days, or in the refrigerator for up to a week to extend their freshness. They can also be frozen for up to a month, simply thaw at room temperature before serving.
More Delicious Fruit Bars to Love:
- Strawberry Crumb Bars
- Blueberry Oatmeal Crumble Bars
- Mixed Berry Crumble Bars
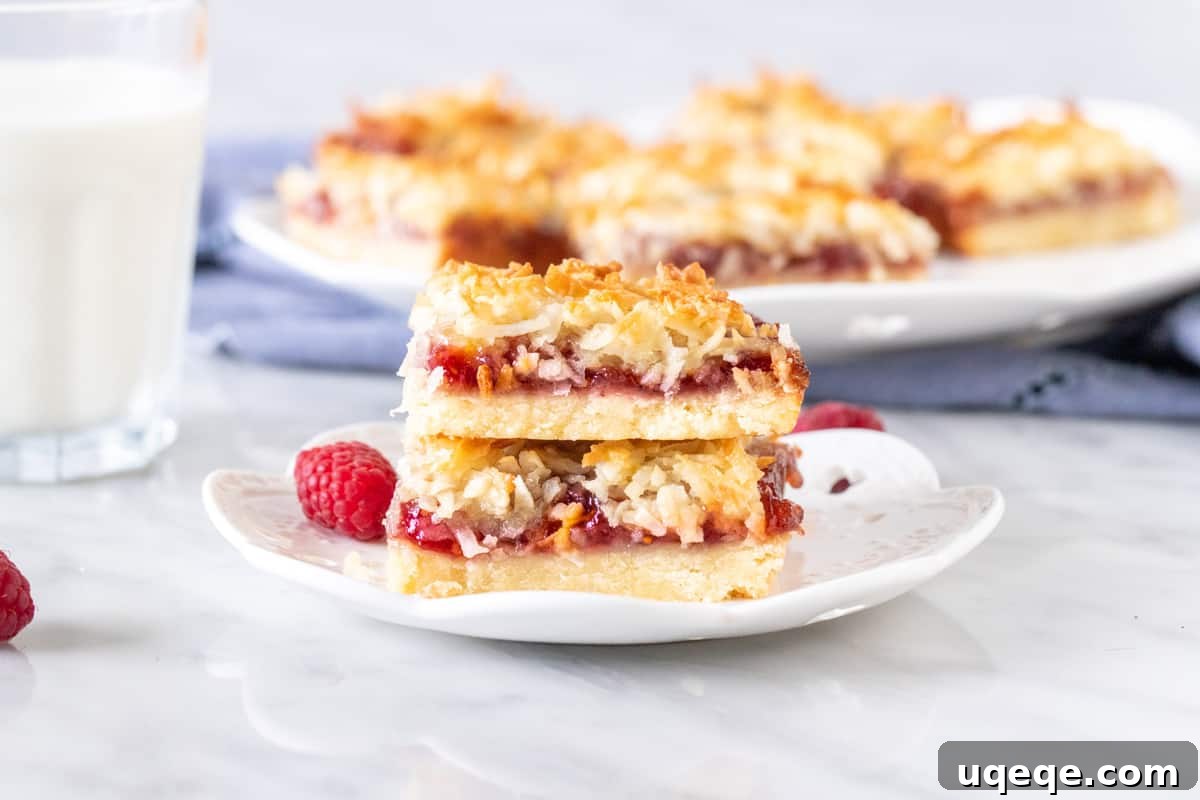
Raspberry Coconut Bars
Rate Recipe
Print Recipe
Equipment
-
8×8 inch (20×20 cm) square baking tin
Ingredients
Base Layer
- 3/4 cup unsalted butter (168 grams), softened
- 1/3 cup granulated sugar (66 grams)
- 1 1/2 cups all-purpose flour (188 grams) , AKA plain flour
- 1 tablespoon cornstarch*, AKA corn flour
Raspberry Layer
- 3/4 cup raspberry jam, I used almost an entire 10.5 ounce (300 gram) jar
Coconut Topping
- 1 large egg
- 1 large egg white , discard the yolk
- 3 tablespoons granulated sugar
- 1 2/3 cup sweetened flaked coconut
Instructions
-
Preheat the oven to 325F (160C) degrees.
-
Line an 8×8 inch (20×20 cm) baking pan with baking paper, leaving an overhang around the sides. Optionally, line with aluminum foil and lightly grease.
Base Layer
-
In a medium bowl, beat the butter and sugar until combined and creamy.
-
Mix in the flour and corn starch, starting with the mixer on low speed. Stop mixing as soon as the flour is combined and the mixture forms a thick dough.
-
Press the dough evenly into the bottom of the lined pan and bake in the preheated oven for about 20 minutes, or until the top looks set and is just starting to become golden brown around the edges. Remove from the oven, and keep the oven turned on.
Coconut Layer
-
While the base layer is baking, whisk together the large egg, extra egg white, and granulated sugar in a small bowl until well combined.
-
Stir in the sweetened shredded coconut until it’s fully coated.
Assembling & Baking the Bars
-
After the base layer has been baked on its own for 15-20 minutes, carefully spread the raspberry jam evenly on top of it.
-
Then, carefully spoon small dollops of the coconut mixture on top of the jam layer, spreading gently with the back of a spoon to ensure the jam is evenly (or mostly) covered.
-
Bake in the oven (still at 325F degrees / 160C) for an additional 30-35 minutes, or until the coconut topping is beautifully golden brown.
-
Remove from the oven and cool fully in the pan on a wire rack. This step is crucial for clean slices.
-
When fully cooled (this may take 2-3 hours), lift the bars out of the pan using the overhang of the parchment paper. Place on a cutting board and slice into 12 even pieces using a sharp knife.
Notes
- I like to add in a little cornstarch because it helps to keep the base soft and tender. If you don’t have any on hand, you can omit it, but the base might be slightly firmer.
- Store these delightful bars in an airtight container at room temperature for up to 3 days to maintain their freshness. For extended enjoyment, they can be stored in the fridge for up to 1 week.
- The nutrition information provided is an estimate only and is based on 1 piece, assuming the entire batch in the pan is sliced into 12 equal pieces. Actual nutritional values may vary depending on ingredients used and precise portion sizes.
Nutrition
Like this recipe? Rate and comment below!