
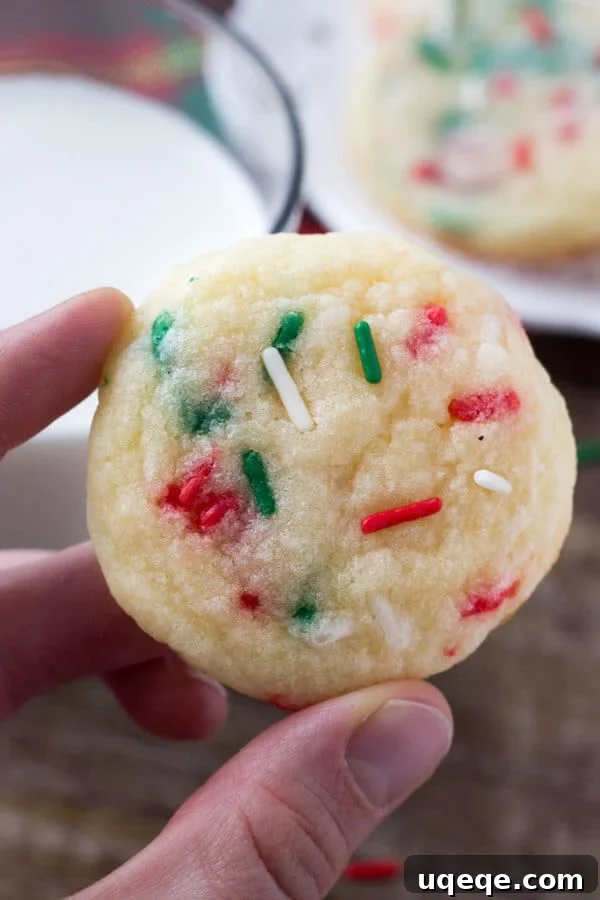
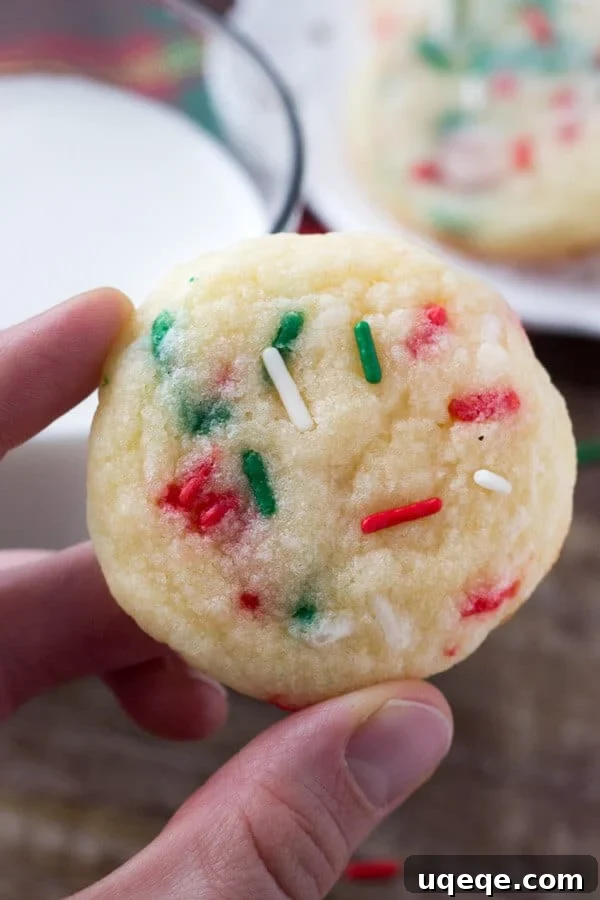
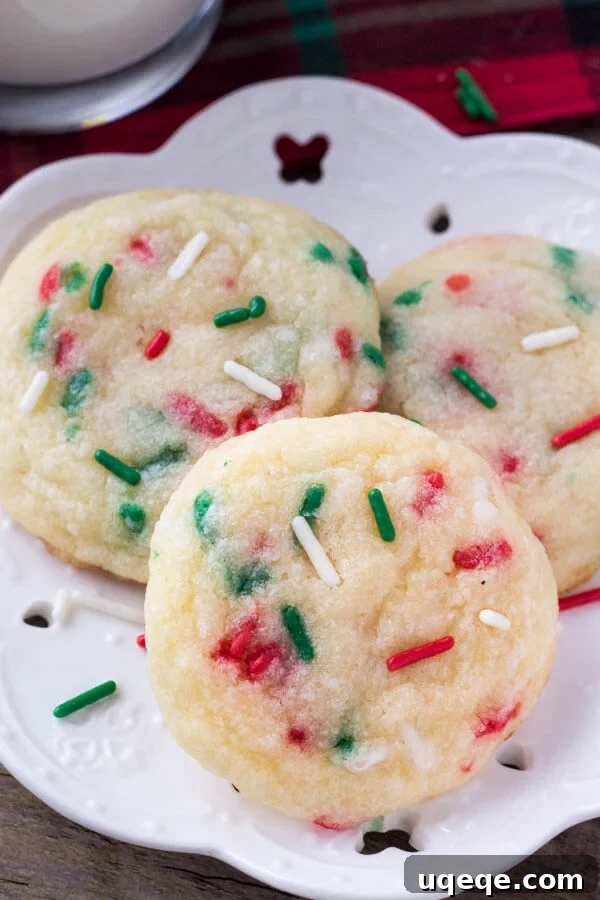
Welcome to the most delightful corner of holiday baking! This year, make your festive season even sweeter with a batch of these truly exceptional Holiday Sprinkle Cookies. They are the epitome of comfort and joy: exquisitely soft, perfectly chewy, and imbued with a rich, buttery vanilla-almond flavor that simply melts in your mouth. Adorned with a vibrant medley of sprinkles, these cookies aren’t just a treat for the taste buds; they’re a feast for the eyes and the perfect easy recipe for all your holiday baking needs.
The Best Holiday Sprinkle Cookies: Soft, Buttery & Easy Christmas Delights!
The holiday season is a magical time, filled with warmth, family, and, of course, an abundance of delicious homemade treats. This year holds a special significance for my family as we’ll all be gathering together under one roof for Christmas. This means a few things are absolutely certain:
- My parents’ house will be bustling with joyous chaos and laughter.
- A vast array of baked goods will be lovingly prepared and enthusiastically devoured.
- My Dad will undoubtedly shed a few happy tears, overcome with emotion.
- Most excitingly, my adorable nephew is coming to visit!
He’s a tiny whirlwind of pure happiness, occasionally punctuated by the perfectly normal tantrums of a toddler. His infectious joy makes every family gathering brighter, and naturally, I wanted to craft the ultimate Christmas cookie especially for him. That’s where these incredible Holiday Sprinkle Cookies come in.
It turns out that for his first birthday, while he wasn’t particularly interested in the cake, he was absolutely captivated by sprinkle cookies. A true connoisseur, even at such a young age! And I must say, he has impeccable taste, because these holiday sprinkle cookies are genuinely divine. Each bite delivers a buttery richness, a tender, pillowy softness, and a delightful hint of vanilla beautifully complemented by a touch of almond. All of this goodness is then generously studded with festive sprinkles, making them truly embody the spirit of Christmas cheer.
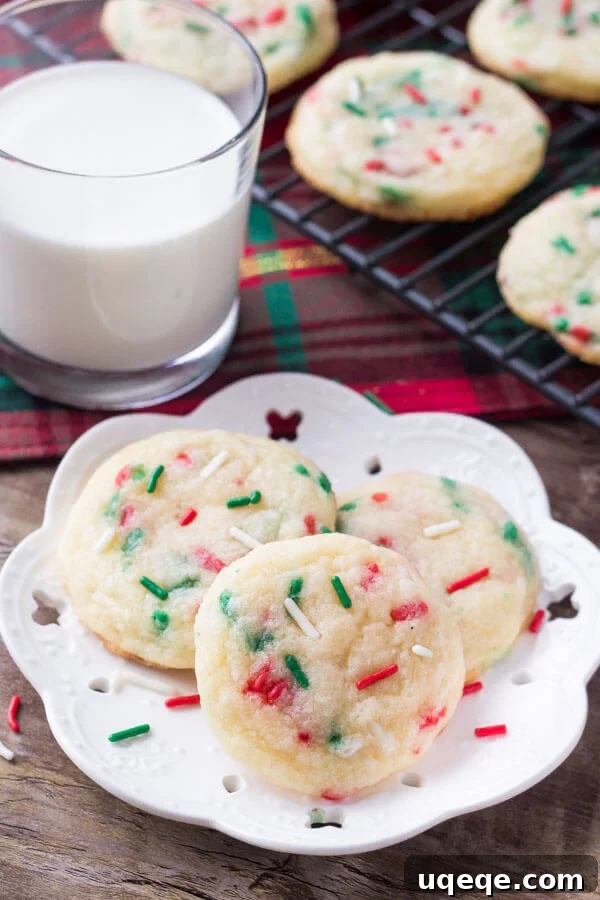
Beyond their irresistible taste and charming appearance, what truly makes these cookies a holiday hero is their simplicity. There’s minimal fuss involved – no intricate decorating, no finicky royal icing, and here’s the best part for busy holiday bakers: no mandatory dough chilling! While chilling the dough is an optional step if you desire extra-thick cookies, these beauties bake up perfectly soft and delicious even without it. This means you can whip up a batch quickly, bringing festive cheer to your home with ease.
Why These Holiday Sprinkle Cookies Are a Must-Bake This Season
In a world of complex holiday recipes, these sprinkle cookies stand out for their straightforward approach and crowd-pleasing results. Here’s why they deserve a top spot on your holiday baking list:
- Incredibly Soft Texture: Thanks to a clever combination of ingredients like cornstarch and cream of tartar, these cookies boast an unparalleled melt-in-your-mouth tenderness that’s simply addictive.
- Rich Buttery Flavor: Made with high-quality butter, every bite is a celebration of classic cookie goodness, enhanced by sweet vanilla and a subtle, sophisticated almond note.
- Vibrant & Festive: The generous inclusion of colorful holiday sprinkles makes these cookies instantly cheerful and appealing, especially to children and those young at heart.
- Effortlessly Easy: Forget complicated techniques! This recipe is designed for ease, perfect for novice bakers or those with limited time during the busy holiday season.
- No-Chill Option: While chilling is an option for thicker cookies, you can skip it entirely and have warm, fresh cookies in under 30 minutes. This makes them ideal for last-minute treats!
- Perfect for Gifting: Their beautiful appearance and delicious taste make them wonderful edible gifts for friends, neighbors, and teachers.
How to Make These Irresistible Holiday Sprinkle Cookies
Let’s dive into the simple steps to create these perfect festive cookies. Following these guidelines will ensure you get that desired pillowy soft texture and rich flavor every time.
1. Preparing Your Ingredients & Oven
Before you begin, ensure all your ingredients are at room temperature, especially the butter and egg. This is crucial for proper emulsification and a smooth dough. Preheat your oven to 350°F (175°C) if you plan to bake immediately. Line your baking sheets with parchment paper or silicone baking mats. These prevent sticking and help the cookies bake evenly without spreading too much.
2. Creaming Butter and Sugar to Perfection
The foundation of any great cookie is properly creamed butter and sugar. In a large mixing bowl, beat together the softened butter and granulated sugar until the mixture is light, fluffy, and pale in color. This process incorporates air, which contributes to the cookies’ soft texture. It’s incredibly important to use high-quality unsalted butter (margarine will not yield the same results) and to ensure your butter is soft but not melted. If the butter is too warm or oily, your cookies are more likely to spread excessively in the oven, losing their delightful chewiness.
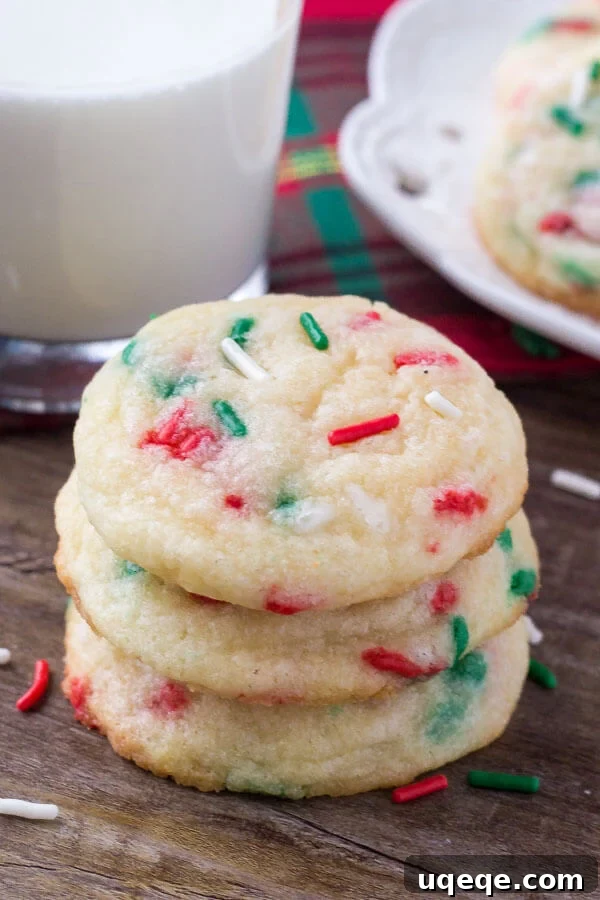
3. Adding Wet Ingredients for Flavor
Once your butter and sugar are perfectly creamed, beat in the vanilla extract, almond extract, and the large egg. The vanilla provides a comforting, classic sweetness, while the almond extract adds a layer of sophisticated depth that truly elevates the flavor profile. Don’t skip the almond extract – it makes a noticeable difference! Beat until everything is well combined and smooth.
4. Whisking Dry Ingredients for Structure and Softness
In a separate medium bowl, whisk together the all-purpose flour, cornstarch, cream of tartar, baking powder, and a pinch of salt. The cornstarch is a secret weapon for creating that pillowy soft, melt-in-your-mouth consistency, while cream of tartar works with baking powder to give the cookies a beautiful rise and chew. Ensure your flour is spooned and leveled, rather than scooped, to avoid adding too much and making your cookies dense.
5. Combining and Adding Sprinkles
Gradually add the dry ingredient mixture to the wet mixture, beating on low speed until just combined. Be careful not to overmix, as this can lead to tough cookies. Finally, gently fold in your holiday sprinkles. I highly recommend using jimmies (the rod-shaped sprinkles) as opposed to nonpareils (the tiny round ones). Jimmies tend to hold their shape and color better during baking, preventing the color from bleeding into the dough and keeping your cookies looking vibrant and festive.
6. Forming and Baking Your Cookies
Scoop the dough into balls, about 1.5 tablespoons in size. A cookie scoop works wonders for consistent sizing, which ensures even baking. Place the dough balls about 2 inches apart on your prepared baking sheets. Bake for 8-10 minutes, or until the edges are lightly golden and the tops look just set. Remember, cookies continue to cook slightly after being removed from the oven, so avoid overbaking if you want them to remain perfectly soft. Let them cool on the baking sheet for a few minutes before transferring them to a wire rack to cool completely.
Whether you choose the quick bake or the optional chilling method for extra thickness, you’ll end up with wonderfully soft, melt-in-your-mouth holiday sprinkle cookies that are truly fit for Santa and everyone on the nice list!
Holiday Sprinkle Cookies Recipe
Holiday Sprinkle Cookies
By: Fiona Dowling
These Holiday Sprinkle Cookies are pillowy soft and melt-in-your mouth. They have a delicious buttery vanilla flavor and are packed with sprinkles. They’re the perfect easy cookie recipe for your holiday baking.
Prep: 15 mins
Cook: 8 mins
Total: 23 mins
Servings: 24 cookies
Ingredients
- 3/4 cup unsalted butter, softened but not melted
- 1 cup granulated sugar
- 1 large egg
- 1 1/2 tsp vanilla extract
- 1/2 tsp almond extract
- 2 cups all-purpose flour, spooned & leveled
- 2 tbsp cornstarch (tablespoons not teaspoons)
- 1 tsp cream of tartar
- 1 1/2 tsp baking powder
- 1/4 tsp salt
- 1/3 cup holiday sprinkles, I recommend jimmies
Instructions
- Preheat the oven to 350°F degrees (if baking right away). Line cookie sheets with parchment paper or silicone baking mats.
- In a large bowl beat together the butter and sugar until fluffy.
- Beat in the vanilla extract, almond extract and egg.
- In a medium bowl whisk together the flour, cornstarch, cream of tartar, baking powder and salt.
- Slowly beat the flour mixture into the butter mixture. Then beat in the sprinkles with the mixer on low speed, or stir them in with a large rubber spatula.
- Form the dough into balls about 1.5 tablespoons in size. Place 2 inches apart on the lined cookie sheets.
- Bake for 8-10 minutes, or until the tops look just set.
Notes
*If chilling the dough: Complete steps 1-5. Wrap the bowl in plastic wrap and refrigerate for 2 hours or up to 48 hours. When ready to bake, remove the bowl from the fridge and let the dough warm up slightly (about 15 minutes if chilled overnight). Preheat the oven to 350°F degrees and line your cookie sheets. Then continue with step 6.
Expert Tips for Perfect Sprinkle Cookies Every Time
- Butter Temperature is Key: As mentioned, ensure your butter is perfectly softened, not melted. It should give slightly when pressed, but not be greasy. This affects both texture and spread.
- Don’t Overmix the Dough: Once you add the dry ingredients, mix only until just combined. Overmixing develops the gluten in the flour, leading to tough, dense cookies instead of soft ones.
- Measure Flour Correctly: Always spoon flour into your measuring cup and level it off with a straight edge. Scooping directly from the bag can pack too much flour, making your cookies dry.
- Choose the Right Sprinkles: For best results and vibrant colors without bleeding, use jimmies. Nonpareils tend to melt and bleed color into the dough, especially if it’s handled a lot.
- Even Baking: Rotate your cookie sheets halfway through baking to ensure even browning. Ovens often have hot spots.
- Watch for Doneness: Cookies are done when the edges are lightly golden and the centers look set but might still appear slightly soft. They will firm up as they cool.
- Cooling Time: Allow cookies to cool on the baking sheet for 5 minutes before transferring them to a wire rack. This helps them set and prevents breakage.
Creative Variations for Your Festive Batch
While these holiday sprinkle cookies are perfect as is, you can easily adapt them to suit different tastes or occasions:
- Citrus Zest: Add 1-2 teaspoons of lemon or orange zest to the butter mixture for a bright, refreshing flavor.
- Spice It Up: Introduce 1/2 teaspoon of ground cinnamon or a pinch of nutmeg for a warm, spiced holiday twist.
- Chocolatey Goodness: Fold in a handful of mini chocolate chips along with the sprinkles for a delicious chocolate-sprinkle combo.
- Different Extracts: Experiment with other extracts like peppermint for a minty Christmas cookie, or even a touch of rum extract for a boozy note.
- Themed Sprinkles: Don’t limit these to just holidays! Use pastel sprinkles for Easter, red/white/blue for patriotic holidays, or school colors for graduation.
Storage and Make-Ahead Options
These cookies are wonderful for making ahead, which is a huge bonus during the busy holiday season.
- Storing Baked Cookies: Once completely cooled, store the cookies in an airtight container at room temperature for up to 5-7 days. For optimal freshness, a slice of bread can be added to the container to help keep them soft.
- Freezing Baked Cookies: Baked and cooled cookies can be frozen in an airtight container for up to 2-3 months. Thaw at room temperature before serving.
- Freezing Cookie Dough: Form the dough into balls as instructed, then place them on a baking sheet and freeze until solid. Once frozen, transfer the cookie dough balls to a freezer-safe bag or container and freeze for up to 3 months. When ready to bake, place the frozen dough balls on a prepared baking sheet and bake for a few extra minutes (approximately 10-12 minutes total), without thawing.
These Holiday Sprinkle Cookies are more than just a recipe; they’re a simple joy, a burst of color, and a guarantee of deliciousness that will make your holiday celebrations even more memorable. They embody everything a Christmas cookie should be: easy to make, beautiful to behold, and utterly scrumptious to eat. Gather your ingredients, put on some festive music, and create some sweet memories with these delightful treats!
These Holiday Sprinkle Cookies are pillowy soft and melt-in-your mouth. They have a delicious buttery vanilla flavor and are packed with sprinkles. They’re the perfect easy cookie recipe for your holiday baking.
The Best Holiday Sprinkle Cookies: Soft, Buttery & Easy Christmas Delights!
The holiday season is a magical time, filled with warmth, family, and, of course, an abundance of delicious homemade treats. This year holds a special significance for my family as we’ll all be gathering together under one roof for Christmas. This means a few things are absolutely certain:
- My parents’ house will be bustling with joyous chaos and laughter.
- A vast array of baked goods will be lovingly prepared and enthusiastically devoured.
- My Dad will undoubtedly shed a few happy tears, overcome with emotion.
- Most excitingly, my adorable nephew is coming to visit!
He’s a tiny whirlwind of pure happiness, occasionally punctuated by the perfectly normal tantrums of a toddler. His infectious joy makes every family gathering brighter, and naturally, I wanted to craft the ultimate Christmas cookie especially for him. That’s where these incredible Holiday Sprinkle Cookies come in.
It turns out that for his first birthday, while he wasn’t particularly interested in the cake, he was absolutely captivated by sprinkle cookies. A true connoisseur, even at such a young age! And I must say, he has impeccable taste, because these holiday sprinkle cookies are genuinely divine. Each bite delivers a buttery richness, a tender, pillowy softness, and a delightful hint of vanilla beautifully complemented by a touch of almond. All of this goodness is then generously studded with festive sprinkles, making them truly embody the spirit of Christmas cheer.
Beyond their irresistible taste and charming appearance, what truly makes these cookies a holiday hero is their simplicity. There’s minimal fuss involved – no intricate decorating, no finicky royal icing, and here’s the best part for busy holiday bakers: no mandatory dough chilling! While chilling the dough is an optional step if you desire extra-thick cookies, these beauties bake up perfectly soft and delicious even without it. This means you can whip up a batch quickly, bringing festive cheer to your home with ease.
Why These Holiday Sprinkle Cookies Are a Must-Bake This Season
In a world of complex holiday recipes, these sprinkle cookies stand out for their straightforward approach and crowd-pleasing results. Here’s why they deserve a top spot on your holiday baking list:
- Incredibly Soft Texture: Thanks to a clever combination of ingredients like cornstarch and cream of tartar, these cookies boast an unparalleled melt-in-your-mouth tenderness that’s simply addictive.
- Rich Buttery Flavor: Made with high-quality butter, every bite is a celebration of classic cookie goodness, enhanced by sweet vanilla and a subtle, sophisticated almond note.
- Vibrant & Festive: The generous inclusion of colorful holiday sprinkles makes these cookies instantly cheerful and appealing, especially to children and those young at heart.
- Effortlessly Easy: Forget complicated techniques! This recipe is designed for ease, perfect for novice bakers or those with limited time during the busy holiday season.
- No-Chill Option: While chilling is an option for thicker cookies, you can skip it entirely and have warm, fresh cookies in under 30 minutes. This makes them ideal for last-minute treats!
- Perfect for Gifting: Their beautiful appearance and delicious taste make them wonderful edible gifts for friends, neighbors, and teachers.
How to Make These Irresistible Holiday Sprinkle Cookies
Let’s dive into the simple steps to create these perfect festive cookies. Following these guidelines will ensure you get that desired pillowy soft texture and rich flavor every time.
1. Preparing Your Ingredients & Oven
Before you begin, ensure all your ingredients are at room temperature, especially the butter and egg. This is crucial for proper emulsification and a smooth dough. Preheat your oven to 350°F (175°C) if you plan to bake immediately. Line your baking sheets with parchment paper or silicone baking mats. These prevent sticking and help the cookies bake evenly without spreading too much.
2. Creaming Butter and Sugar to Perfection
The foundation of any great cookie is properly creamed butter and sugar. In a large mixing bowl, beat together the softened butter and granulated sugar until the mixture is light, fluffy, and pale in color. This process incorporates air, which contributes to the cookies’ soft texture. It’s incredibly important to use high-quality unsalted butter (margarine will not yield the same results) and to ensure your butter is soft but not melted. If the butter is too warm or oily, your cookies are more likely to spread excessively in the oven, losing their delightful chewiness.
3. Adding Wet Ingredients for Flavor
Once your butter and sugar are perfectly creamed, beat in the vanilla extract, almond extract, and the large egg. The vanilla provides a comforting, classic sweetness, while the almond extract adds a layer of sophisticated depth that truly elevates the flavor profile. Don’t skip the almond extract – it makes a noticeable difference! Beat until everything is well combined and smooth.
4. Whisking Dry Ingredients for Structure and Softness
In a separate medium bowl, whisk together the all-purpose flour, cornstarch, cream of tartar, baking powder, and a pinch of salt. The cornstarch is a secret weapon for creating that pillowy soft, melt-in-your-mouth consistency, while cream of tartar works with baking powder to give the cookies a beautiful rise and chew. Ensure your flour is spooned and leveled, rather than scooped, to avoid adding too much and making your cookies dense.
5. Combining and Adding Sprinkles
Gradually add the dry ingredient mixture to the wet mixture, beating on low speed until just combined. Be careful not to overmix, as this can lead to tough cookies. Finally, gently fold in your holiday sprinkles. I highly recommend using jimmies (the rod-shaped sprinkles) as opposed to nonpareils (the tiny round ones). Jimmies tend to hold their shape and color better during baking, preventing the color from bleeding into the dough and keeping your cookies looking vibrant and festive.
6. Forming and Baking Your Cookies
Scoop the dough into balls, about 1.5 tablespoons in size. A cookie scoop works wonders for consistent sizing, which ensures even baking. Place the dough balls about 2 inches apart on your prepared baking sheets. Bake for 8-10 minutes, or until the edges are lightly golden and the tops look just set. Remember, cookies continue to cook slightly after being removed from the oven, so avoid overbaking if you want them to remain perfectly soft. Let them cool on the baking sheet for a few minutes before transferring them to a wire rack to cool completely.
Whether you choose the quick bake or the optional chilling method for extra thickness, you’ll end up with wonderfully soft, melt-in-your-mouth holiday sprinkle cookies that are truly fit for Santa and everyone on the nice list!
Holiday Sprinkle Cookies Recipe
Holiday Sprinkle Cookies
By: Fiona Dowling
These Holiday Sprinkle Cookies are pillowy soft and melt-in-your mouth. They have a delicious buttery vanilla flavor and are packed with sprinkles. They’re the perfect easy cookie recipe for your holiday baking.
- Prep:
- 15 mins
- Cook:
- 8 mins
- Total:
- 23 mins
- Servings:
- 24 cookies
Ingredients
- 3/4 cup unsalted butter, softened but not melted
- 1 cup granulated sugar
- 1 large egg
- 1 1/2 tsp vanilla extract
- 1/2 tsp almond extract
- 2 cups all-purpose flour, spooned & leveled
- 2 tbsp cornstarch (tablespoons not teaspoons)
- 1 tsp cream of tartar
- 1 1/2 tsp baking powder
- 1/4 tsp salt
- 1/3 cup holiday sprinkles, I recommend jimmies
Instructions
- Preheat the oven to 350°F degrees (if baking right away). Line cookie sheets with parchment paper or silicone baking mats.
- In a large bowl beat together the butter and sugar until fluffy.
- Beat in the vanilla extract, almond extract and egg.
- In a medium bowl whisk together the flour, cornstarch, cream of tartar, baking powder and salt.
- Slowly beat the flour mixture into the butter mixture. Then beat in the sprinkles with the mixer on low speed, or stir them in with a large rubber spatula.
- Form the dough into balls about 1.5 tablespoons in size. Place 2 inches apart on the lined cookie sheets.
- Bake for 8-10 minutes, or until the tops look just set.
Notes
*If chilling the dough: Complete steps 1-5. Wrap the bowl in plastic wrap and refrigerate for 2 hours or up to 48 hours. When ready to bake, remove the bowl from the fridge and let the dough warm up slightly (about 15 minutes if chilled overnight). Preheat the oven to 350°F degrees and line your cookie sheets. Then continue with step 6.
Expert Tips for Perfect Sprinkle Cookies Every Time
- Butter Temperature is Key: As mentioned, ensure your butter is perfectly softened, not melted. It should give slightly when pressed, but not be greasy. This affects both texture and spread.
- Don’t Overmix the Dough: Once you add the dry ingredients, mix only until just combined. Overmixing develops the gluten in the flour, leading to tough, dense cookies instead of soft ones.
- Measure Flour Correctly: Always spoon flour into your measuring cup and level it off with a straight edge. Scooping directly from the bag can pack too much flour, making your cookies dry.
- Choose the Right Sprinkles: For best results and vibrant colors without bleeding, use jimmies. Nonpareils tend to melt and bleed color into the dough, especially if it’s handled a lot.
- Even Baking: Rotate your cookie sheets halfway through baking to ensure even browning. Ovens often have hot spots.
- Watch for Doneness: Cookies are done when the edges are lightly golden and the centers look set but might still appear slightly soft. They will firm up as they cool.
- Cooling Time: Allow cookies to cool on the baking sheet for 5 minutes before transferring them to a wire rack. This helps them set and prevents breakage.
Creative Variations for Your Festive Batch
While these holiday sprinkle cookies are perfect as is, you can easily adapt them to suit different tastes or occasions:
- Citrus Zest: Add 1-2 teaspoons of lemon or orange zest to the butter mixture for a bright, refreshing flavor.
- Spice It Up: Introduce 1/2 teaspoon of ground cinnamon or a pinch of nutmeg for a warm, spiced holiday twist.
- Chocolatey Goodness: Fold in a handful of mini chocolate chips along with the sprinkles for a delicious chocolate-sprinkle combo.
- Different Extracts: Experiment with other extracts like peppermint for a minty Christmas cookie, or even a touch of rum extract for a boozy note.
- Themed Sprinkles: Don’t limit these to just holidays! Use pastel sprinkles for Easter, red/white/blue for patriotic holidays, or school colors for graduation.
Storage and Make-Ahead Options
These cookies are wonderful for making ahead, which is a huge bonus during the busy holiday season.
- Storing Baked Cookies: Once completely cooled, store the cookies in an airtight container at room temperature for up to 5-7 days. For optimal freshness, a slice of bread can be added to the container to help keep them soft.
- Freezing Baked Cookies: Baked and cooled cookies can be frozen in an airtight container for up to 2-3 months. Thaw at room temperature before serving.
- Freezing Cookie Dough: Form the dough into balls as instructed, then place them on a baking sheet and freeze until solid. Once frozen, transfer the cookie dough balls to a freezer-safe bag or container and freeze for up to 3 months. When ready to bake, place the frozen dough balls on a prepared baking sheet and bake for a few extra minutes (approximately 10-12 minutes total), without thawing.
These Holiday Sprinkle Cookies are more than just a recipe; they’re a simple joy, a burst of color, and a guarantee of deliciousness that will make your holiday celebrations even more memorable. They embody everything a Christmas cookie should be: easy to make, beautiful to behold, and utterly scrumptious to eat. Gather your ingredients, put on some festive music, and create some sweet memories with these delightful treats!